
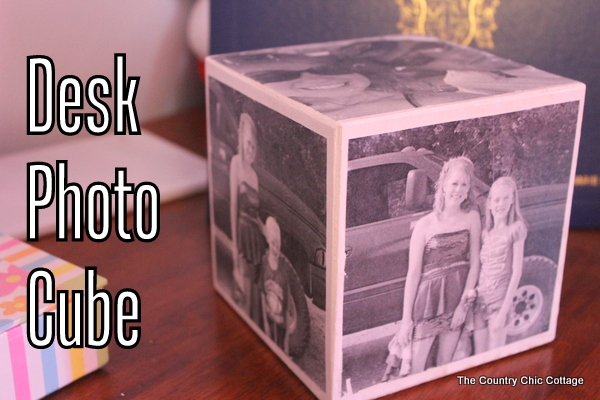
Photo gifts make wonderful and special personalized gift ideas. With this technique, you can skip spending a lot of money to buy a photo gift from a company and make your own DIY photo cube yourself!
I remember the first time I saw a photo cube. I was blown away by how amazing and personal it was. One simple item meant so much to its owner because it was a connection to family and friends who weren’t present at the moment.
Since then, I have seen photo cubes sold as gift ideas, and they can be so expensive!
Well, what if I told you there’s a way you can make a personalized DIY photo cube for your own desk or to give as a gift? It’s true! All you need are 5 items to get started.
Note: If you love photo gift ideas as much as I do, be sure to check out my Photo Lantern, Make A Banner From Photos, and DIY Photo Coasters projects!
Supplies Needed To Make A DIY Photo Cube
Here’s a list of the supplies you’ll need for this project. I have linked a few items to help you find them easier. Please note: some of the links may be affiliate links. If you make a purchase, you won’t pay any extra, but I may receive a small commission to go towards this site.
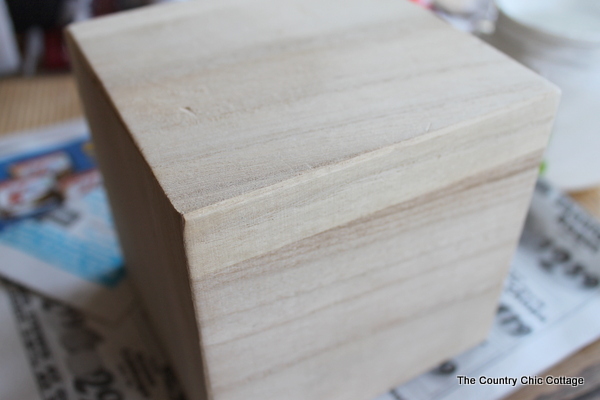
- Wood cube (you can order it online or possibly find it in the craft section at Walmart)
- Black and white photocopies of the photos you want to include
- White paint
- Mod Podge photo transfer medium
- Sponge
How To Make A Photo Cube At Home
This was my first time working with an image transfer technique and I must say I love it. The process was even easier than I thought it would be.
Note: This is an EASY picture cube DIY project…but it is a bit time-consuming. So do this one when you have a little time (I go into more detail about how much time it takes at the end of the post).
Ok, grab those photocopies of your pictures, and let’s make something cute for your desk!
Here’s how.
Step 1
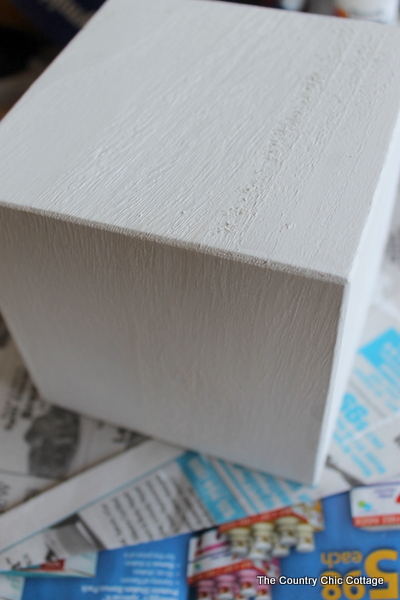
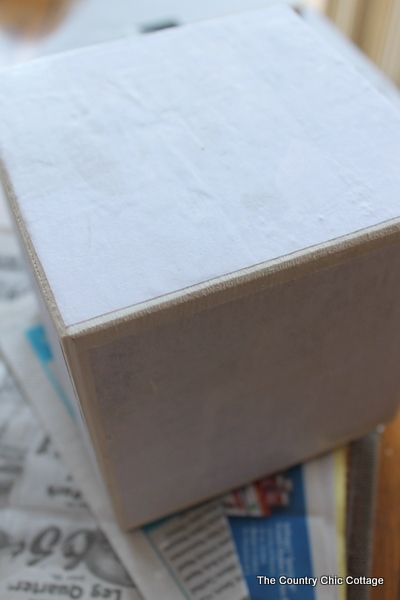
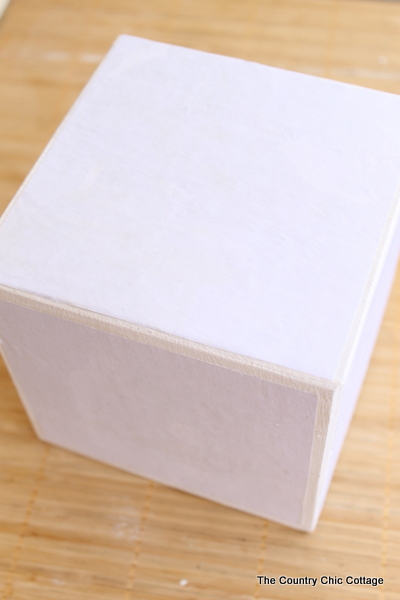
First paint your cube white and allow it to dry completely.
Step 2
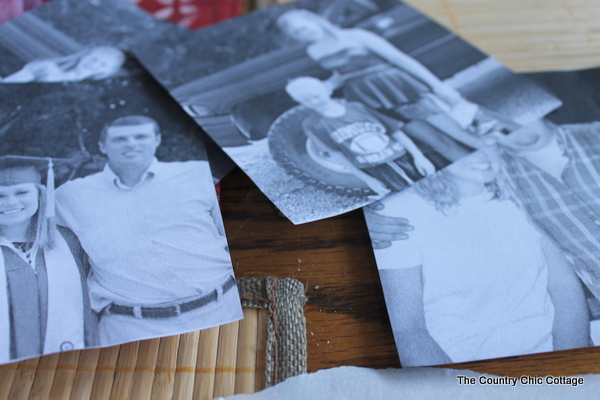
You will need black and white photographs that are printed on a toner-based printer or copier. Trim your photos to the size of the cube.
Pro Tip: The images also need to be mirrored in order for them to appear correctly on your cube.
Step 3
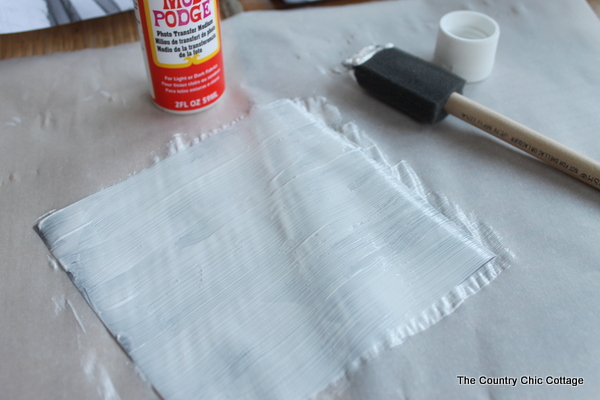
We are going to use Mod Podge photo transfer medium to put our photos on the cube. Be sure to read the directions on the bottle thoroughly before starting to use it.
You will need to apply a thick coat to the front of your image (see the example below).
Step 4
Then, place the chosen photos face down on your cube and smooth them out. You want to avoid as many air bubbles as possible for a smooth finish.
Allow drying for the recommended amount of time.
Note: Your DIY photo cube won’t look like much at this stage.
Step 5
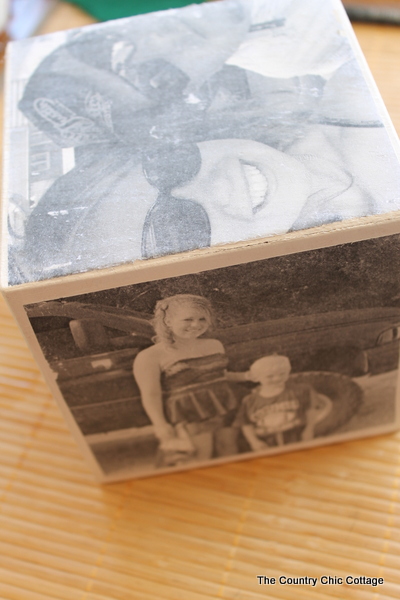
Now, get the paper damp and begin to gently scrub with a sponge (or your hands). This will make a huge mess AND it’s the time-consuming part.
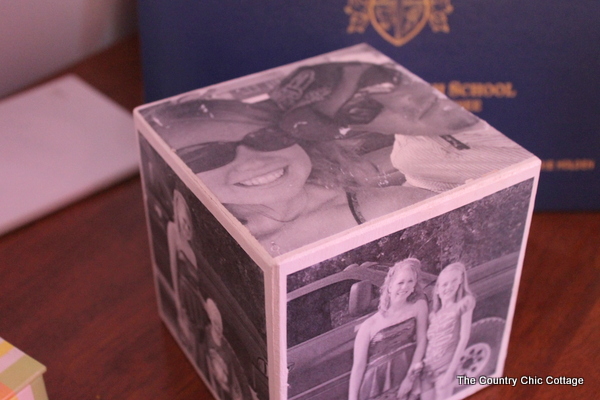
It will take 30 minutes or more for each side of your cube. In the picture below, the image on the side has been completed and the image on top still needs some more paper removed. You just keep working the images until they all look good. Work slowly and come back if an image does not look great after it dries.
Step 6
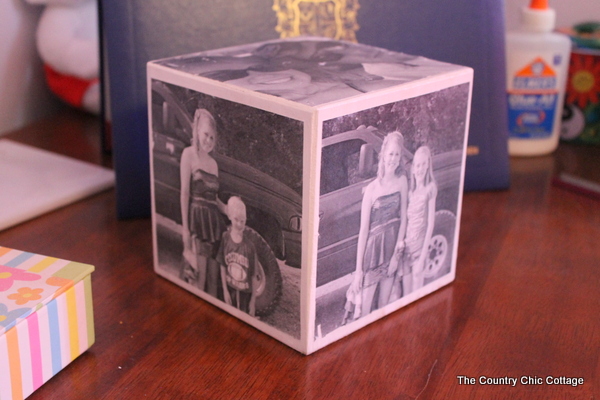
Finally, coat your entire project in Mod Podge to finish it off.
Simple and oh so cool! I just love the way my DIY photo cube turned out.
This is a great gift for moms, grandmas with images of their grandchildren, or even for dad’s desk at work. Hmm, as a matter of fact, you might want to pick up a few of these and make more than one!
More Great DIY Gift Ideas
If you love this DIY photo cube idea and want more DIY gift ideas, check these out!
- Double Photo Frame
- How to Make a Silhouette from a Photo with Your Cricut
- Easy Soup in a Jar Gift Idea
- DIY Sentimental Gifts: 100 Handmade Gifts for Friends and Family

Supplies
- wood cube
- black and white photocopies of photos
- white paint
- Mod Podge Photo Transfer medium
- sponge
Instructions
- Paint your entire cube with white paint. Let it dry completely.
- Print black and white copies of your photos with a toner-based printer or copier and trim them to size.
- Apply a thick coat of Mod Podge Photo Transfer medium on your photocopies.
- Place your photos facedown on the sides of your cube and spread them out so they're flat and smooth. Dry according to the instructions on the Mod Podge Photo Transfer medium bottle.
- Use a sponge to wet down your photos. As the paper gets wet, it will peel off and leave the photos on your cube. This is the time-consuming part and will take time to slowly wet down the paper and remove it.
- Once all of the images are complete, let them dry and cover them with a coat of Mod Podge. Let dry completely.


Angie I just love everything that you create you are just an amazing person I can’t get enough of you. I have a cricket machine so I can print with a mirror image but if I didn’t have a cricket machine how would I do it on my regular HP printer
You can use the printer settings for mirroring or something like Canva usually has that option and is a free online program.
do the copies need to be on photo paper or regular copy paper?
Regular copy paper.