
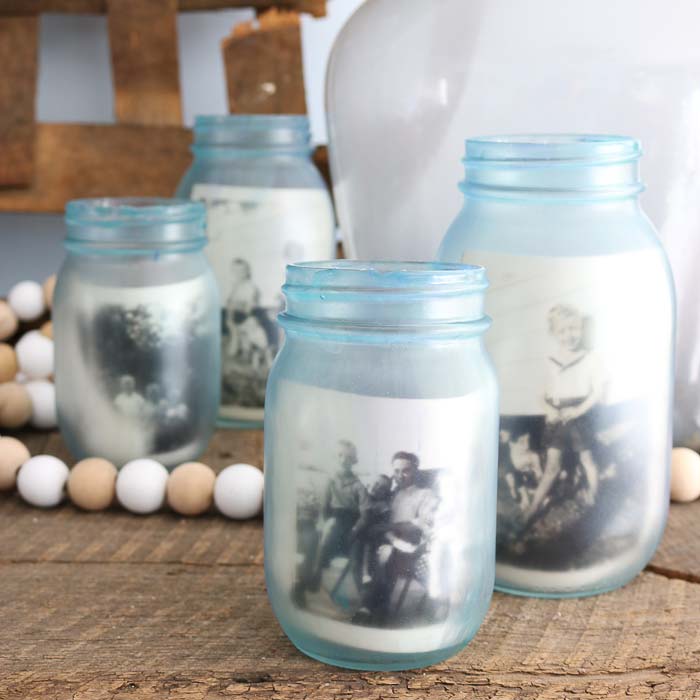
Looking to add a bit of vintage flare to your house? This tutorial for how to paint glass jars is super easy and yields amazing results! With the classic frosted glass look, these jars are perfect for your farmhouse-styled home. Made in just a few simple steps, this is one of the best ideas for painting jars!
If you’re in need of more vintage decor ideas, then be sure to look into these DIY vintage labels. You’ll have your house decorated with tons of vintage items in no time.
Video Tutorial How To Paint Glass Jars
You can actually watch my method for how to paint glass jars in the video below. Just click play!
Can’t watch the video or miss some of the information? You can also follow along below!
Painting Glass Jars
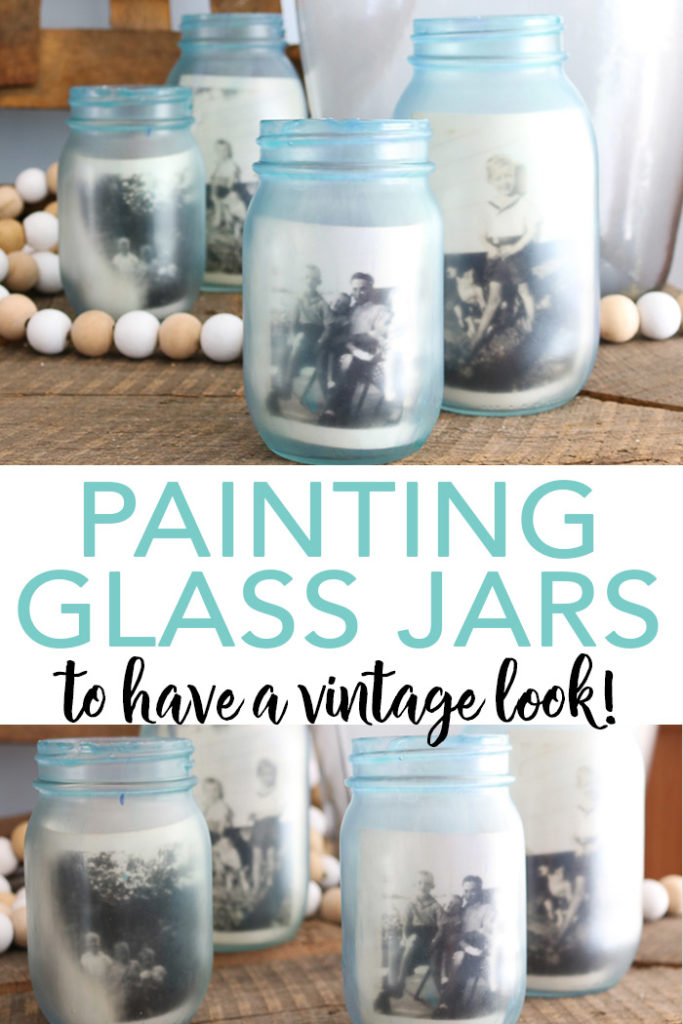
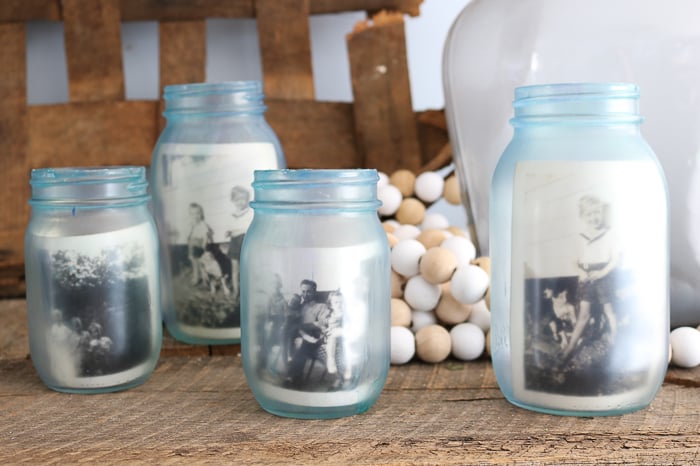
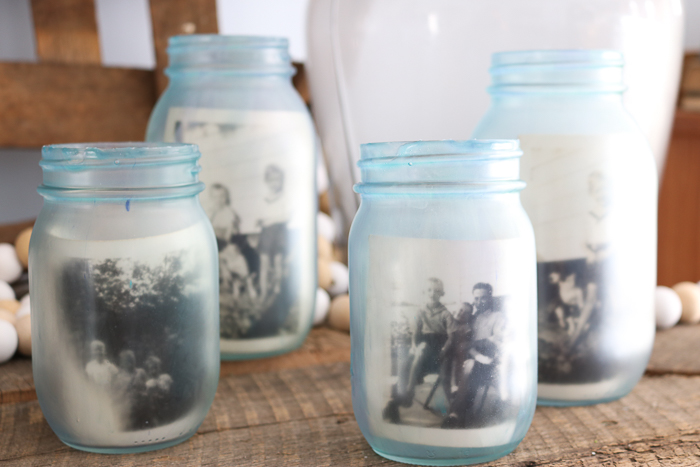
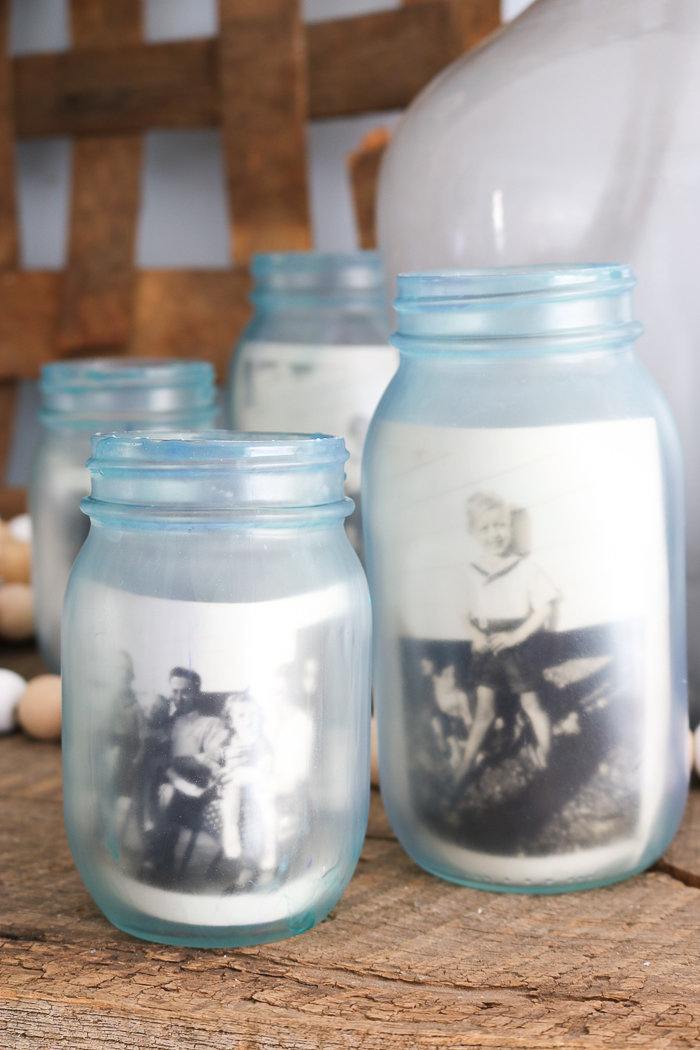
If you like the look of the old-fashioned mason jars that are in shades of blue, then you’ve come to the right place. Painting glass jars to look vintage has never been easier! These jars are so easy to customize and perfect if you’re looking to have a vintage aesthetic in your home.
Supplies Needed To Paint Glass Jars
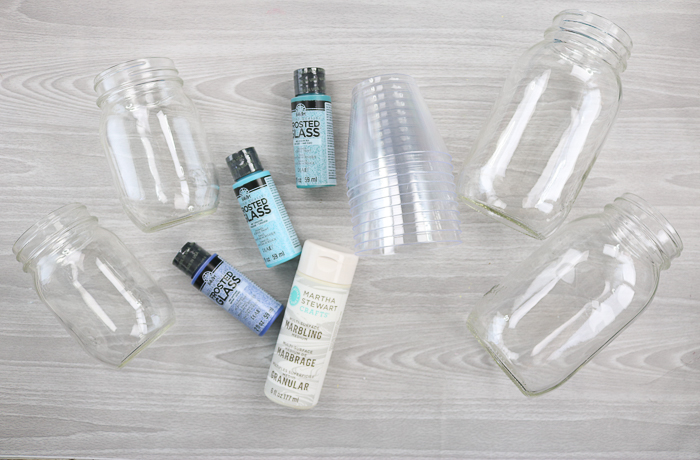
- Mason jars in various sizes (I used the smooth-sided version)
- Marbling medium
- Frosted glass paint in sapphire, turquoise, and Aegean sea
- Craft sticks
- Disposable cups
- Cardboard
- Black and white or color photos
Note: Add some extra decor to the jars by adding jewelry or fabric to them.
How To Paint Glass Jars
You’ll love how easy it is to paint these mason jars! With just a handful of steps, you’ll love a vintage look in no time. For more detailed steps, scroll down to the card below.
Step 1: Mix Marbling Medium With Paint
Mix the marbling medium with the paint in disposable cups. Mix 2 parts marbling medium to 1 part paint. This is NOT what the instructions on the bottle say to do but I find this works better for this project.
Step 2: Drip Paint Down The Mason Jar
Stir each color well.Turn the mason jar upside down on another plastic cup. Set on cardboard or some other disposable surface as this project is super messy. Use your craft stick to drip the paint down the jars.
There is no method to this part of the project. You just want to get a wide variety of the colors on each jar and have complete coverage. You can pick the jar up or leave it upside down. Whatever works best for you! You can also use your stir stick to push the paint around to cover any gaps.
Step 3: Allow Jar To Dry
Allow the jar to dry overnight. Remove the jar from the up and clean the dried paint.
Step 4: Add Photo To Mason Jar
Add your photos to the jars and display them around your home. Enjoy!
How To Use Painted Glass Jars
You can use these mason jars are decor items around your home. If you’re wanting to add a purpose to these jars, then you can add candles, wood beads, flowers, jewelry, rocks, and so much more.
FAQs About How To Paint Glass Jars
If you have questions about making these painted glass jars, I have answers for you! Please leave your question for me in the comments if you don’t see it already answered below.
Can I Use Any Type Of Mason Jar For This Project?
Technically, yes. However, if you want to put a picture on the inside of the jar, I recommend using a smooth-sided mason jar.
6 More Mason Jar Crafts
Do you love this how to paint glass jars, and are looking for more mason jar crafts? Then check out the projects below!
- Mason Jar Etching + A Gift in a Jar Idea
- How to Make a Mason Jar Soap Dispenser
- Mason Jar Wall Sconces
- Painted Cactus Mason Jars
- Watercolor Mason Jar Vases That Are Easy to Make
- DIY Photo Mason Jar That is Easy to Make


