
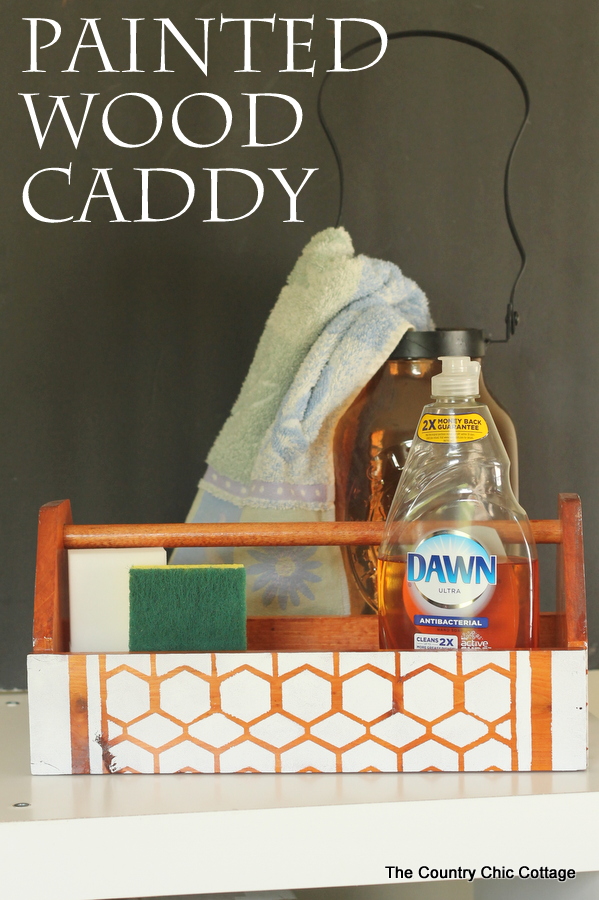
See how I made this painted wood caddy to use as a mudroom cleaning caddy. Brighten up your cleaning workspace with this easy craft project!
It’s no secret that chalk paint is one my my favorite craft supplies. I recently completed this painted wood caddy and thought I would share it with y’all today.
How to Make A Wood Caddy
Let me walk you through how I made this wood caddy with a few supplies and my Cricut machine.
I am going to use my Cricut machine to make a stencil design. You can make a stencil with just about any shape you can imagine. Just follow my tips and tricks below then grab your Cricut and stencil material to make something amazing!
Supplies Used
To make your own wood caddy you will need:
- Cricut Maker or Cricut Explore Air
- Vinyl (stencil vinyl or any vinyl color that you have on hand) (can also use contact paper)
- Transfer Tape
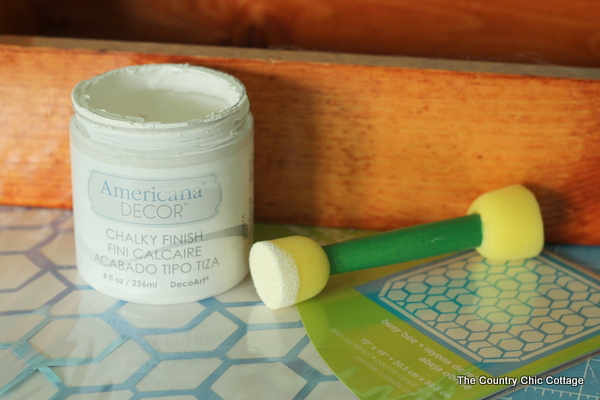
- Chalk paint
- Wood caddy
- Pouncer stencil brush
- Stencil adhesive (if NOT using stencil vinyl)
- Weeding tools (if using stencil vinyl)
- Transfer tape (if using stencil vinyl)
- Scraper (if using stencil vinyl)
- Painter’s tape
- Americana Decor Creme Wax
Instructions to Make Wood Caddy
Stain Your Wood Caddy
My wood caddy was nicely stained already. If you want to learn how to stain wood, this is a great tutorial.
Designing Your Stencil
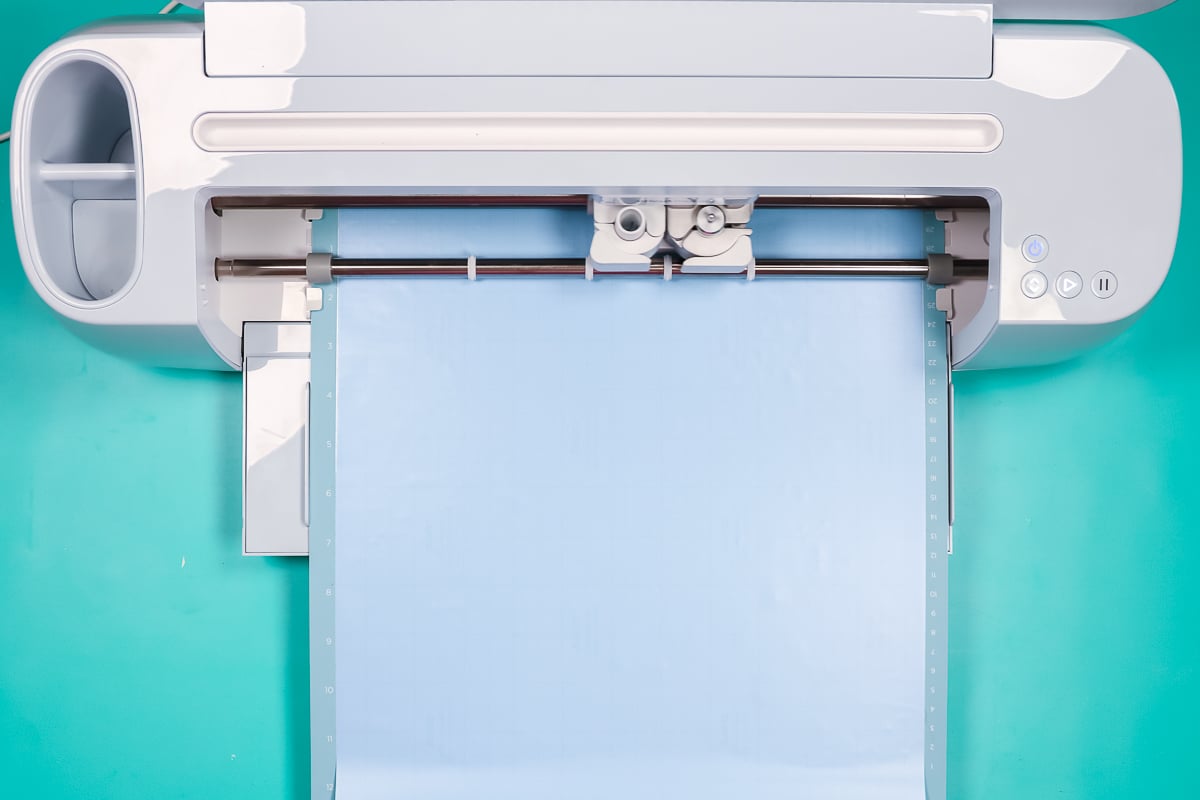
First, use your Cricut to design and cut your stencil for your caddy. You can upload an SVG to Design Space or design right in the application.
You can use stencil vinyl, regular vinyl in any color, or even contact paper.
See how to make your own stencil with a Cricut here.
Cutting a Stencil on a Cricut
Once you have your design, cut it from stencil vinyl or even a stencil film to make a reusable stencil. Click make it in Design Space. Then pick the type of material you are using for the correct cut settings. Cut the material with your Cricut.
If you are using stencil vinyl, make sure to weed any parts that you want to paint on your caddy. If you are using stencil film, the stencil is ready for painting!
Adding a Stencil to a Wood Caddy
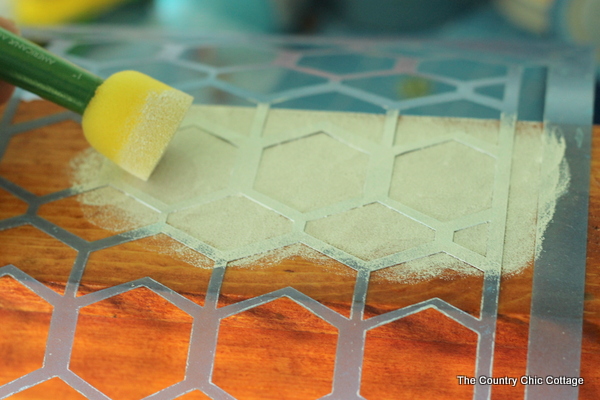
Spray the back of the stencil with removable stencil adhesive (do this outside!). Lightly tack to your surface and pounce with a brush and chalk paint.
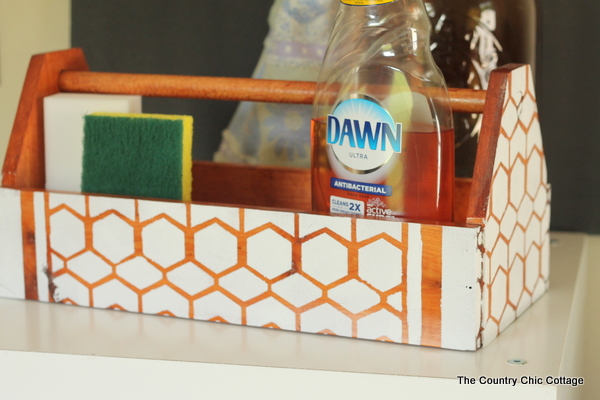
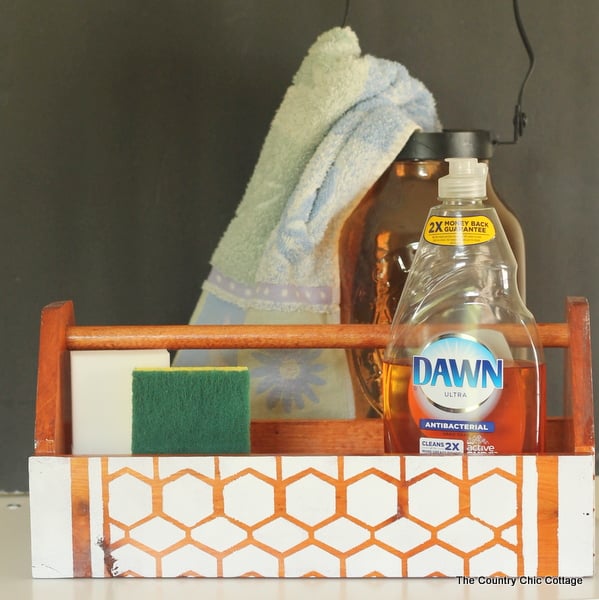
Readjust the stencil to the next area to be covered. In my case, I covered all of the sides but left the ends and inside unpainted.

Allow the paint to dry completely before using the caddy. You can wax with Americana Decor Creme Wax to get a glossier sheen and protect your work.
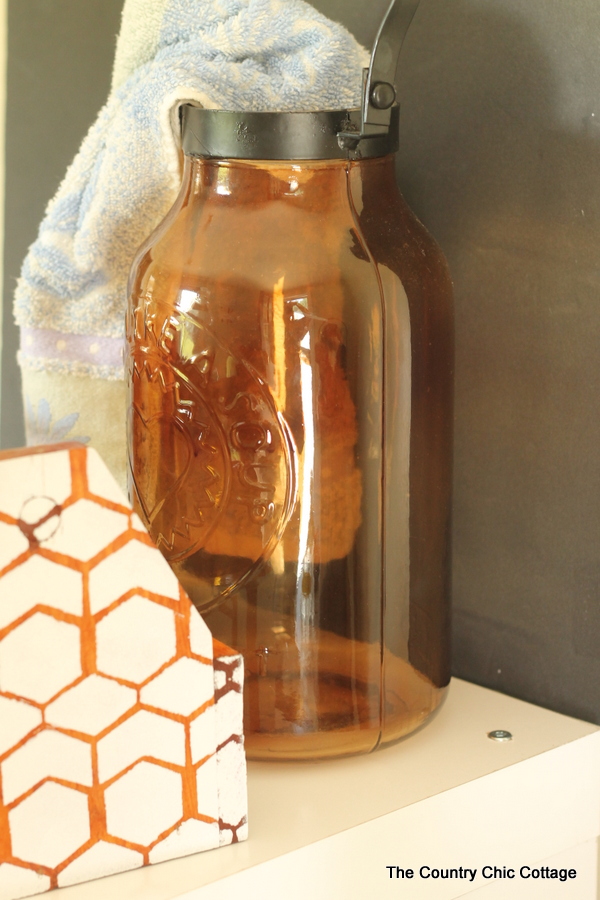
I am using this one as a storage cleaning caddy in our mudroom. It will sit next to the sink and store soap, sponges, etc. I love the wood showing through the stenciled surface. It really was just what this room needed.
We will be enjoying our new painted wood caddy as part of our mud room organization. Want to see more projects that I have used the chalky finish paint on?
- Chalky Painted Nightstand
- Stenciled Bookcase
- Rustic Gold Centerpiece
- Wicker Makeover with Paint
- Painting a Claw Foot Tub
- French Script Mason Jar

Equipment
- Cricut Maker or Cricut Explore Air
Supplies
- Vinyl
- Transfer tape
- Chalk paint
- Wood caddy
- Pouncer brush
- Stencil adhesive (if not using stencil vinyl)
- Weeding tools (if using stencil vinyl)
- Transfer tape (if using stencil vinyl)
- Scraper (if using stencil vinyl)
- Americana Decor Creme Wax
Instructions
- First, use your Cricut to design and cut your stencil for your caddy. You can upload an SVG to Design Space or design right in the application.You can use stencil vinyl, regular vinyl in any color, or even contact paper.See how to make your own stencil with a Cricut here
- Once you have your design, cut it from stencil vinyl or even a stencil film to make a reusable stencil. Click make it in Design Space. Then pick the type of material you are using for the correct cut settings. Cut the material with your Cricut.

- If you are using stencil vinyl, make sure to weed any parts that you want to paint on your caddy. If you are using stencil film, the stencil is ready for painting!
- Spray the back of the stencil with removable stencil adhesive (do this outside!). Lightly tack to your surface and pounce with a brush and chalk paint.Readjust the stencil to the next area to be covered. In my case, I covered all of the sides but left the ends and inside unpainted.
- Allow the paint to dry completely before using the caddy. You can wax with Americana Decor Creme Wax to get a glossier sheen and protect your work.


That caddy turned out so cute and would be great for so many uses. You could use it to organize something in every room of your house.