
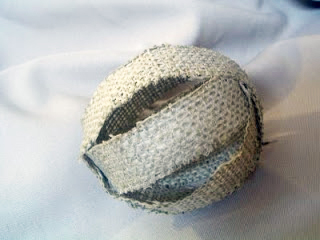
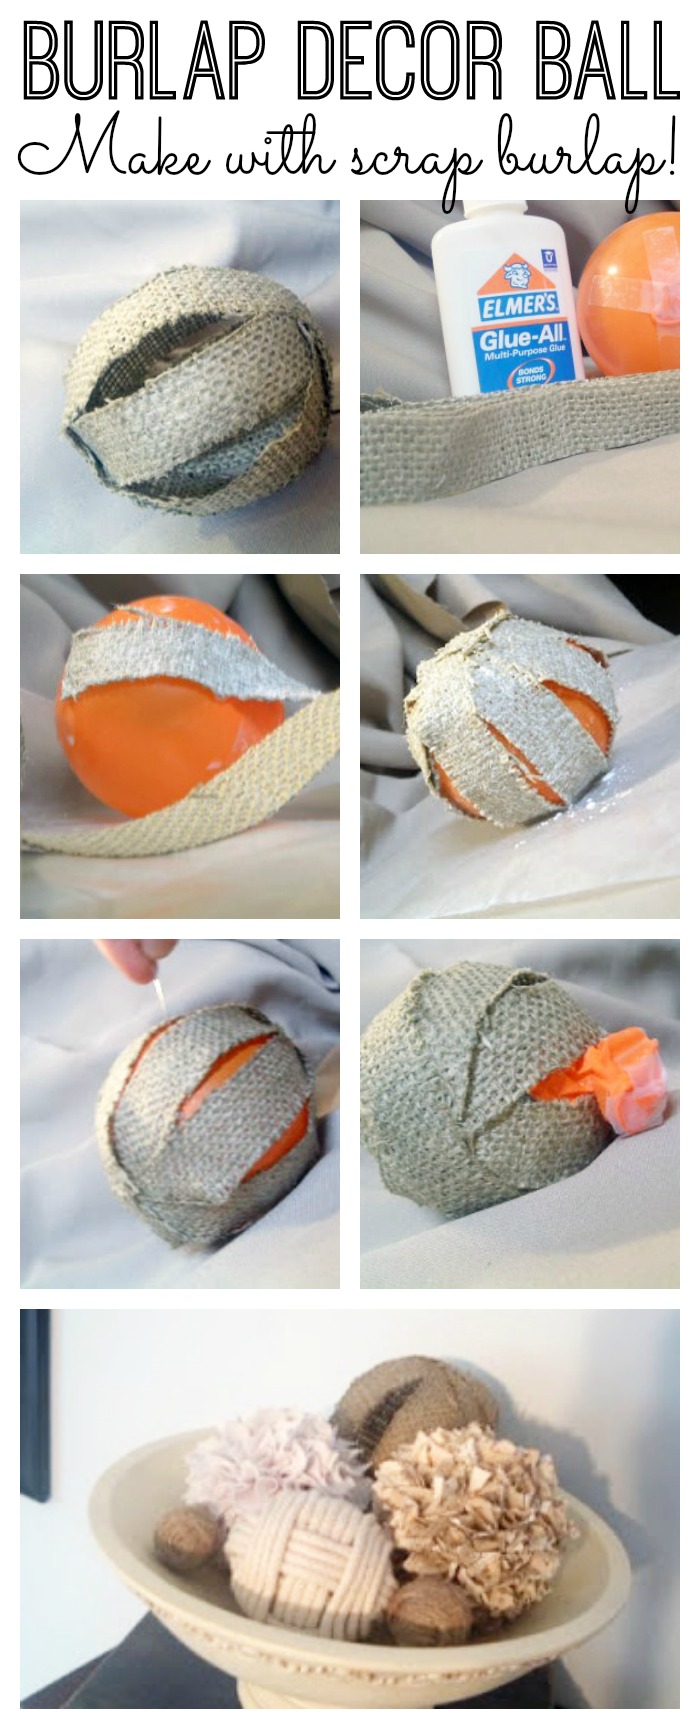
So far this week I have been balling in love with sheet music, fabric, jute, and rope. I couldn’t leave burlap out! Today we are making a fun burlap home decor ball that is easy to make and will look great in your home decor.
For this one, we are going to leave the styrofoam and glue gun behind. You just need a 1″ strip of burlap, some white glue, tape, and a balloon (yep balloon).
Blow up your balloon to the size ball you want. Don’t worry about the color of the balloon — we will be getting rid of it later. Tape the end down. And if there is anything sticking out on the opposite end — tape it down too.
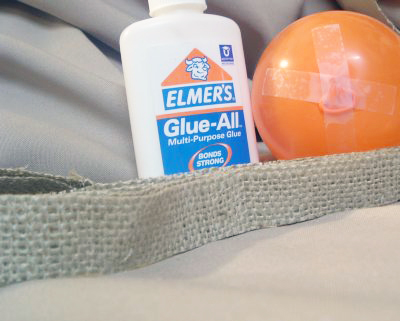
Mix equal parts white glue and water. This makes an AWESOME starch in case you are ever wondering. Run your burlap strip through the mixture and start applying it to your balloon.
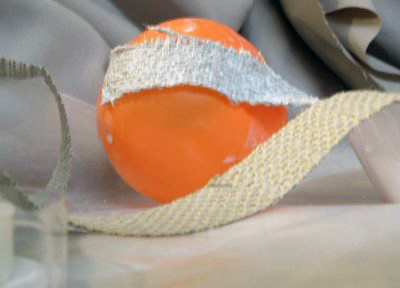
Wrap that burlap until you get your desired look. Then — the hard part — let it dry. Tip: place on waxed paper and it won’t stick. This needs to dry for 24 or more hours. And you will probably have to rotate at least once.
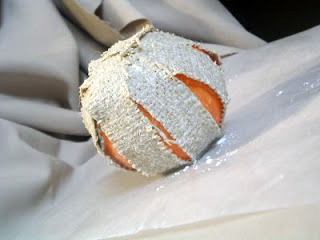
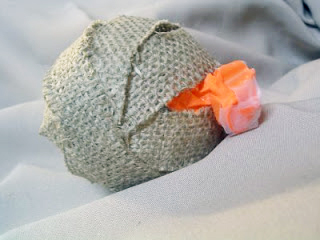
Once dry — take a needle and POP that balloon. Yeah I know but don’t be scared. It is like magic. The balloon just peels away from the burlap.
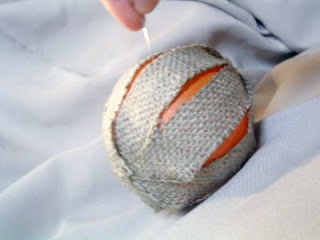
Remove the balloon. I took my needle and worked the balloon over to the edge where I could grab it.
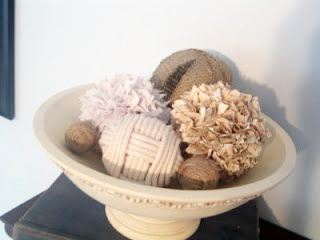
And there you have it. A burlap home decor ball! Perfect for adding to your rustic farmhouse decor. A touch of burlap looks great in any room of your home. I love that this one can be made with a scrap strip of burlap as well.
Tomorrow is my last day for “balling” in love…and I am going to use a sweater — yep you don’t wanna miss it!


Cute! You’re on a roll this week…. hahaha!
Great craft, my sister has made them for me out of jute twine, and they are just great. I’m thinking of trying some of your other Ideas to add to them. Thanks so much for sharing. -Carrie
http://thevintagewren.blogspot.com
I like this! I think I might evan be able to get my kid to make it for me. 😉 Well he’d like popping the ballooon!
Neat! Great idea!
I love this project! I collect decorative balls {having 3 boys, mom needs balls too!} 🙂
Thanks for sharing!
Super cute! I’m loving all that texture!
sweet idea!
Wow! What a great idea! The bowl full of balls in various textures and shades is beautiful!
Love the texture! Kim
I love this! I think I might even be able to do it! Thank you!
WHAt a fabulous idea! LOVE IT!
Great work!
Thanks for linking up to Thrifty Thursday!
Leigh
Tales from Bloggertiaville
http://www.lbratina.blogspot.com
This brings me back to paper mache days in art class. What a great idea! You are now on my blog reader list – I’m feeling so inspired. Thanks for stopping over my way so that I could end up meeting you!
What a cute idea! Looks great!
Wow! I love this! Thanks for the how -to. I will definitely be trying all your “ball” techniques.
Thanks for your kind comment on my “cloche” over at Gail’s blog “My repurposed Life”. She’s so nice to post some of my projects on her blog!
Rose
This one is awesome too! I’m featuring it at somedaycrafts.blogspot.com!
I love this! Now I am going to have to make some. Fantastic idea!