
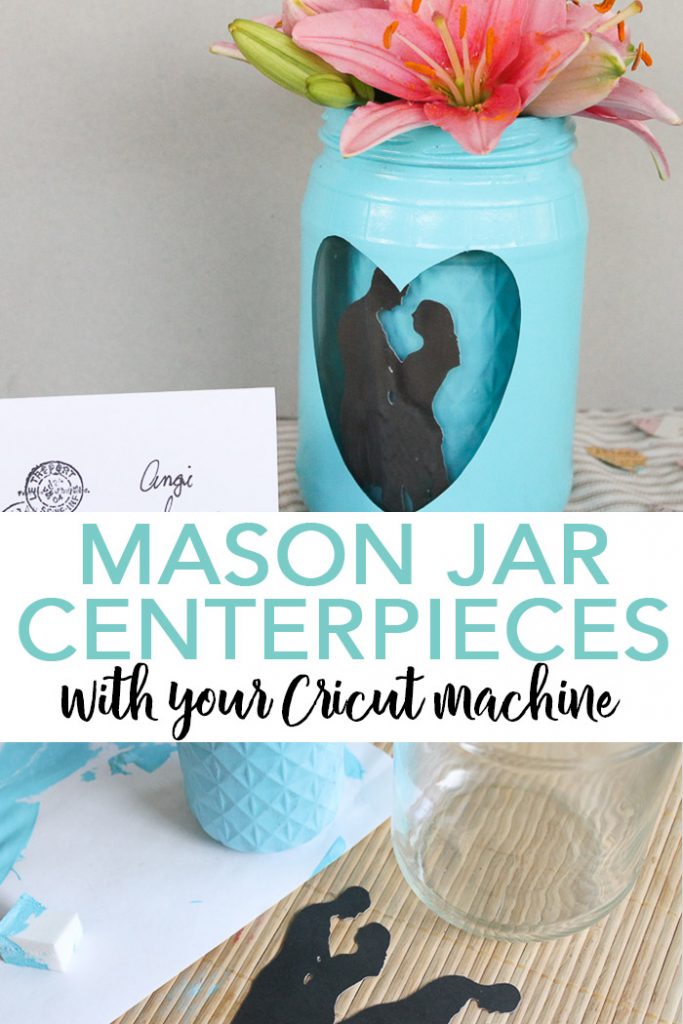
Making your own decorations is a great way to save some money for large events like weddings. DIY wedding decor is also a great way to personalize your decor and put a personal touch on the big day. Save money and add a beautiful personal touch with these mason jar centerpieces!
Weddings are expensive, y’all! Other big events like parties and baby showers can be too, but weddings always seem to take the cake when it comes to shelling out cash.
I love making centerpieces and have made many over the years. That’s why when we were working to plan a wedding, I chose to make the centerpieces. With mason jars, of course!
Mason jar centerpieces are great any time of the year, but they’re especially terrific for weddings. When you can use your Cricut they are oh-so-easy to make!
Note: If you’re planning a wedding, make sure to also check out my DIY Rustic Wedding Signs, Wedding Frame with Song Lyrics, and DIY Burlap Wedding Aisle Runner ideas!

How To Make These Rustic Mason Jar Centerpieces
I was inspired to create some mason jar centerpieces with flowers after seeing this idea from my friend Cyn over at Creative Cynchronicity. I loved the kissing couple silhouette and could not stop until I made my own wedding craft with a silhouette of a couple.
She did hers with a broken wreath frame, and it’s lovely. Of course, my version had to involve jars but y’all knew that right? 😂
Supplies Needed
Here’s everything you’ll need to put together this beautiful project. I’ve included a few links to items to help you find them faster and easier.
- One small jar and one large jar (see notes about the best mason jars to use down below)
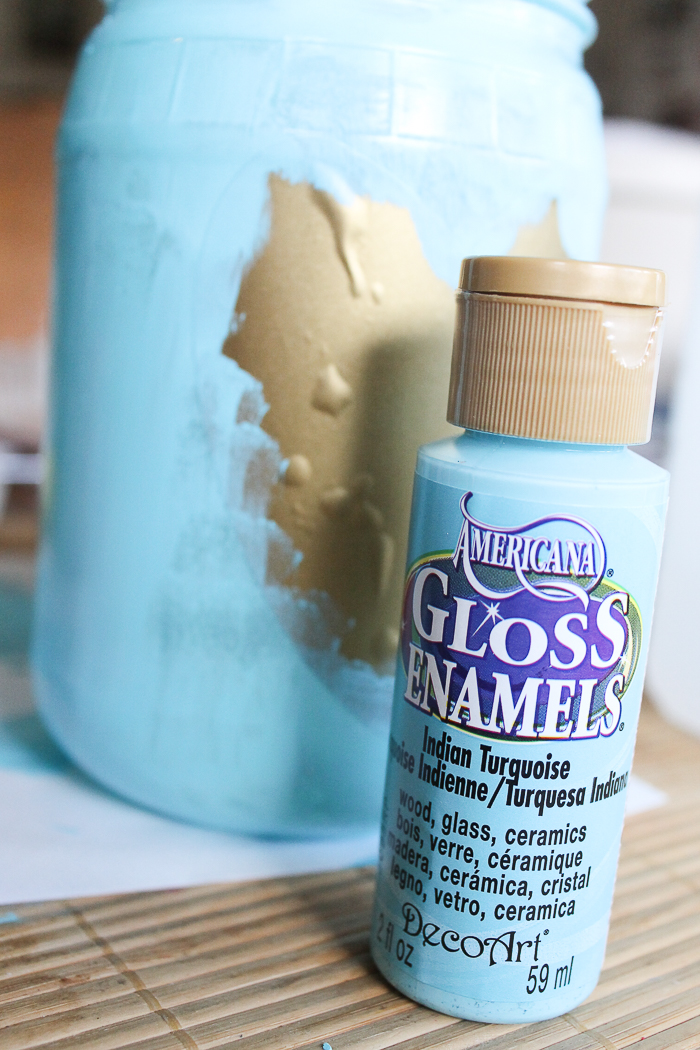
- Glass paint in the color of your choice
- Cricut machine (here’s the one I like best)
- Black card stock
- Paintbrush
- Vinyl (in any color)
- Cricut cut file (click here to access for a similar look to the project below)
- Rubbing alcohol
- Craft knife
- Tape
Instructions
Follow this process to make these mason jar wedding decorations. It’s much easier than it may seem!
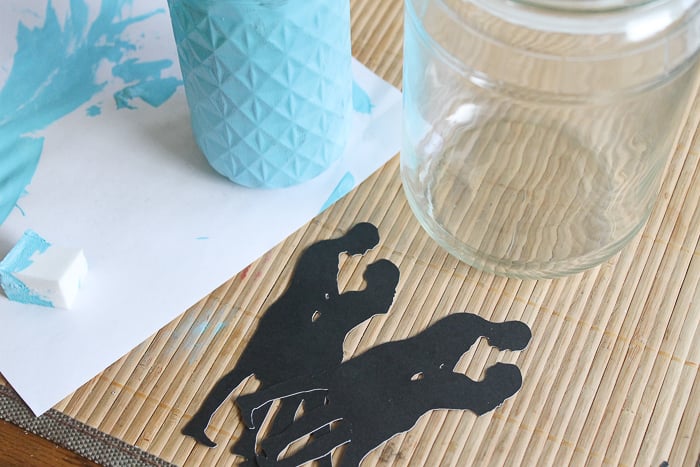
Step 1
Cut two couples from black card stock.
Step 2
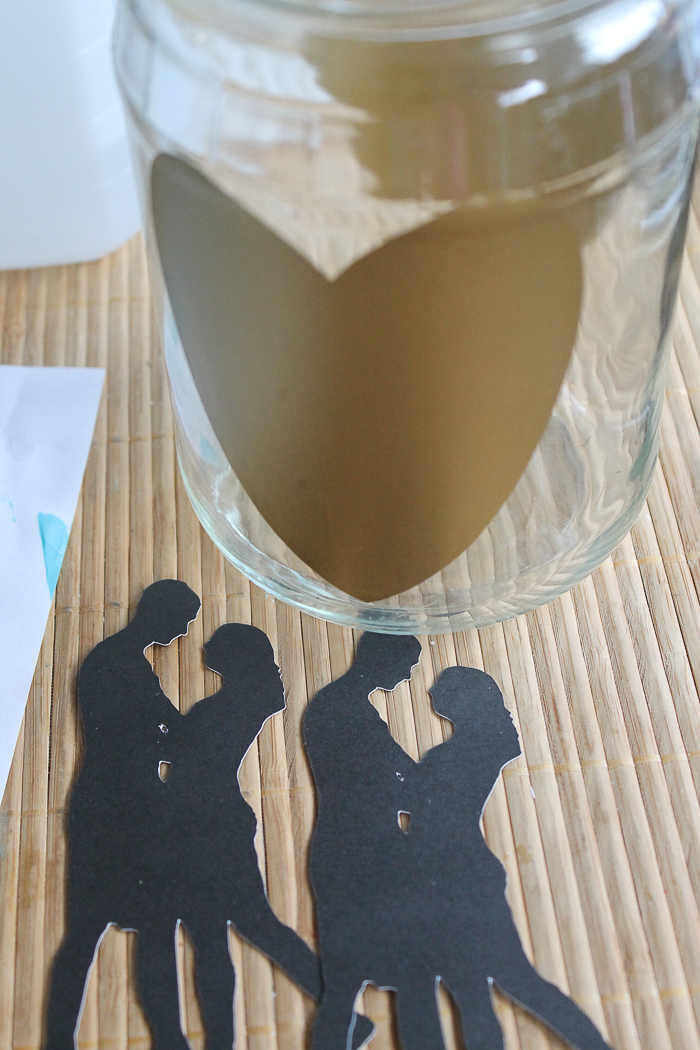
Next, cut two hearts from any color of vinyl that you have on hand.
Note: We are going to use the vinyl as a mask only. Be sure to size your file to fit the jars you are using before cutting.
Step 3
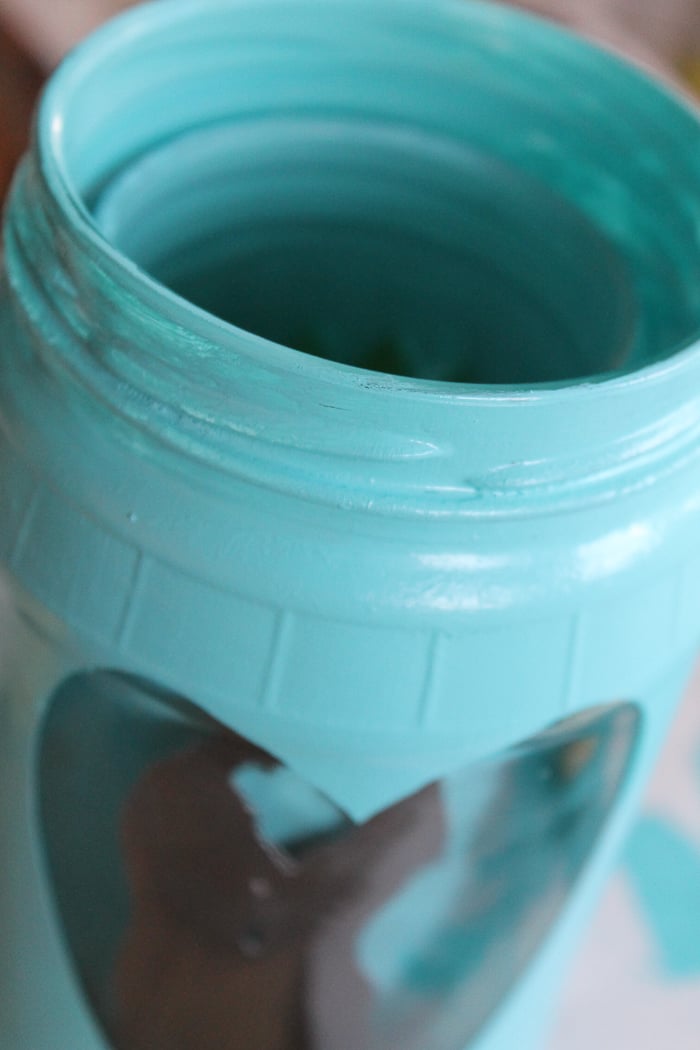
On the larger of the two jars, clean your glass well with rubbing alcohol and allow it to dry.
Step 4
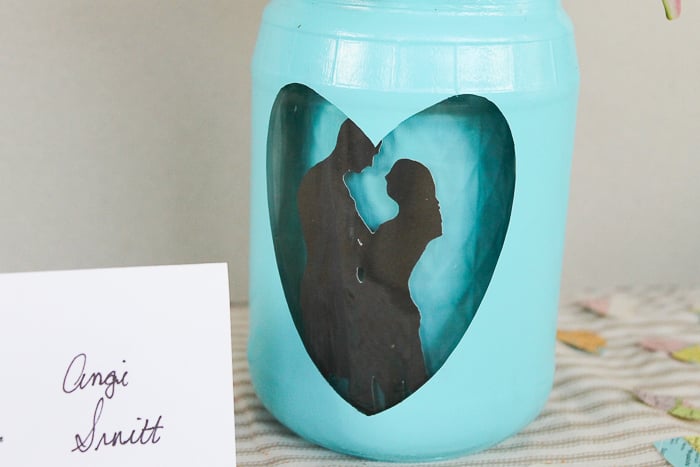
Apply your heart and burnish the edges well to avoid paint leaking under your masking. I added a heart on both the front and the back so that the vase is the same from both sides.
Step 5
Then, apply glass paint to the entire jar. I also used this same color on the outside of the inner jar.
My jars each needed two coats of paint. Be sure to allow them to dry between coats and follow all package instructions.
Step 6
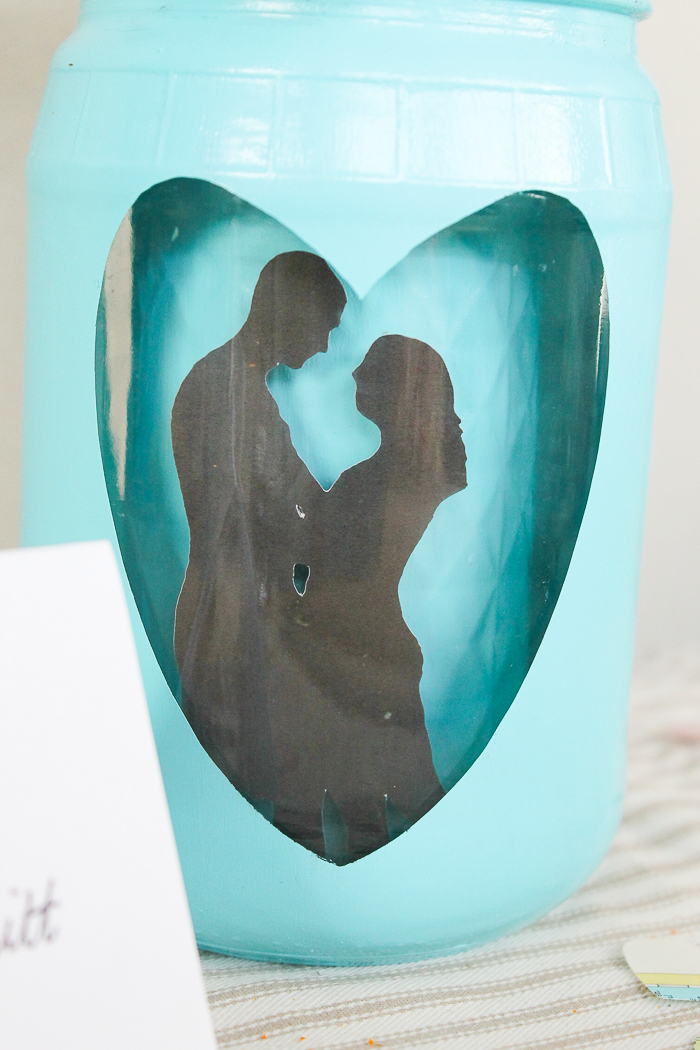
Once your jars have fully dried, you can remove the mask. I found it necessary to cut around the heart mask with a craft knife before removing the mask.
Step 7
Now it is time to add your silhouettes and assemble your vase!
Add a silhouette in both the front and the back heart. Secure them into place with a bit of tape at the feet.
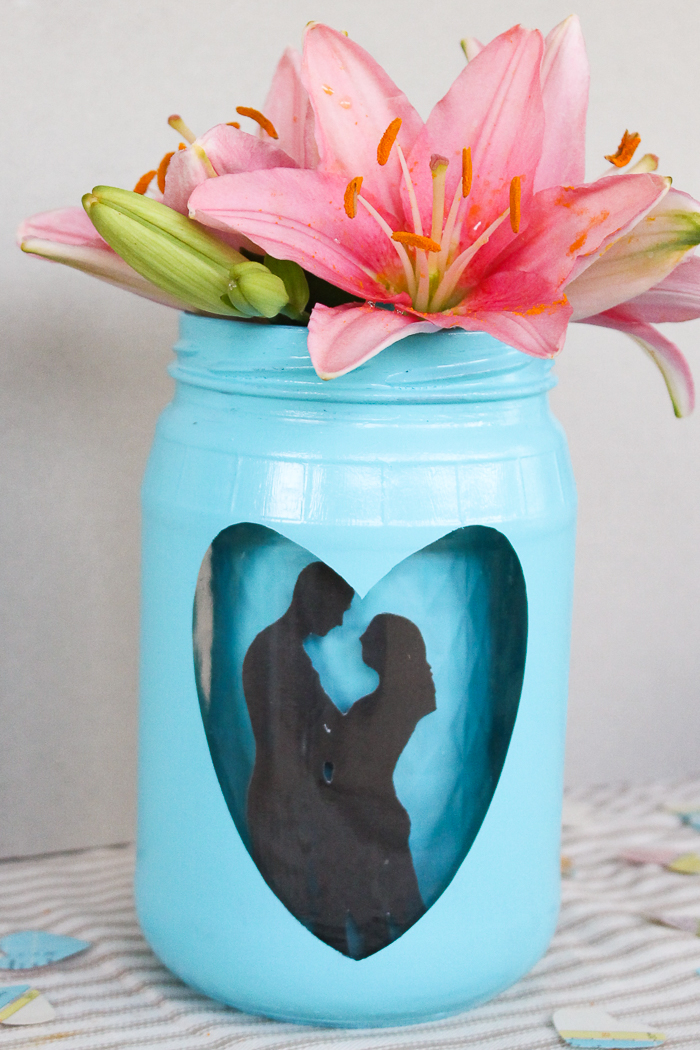
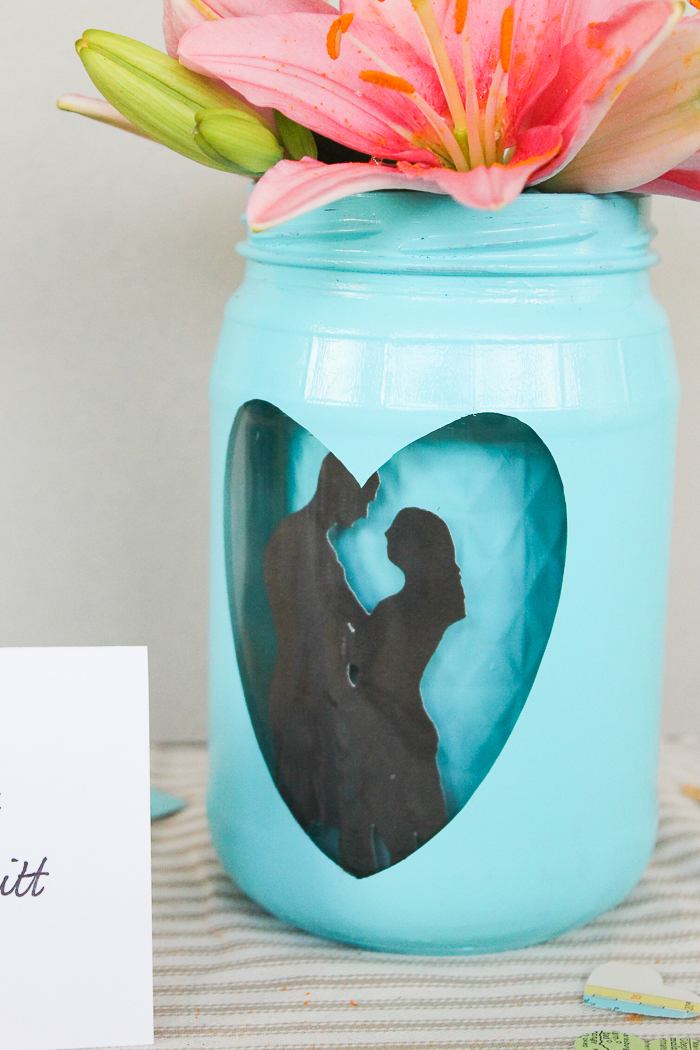
Then (carefully) drop your inner jar into your outer jar and you have a completed wedding vase centerpiece!
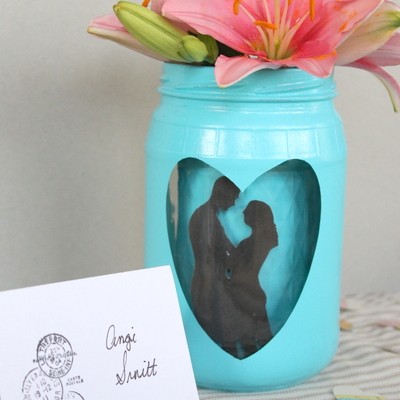
All that is left is to add flowers to the top and enjoy your mason jar centerpieces. I love how it is like looking into a window at a couple in love.
Project Tips And Notes
- The small jar should be able to fit inside the large one. I used a tall jelly mason jar for the inside and an old pickle jar for the outside. A wide-mouth mason jar that is plain on the outside could work as well.
- Be sure to click here to see tips and tricks on removing labels from jars.)
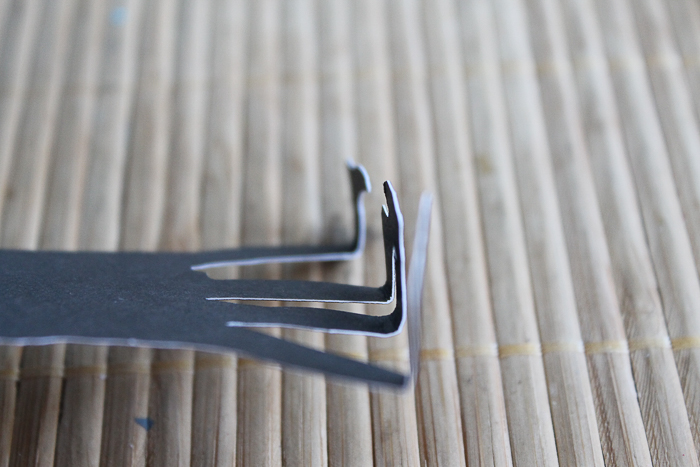
- My silhouette was a little tall for my opening so I just folded the feet. This is also what I used to tape the silhouette in place inside the jar.
Complete the look by adding some other wedding elements to your table to create a gorgeous wedding reception table for your guests.
You can also use these at bridal showers or even an engagement party!

Here’s a fun idea! You could use an actual picture of the couple and trace around it for an extra special personalized touch.
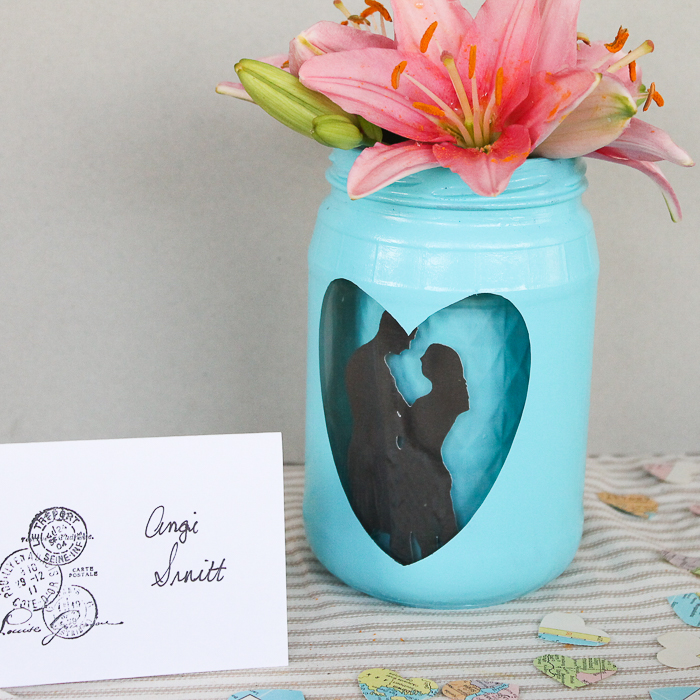
If you want jars at your wedding, this is a uniquely beautiful way to add mason jar centerpieces with flowers to your decor.
Choose the color of the jar and flowers to match your wedding decor then cut out your pieces on your Cricut machine.
FAQs
Here are a couple of questions that I see readers ask about making these cute mason jar centerpieces with your Cricut. If you have a question, please check to see if it’s already answered below. If you don’t see it below, leave it in the comments so I can answer it!
Can I decorate the inner mason jar in a different way?
Yes, absolutely! Instead of painting your inner mason jar a (matching) solid color, you could:
- Paint it a different color
- Use Sea Glass Mason Jars
- Create Gold Marbled Mason Jars
- Use one of these Five Ways For Decorating Jars
What can I use to fill mason jars for centerpieces?
We used flowers and the combination was stunning. If you want some other ideas, you could use:
- Faux flowers (no water, no mess!)
- Flags (for international weddings)
- Feathers
- Succulents
- Candles
I hope you will make these great DIY mason jar centerpieces for your wedding reception. You’ll love the results!
More Mason Jar Inspiration
Love these rustic mason jar centerpieces and want more ideas? In addition to our collection of over 80 MORE mason jar wedding ideas here, we have tons of mason jar ideas that will inspire you in all areas of life!
Check out our:
- Mason Jar Lights
- DIY Mason Jar Candle Molds and Candles
- How to Make a Mason Jar Light
- How to Make a Mason Jar Soap Dispenser
- DIY Lantern Project: Mason Jar Fairy Lights
Supplies
- One small jar and one large jar
- Glass paint in the color of your choosing
- Cricut machine
- Black card stock
- Paintbrush
- Vinyl any color
- Cricut cut file click here to access for a similar look
- Rubbing alcohol
- Craft knife
- Tape
Instructions
- Cut out two silhouettes from black card stock.
- Cut out two hearts from any color of vinyl.
- Clean the glass of your larger mason jar well and allow it to dry.
- Apply your heart and burnish the edges well to avoid paint leaking under your masking.
- Paint your entire jar and the outer part of your inner jar. You may need 2 coats.
- Let your jars dry completely, then remove your heart mask. You might need to cut the paint around the edge of the mask with a craft knife first.
- Tape your silhouettes to the inside of your larger jar. Carefully insert your smaller mason jar, and your centerpiece is done.


I am in love with this idea! Just think how cute that would be with my centerpiece too!!!!!! Ohhhh the ideas I’m getting 🙂
What kind of material did you use for the heart?
Just vinyl Mayra. Contact paper would probably work as well.
Beautiful idea. Love it. I will try this.
put a mini led tealight inside the jar 🙂
I don’t have any wedding plans in the future,but the possibilities are endless. I love how simple something so special is going to be to make, Thank you
Love it just think what we can do with mason jars who would of thought.