Repairing Heat Transfer Vinyl
Fixing those iron-on mistakes has never been easier!
What You Will Need
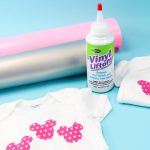
- Vinyl Lift-Off
- Fabric with heat transfer vinyl applied
- Rag
- Q-tips
- Protective gloves
- Heat transfer vinyl to add once old is removed
Instructions
- Gather any materials where you have made a mistake when applying your heat transfer vinyl. I will note that this product works better on light-colored fabrics. You will want to put on your protective gloves before starting and work in a well-ventilated area.

- Apply the Vinyl Lift-Off to the back of the piece you want to remove. Apply as little as possible dripping onto the surface and using a q-tip to spread around. Stretch your fabric to start loosening the HTV. I suggest putting an old rag under your fabric to catch any excess.

- Pull off the HTV after a few minutes. It may come off in pieces. Apply more of the Vinyl Lift-Off to the back if needed. You can also add some to the front with a q-tip if any adhesive residue remains after removal. I used probably 7 drops total to remove this Mickey head so it does not take much!

- I also used this on a tea towel. The HTV had been on this towel for over 6 months. The regular HTV removed just fine, however, the patterned version did stain my towel. It was also harder to remove. So, note that not all HTV products will remove as successfully as others.

- Once your HTV is removed, allow your fabric to dry completely.

- Then just use the same application methods as before to apply new HTV to your fabric. It will stick the same as when you were first applying it.