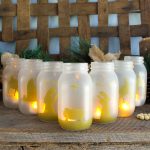
Nativity Christmas Jars
Make some nativity scene mason jars with your Cricut machine and these simple instructions.
Makes 1
What You Will Need
- Ball Quart Jars with smooth sides
- Krylon Sea Glass Paint in ice
- Battery operated tea lights
- Gold vinyl
- Transfer tape
- Weeding tools
- Cricut machine
- Nativity scene cut file see how to download above
- Scissors
Instructions
- You will want to paint your jars first so that they can dry. Be sure to start with clean jars and do your spray painting outside.
- Spray all sides with a couple of coats of sea glass paint and allow to dry completely. This paint gives your mason jars a frosted look that is just perfect for adding in candles.
- You can then download the nativity file. Upload this file to Cricut Design Space and resize it to fit your jars. You can see more about uploading images here if you have issues. All of your images will fit on one 12x12 sheet of vinyl.
- Cut the images from gold vinyl then use weeding tools to remove all of the excess. Continue until all of your excess vinyl has been removed.Remember to remove things like the centers of the letter as well.
- Then use scissors to cut the images away from each other.
- Cut transfer tape to approximately the same size as your image.
- Place the transfer tape over the top and then press down well.
- Remove the backing and your vinyl should be left on the transfer tape.
- Add the vinyl to the painted jars.
- Press down well.
- Then peel back your transfer tape.
- You may have to clip the very bottom of your vinyl to make it lie flat.
Notes
- For the images that are just one piece, you can just peel and stick them instead of using transfer tape if desired.
- Then just add a tea light to each of your Christmas jars and display them!
