DIY Cabinet Organizer
Turn simple crates into something to organize your kitchen in just minutes.
What You Will Need
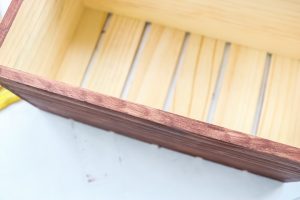
- Wood crates
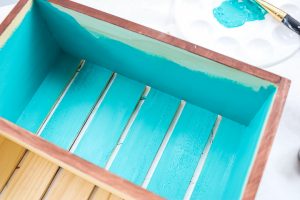
- Craft paint any color that you like
- Stain any color that you like
- Paintbrushes
- Rag
- Wood glue optional
Instructions
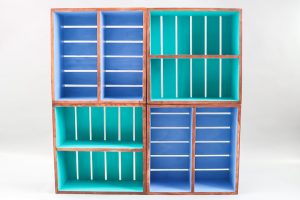
- Start by staining the outside of each crate. Brush on the stain, allow to sit a few minutes, then wipe away any excess with a rag. I did both the sides, back, and front edges with stain. You can do any combination of stain and paint that you wish. Allow the stain to dry completely before continuing.
- Then paint the inside of each crate with the craft paint. Be sure to choose paint colors that will work with your kitchen’s decor. I did two coats of paint but you may need more or less depending on what type of paint you are using. Just be sure to allow it to dry in between coats.
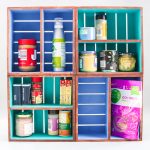
- Once your paint and stain have fully dried and cured, you can use these wood crates alone or stack them to create a larger organizer. You can also use wood glue to secure these together if you like.