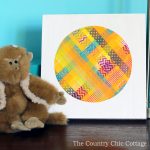
Washi Tape Wall Art
Washi tape art is a simple project to make and perfect for kids to get involved! They can make their own one-of-a-kind art in any shape and pattern they wish. Once you learn this technique for using washi tape in your projects, you will think of all sorts of possibilities!
What You Will Need
Instructions
- First, paint the wood canvas with a few coats of white paint. Set aside to dry.
- On the shiny side of your freezer paper, trace a circle the same size you want your finished circle to be on your finished piece.
- Place your washi tape in random order across the circle. Be sure to go past the outside edges of the circle. The only important part is that on this first layer the tape overlaps and completely covers the circle.
- Continue layering on tape strips in a variety of directions until you are happy with the results.
- Cut out the circle along the line you traced.
- Then, peel away the freezer paper from the back of the tape.
- Adhere your circle to the center of your board or canvas. Then, cover with Mod Podge.
- Allow to dry and display.
Notes
Don’t love the idea of a circle? Experiment with different shapes for your own unique spin on this project. I am telling you the possibilities are endless with this technique!
Turn the freezer paper over and you should be able to see the line well enough to cut by.
Turn the freezer paper over and you should be able to see the line well enough to cut by.