
How to Make a Burlap Cactus Succulent Plant Decoration
I did it! I made this burlap cactus succulent decor with my Cricut Maker. It took a bit of trial and error; however, I am thrilled with the results. So if you have ever wanted a cute succulent made from burlap, this is the post for you!
Makes 1 plant
Equipment
- Cricut Maker (Want to see the difference between the machines? I compared the Cricut Maker and Explore here.) NOTE: My recommendation is to use the Maker for all fabric projects including this one.
- Hot glue gun
What You Will Need
- Burlap A fairly tight weave works best.
- Tacky Glue Buy the glue online or find it in your local craft store. This is a thick glue that is commonly used for different types of crafts.
- Pouncer brush This is used to spread the glue on the burlap in an even manner.
- Wax paper Used to prevent a huge mess! If you don't have wax paper, then you can use recycled newspaper or paper towels.
- Cricut Strong Grip transfer tape Want to see the difference between the machines? I compared the Cricut Maker and Explore here. NOTE: My recommendation is to use the Maker for all fabric projects including this one.
- Cricut green mat
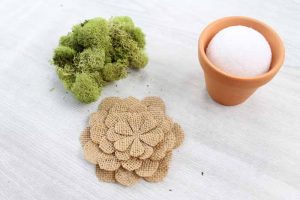
- Terra cotta pot The one I used was approximately three inches in diameter at the top.
- Styrofoam ball Be sure to use a styrofoam ball that is small enough to fit into the small pot.
- Moss You can use your favorite kind of moss. There are different types that can be found online and at craft stores. Want to be even more creative?
- Hot glue sticks Super important for this DIY home plant decoration.
- Cricut succulent file Click here to access the cut file.
Instructions
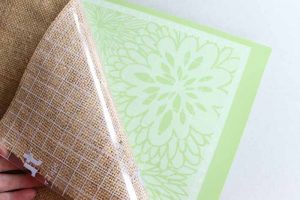
- Start with a 12 x 12 square of burlap and lay it on some was paper to protect your work surface. Mix tacky glue half and half with water. Then use a pouncer brush to apply this mixture all over your burlap.

- Allow the glue on the burlap to dry. This will take at least overnight. Then just peel your stiff burlap from the wax paper sheet. Now we have to get this stiff material to stick to a Cricut mat. Apply strong grip transfer tape to the back of your burlap. Then place the non-sticky side of your transfer tape down onto your mat. Press it down really well. You can even use a brayer or rolling pin here.
- Access the succulent cut file in design space by clicking here. Then resize so that your smallest piece is not less than 1 ¾ inches. This will ensure that the pieces are large enough to be cut by the rotary blade.
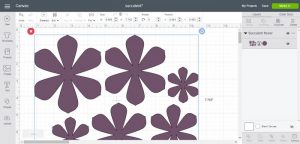
- Now you can choose two different cut settings and both have pros and cons: Heavy duty fabric - this is done with the rotary blade and will give you perfect cuts. The blade, however, will dig into your mat on those curves. This could potentially shorten the life of your mat.Medium fabric - also with the rotary blade and you will get great cuts. However, there will be some strings that will be uncut and you will have to use your scissors to complete those. The mat however will be in better condition.

- Also, note that I do not recommend the burlap setting as this stiff version did not work well with it. Now, make your choice, and then cut your succulent pieces with your Cricut Maker. No Cricut Maker? Sorry, I do not recommend any other cutting machine for these fabric cuts as the rotary blade is only for the Maker and is the only thing I have found to make this project.
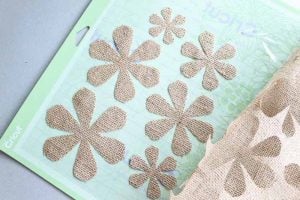
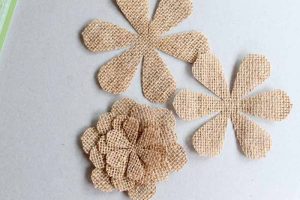
- Then you can just peel back your excess burlap and you are left with gorgeous burlap succulent pieces.
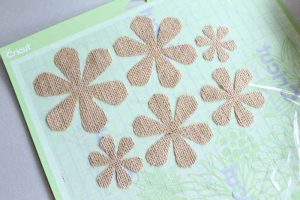
- Carefully, remove each piece of burlap from the transfer tape. Then you can remove that transfer tape from your mat as well. These stiff pieces will not fray and are perfect for this burlap succulent decor.
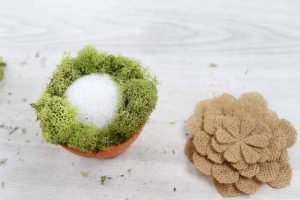
- Now, let's complete this burlap cactus succulent decor. Add a styrofoam ball to a terra cotta pot as shown below.
- Then, use hot glue to secure moss around the outer edges.
- Next, start with the largest succulent piece and glue to your ball in the center ONLY! This will allow your petals to be free and not glued down. Continue stacking the pieces as shown below and gluing only in the center.
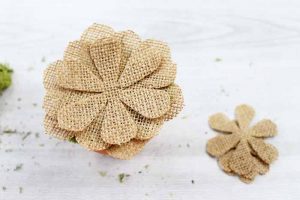
- Continue until you have secured all of the burlap succulent pieces into place. You can then fold up the petals of your project to make it look more realistic. Add more moss under the bottom petals if needed to hold them up and not have any of the styrofoam ball showing.
