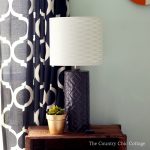
How To Add A Lamp Shade Pattern
Have an old lamp that needs a little sprucing? Consider creating a unique lamp shade pattern using your Cricut! Creating a fun pattern in your complimentary color can really give your old lamp a new life!
Makes 1 lamp
What You Will Need
- Cricut Explore
- Cricut Vinyl
- Cricut 12 x 24 mat
- Weeding Tool
- Lamp and shade
- Scallop pattern (from Cricut Design Space - Scale Pattern Overlay #M475F6)
Instructions
- Start with your Cricut Design Space and add in the pattern of your choice.
- Measure your lamp shade. Measure the diameter and multiply it by 3.14. Stretch your pattern to the correct size in Cricut Design Space.
- Pick an area where it will be good to split the vinyl (an area where it will be easy to line it back up and get everything straight). Draw a box from that area to the end of your pattern.
- Click "Select All" at the top and then click "Slice Under Layers" in the right-hand toolbar.
- Delete the pieces you do not need until you are left with a split version of your original image, as shown below.
- Now, when you click "GO", you will see that the two will be on two separate mats.
- Cut both pieces of your pattern with your Cricut.
- Weed away all of the excess vinyl.
- Start close to where the seam of the lamp shade is located. Lay down your vinyl nice and straight and lined up with the top of the shade. You may have to trim away excess of the backing paper when starting and during the application process. Go a little at a time and keep everything straight, pushing the vinyl down onto the inside of the lampshade as you work your way around.
- Line up the last piece where your original ends. The seam where the two come together is not very visible. You can, of course, see where the two ends are on my lamp shade. They are, however, on the seam of the shade.
- Add a low-wattage bulb to the lamp, and you are ready to add this one to any room in your home!