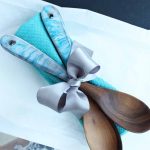
Decorated Wooden Spoons
Follow along with this tutorial to learn how to use epoxy resin to decorate wooden spoons and create gorgeous kitchen decor or beloved DIY gift iddeas.
What You Will Need
- Wooden spoons choose ones with a flat handle surface
- Stir Sticks
- EnviroTex Lite Pour-On High Gloss Finish
- Castin’ Crafts Opaque Pigment in the colors of your choice – I used white, green, and blue
- Masking tape
- Mixing cups
- Toothpicks
- Rag
Instructions
- Cover the sides and any holes in your handle with masking tape. You may need to cut the edges to help the tape wrap around the spoon (or roll up a piece of tape to slide into the hole).
- Protect your work surface and then lay your spoon down on a flat surface. If it tilts, prop up the end to make the handle flat.
- Mix the EnviroTex Lite Pour-On High Gloss Finish according to the package directions. Take care to follow the directions when mixing this product.
- Pour small amounts into three different mixing cups.Add some of the Castin’ Crafts Opaque Pigment into each of these cups and stir well. I used, blue, a mix of blue and green, and white.
- Add the white to the handle of one of the wooden spoons using a stir stick.Use less than you think you will need because it will slowly spread out and fall over the edges.
- Randomly drip your colored resin onto the handles with toothpicks.
- Take a clean toothpick and run it through the resin to start creating that gorgeous marbled effect.
- Let your decorative spoons sit so the resin can set. The material will run off the sides. Note: if you notice any bubbles come to the surface, pop them according to the package instructions.
- Check on your spoons occasionally and use a damp rag to wipe away any excess resin.
- Allow the resin on your decorated wooden spoons to set up for a few hours then carefully remove the tape. The resin will still be wet but it shouldn't run.Use your rag to wipe away any excess resin on your spoons that may have seeped under your tape.
- Check on your decorated wooden spoons a few more times to ensure that no additional bubbles appear or resin drips over the edges.Allow the spoons to cure for about 24 hours.