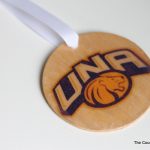
DIY Image Transfer Ornament
Make a DIY image transfer ornament with a few easy steps! Create your own ornament from whatever image you choose. All you need is a printer, tissue paper, and Mod Podge to get started.
Equipment
- issue Paper
- Card stock
- Tape
- Printer
- Glaze or Paint
- Paint Brush
- Ribbon
- Drill (or other tool to create a hole for threading ribbon)
- Wooden Circle Ornament
What You Will Need
- DecoArt’s Matte Finish Spray
- Aerosol Hair Spray
- Mod Podge regular and Dimensional Magic
Instructions
- Tape the tissue paper into place with the matte side OUT. Shiny side in. Trim the tissue to about 1 to 2 inch overhang then tape on the back.
- Invert any image with words and run your sheet through your printer. Print directly on the tissue paper.
- Lightly spray your image with aerosol hair spray. This will set the ink. Allow to dry.
- While your hair spray is drying, paint or glaze your wooden circle ornament. Set aside to dry.
- Then, remove your tissue paper from your card stock. Apply a coat of Mod Podge to the ornament, and lay your image down on top of that. Smooth from the center out using your fingers or a brush. Allow to dry.
- To remove the excess tissue paper, you can literally just push down REALLY well on all the edges. Then just dampen your finger and rub those edges. The tissue paper will separate there in a fairly clean line.
- Spray a few light coats of Decoart’s matte finish spray to finish off the ornament.
- After the finish spray has dried, coat the ornament with two thin coats of regular Mod Podge and one coat of Mod Podge Dimensional Magic. Those last steps are optional but they really make the ornament look professional.
- After everything is dry, make your hole, thread your ribbon, and hang on your tree!
