Personalized Glowforge Christmas Ornament
Today I'm going to teach you how to create a personalized Glowforge Christmas ornament. Using you're Glowforge you can create personalized ornaments for yourself or anyone else on your gifting list!
Equipment
- Glowforge Aura (or other laser)
- Paintbrush
What You Will Need
- Free SVG Files
- Eco Thin Teal Acrylic
- Light Maple Plywood
- White Paint
- Glue
- Ribbon or Twine
- Gorilla Tape
- Masking (optional)
Instructions
Preparing Materials for Cutting with Glowforge
- On the supply list, you'll see I have masking listed. Glowforge proofgrade materials already have masking on both sides.
- If the material you're using doesn't have a masking I would recommend adding it to both sides before you cut.
Uploading Designs into Glowforge
- Go to app.glowforge.com and then click on Start a New Project. Click the plus button to upload the design.
- First, I'm going to upload the cookie jar. If you're cutting different materials you'll follow the steps for each different material.
- Click Upload, find the image on your computer, and upload the SVG. You'll see the design in the program and you'll want to resize the design to whatever size you want. You can click the bottom left corner and see the exact measurements in the Glowforge app.
Add Materials to the Glowforge App
- I am using the Eco Thin teal acrylic and because I already added it to my Glowforge Aura the camera was able to pick it up.
- As soon as you add proofgrade materials to your Glowforge Aura the camera is able scan it and it will show up on the screen in the app.
Adjust Cut Settings in the Glowforge App
- I want the outside of the cookie jar to be cut out and the inside markings to be scored.
- The text will all be etched so let's look at how to add the text.
Adding Text for Christmas Ornaments in Glowforge
- I didn't include the text with the SVG so you can customize the text for your needs. To add text click the text button and then type out what you want it to say.
- I typed "Grandma's Perfect Batch" but you can change that to whatever works for you. "Gigi's Perfect Batch", "Mom's Perfect Batch" or anything else.
- Resize the text to fit onto the cookie jar and place it wherever you want it on the jar. I put my text at the top but you can add it to the bottom if you like it there better.
- I also added the year to my Glowforge Christmas ornament.
- Check all the cut settings one more time. The outside is set to cut, the inside lines are set to score, and all the text is set to engrave.
- Click Print to send the design to the Glowforge.
Printing a Personalized Christmas Ornament with Glowforge
- These Christmas ornaments do take quite a while to do on the Glowforge Aura. Make sure you stay by your Glowforge the entire time it's printing.
- When the printing is done it will tell you right on the computer screen. Simply lift the lid on the Glowforge and remove the pieces.
- You'll repeat the process for the gingerbread men.
- Upload the SVG, duplicate the design as many times as you need for your grandchildren or children, and then add the material to the Glowforge.
- Add the names by clicking Text and resize each name to fit your gingerbread man.
- Make sure the cut settings are correct for the different layers and click Print.
Paint the Glowforge Christmas Ornaments
- Do not remove the masking. The scored and engraved lines in the masking will act as a stencil for the details.
- I am using regular paint and a small paintbrush. Try to avoid the edges and go over all of the details a few times.
- I allowed each layer to dry before adding the next layer and ended up applying 3 layers of paint.
- When the paint is dry it's time to remove the masking.
- The masking on the blanks can be difficult to remove. I've found using a strong grip tape like Gorilla tape helps grip the masking and lifts it right off.
How to Remove Masking from Details
- Removing the large part of the masking was easy with the gorilla tape. The detail pieces can also be removed with the gorilla tape but if you're having a hard time getting the masking without removing paint you can use a weeding tool to gently lift the tape.
- I used the tape for everything except the inside of the letters.
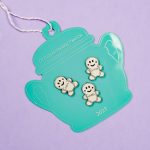
How to Add Gingerbread to the Christmas Ornament
- Now it's time to add the little gingerbread people! All I did for my gingerbread men was remove the masking. I didn't add any painted details for these pieces.
- To add the gingerbread men make sure that you remove the masking from the back as well as the front. You don't want the gingerbread men to fall off the ornament because only the masking stuck.
- You want to choose an adhesive that will work with the two materials you're gluing together. I am using clear Gorilla glue to adhere the gingerbread men to the Christmas ornaments.
- You can place the gingerbread men wherever you want in the cookie jar.
- Once they're where you want them set the ornament aside and allow the glue to dry completely.
Finish the Personalized Glowforge Christmas Ornaments
- To finish off the Christmas ornament we just need to add twine or ribbon to the top so we can hang it on the tree.