Make an Applique Bib
You can make an applique bib in minutes with a few supplies. These make great baby shower gifts or make a bunch for your own baby. You can also use this same method to put an applique on any piece of clothing for yourself or baby. The possibilities are endless once you learn this simple technique.
Equipment
- iron
- Sewing machine
- Plain Bibs
What You Will Need
- Silhouette Interfacing
- Die Cutting Machine & Fabric Blade optional (a craft knife or fabric scissors will also work with a little patience)
- Bandana or other fabric in color of your choice
Instructions
- Start by reading the directions that come with your interfacing. You will need to cut the bandana and interfacing to approximately the same size.
- Iron interfacing onto the back and trim to exactly the same size. Peel off liner piece from back of bandana. There should be a plastic like coating on your fabric. Remember to follow all instructions that come with your interfacing including ironing times.
- Find the shape of your choice online to cut from the fabric. You can use the Silhouette software to trace it and cut from your bandana. If the logo is simple enough, you can also hand cut. Use scissors or a craft knife to do any hand cutting. Be sure to protect your work surface. Trim any remaining threads with scissors when removing the cut out.
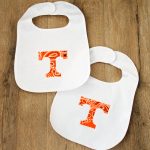
- Place the logos onto your surface. In this case I used a package of plain bibs but again you can choose to use a shirt or even pants! Just use your iron to adhere the logo to the bib.
- The logo is now firmly in place on your surface. If you want your DIY baby bibs to be washing machine safe, you will need to break out the sewing machine. Use a zig zag stitch all the way around to make your applique permanent. You have now learned how to make an applique bib.