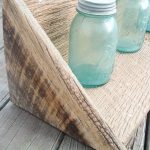
How to Make a Barn Wood Shelf
Learn how to make a barn wood shelf for your farmhouse style home!
Equipment
- saw
- drill
- drill bit
What You Will Need
- barn wood
- dowel rod
- wood glue
- finishing nails
Instructions
- Start by picking the barn wood pieces that are perfect for your shelf. You will want to pick your barn wood carefully. The worn edges make your shelf extra special.
- We are extremely blessed with a great supply of barn wood! Cut the bottom and back of your shelf to the same length.
- Drill three holes in the bottom of the shelf 1/2 inch deep. These should be along the back edge but on the top surface.
- TIP: put tape on the drill bit at 1/2 inch so you know when to stop drilling.
- You will also want to add three holes in the board that you are going to use for your back. These should be along the bottom edge. They should be in the same location as the holes you drilled in the bottom board. You want all of the holes to line up when you put the two boards together.
- Then cut short dowel pieces for the holes.
- Do a dry fit of the two pieces together to make sure everything goes together well. Then put the glue into each hole.
- Put the two pieces together. Use a few finishing nails to hold the two pieces together while they dry. You can then add the ends to your DIY barn wood shelf. Cut triangles to fit in the corners as shown below. You will want to cut them so the barn wood edge is out once assembled.
- Once again, use a little wood glue and finishing nails to hold those into place. Your barn wood shelf is now complete and ready for your home's decor.
