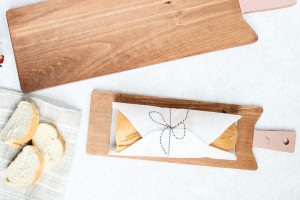
DIY Cutting Board with Painted Handles
Have you ever wanted to add a little something special to your cutting board? Well, now you can with this idea for painting the handles.
What You Will Need
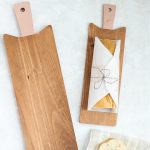
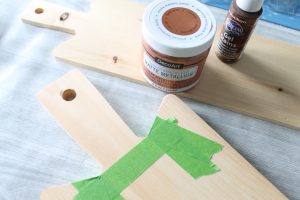
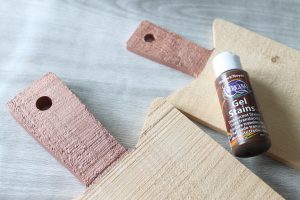
- Cutting boards or breadboards look for one with a handle (Please note the ones I am using are unfinished but you can pick up a finished one and do the same project.)
- Paint I am using the Americana Decor Matte Metallics but any paint you love will work.
- Painter's Tape my favorite is Frog Tape
- Stain if your board is not finished
- Paintbrushes
- Rag
Instructions
- Start by using painter's tape to mask off the handle area. Remember that paint is not food-safe so you want to keep this in an area that will not touch food.
- You can then paint the handles in the color of your choice. Depending on the paint you are using, this may take a few coats. Paint the first coat, allow to dry completely, then add a second coat. Repeat until you have the coverage desired.
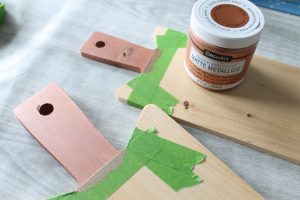
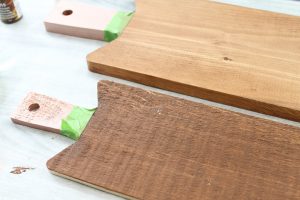
- You will also want to be sure to paint the sides as well as the back for a more finished look. To paint the back, complete the painting on the front before flipping over to repeat the same procedure on the back. Once all of your paint has dried, carefully remove the painter's tape.
- The bread boards that I am using for this project were unfinished so I also needed to stain the boards themselves. You can skip this step if you are using a finished piece. Please note that if you do stain your boards, they will not be food safe. To stain, use painter's tape on the handle.
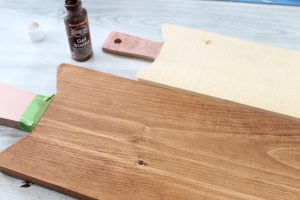
- Then brush on a coat of stain with a paintbrush, allow it to sit a few minutes, and wipe away all excess with a rag. Once again, you will want to do this on all sides to get a more finished look. These boards actually have a rough side and a smooth side which gives a completely different look depending on which way you flip them.
- Allow everything to dry completely then these are ready for display in your kitchen. NOTE: I used products that made mine for display only. I have a few tips below for finding products for cutting boards that you will use in your kitchen.