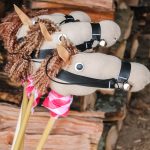
How to Make Sock Stick Horses
Grab those socks (new or old) and make a cute horse for someone special.
What You Will Need
- Brown socks I found mine in the men’s department at Walmart.
- Faux leather fabric in black I purchased one yard cut of fabric. A 1/4 of a yard would have been plenty.
- Suede lace 1/8 inch
- Lion Brand Yarn in Barley
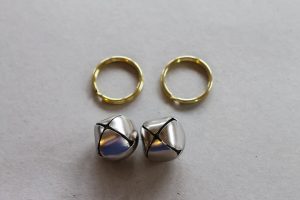
- Brass Plated Keyrings 2 per horse (30 mm rings work best)
- 1 inch Jingle Bells 2 per horse
- 2 white and 2 black buttons per horse
- Brown felt
- Brown embroidery thread
- 2 1/2 inch Styrofoam ball
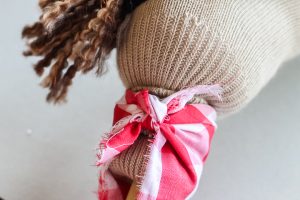
- Red plaid material or bandanna
- Hemp twine
- E6000 glue
- Fiberfill stuffing
- 5/8 inch dowel rod 36 inches long
Instructions
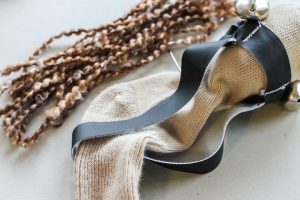
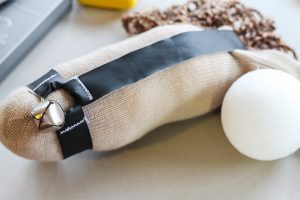
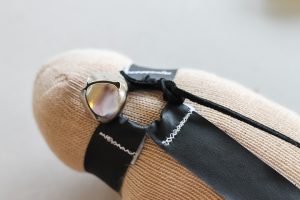
- Let's start with the halter for our horse. Grab your brass plated key rings and jingle bells. Put the jingle bells on the key rings just like you would a key.
- Cut your faux leather into 1 inch strips. You will need 2 pieces 5 inches long and one piece 16 inches long. Use the zig zag stitch on your sewing machine to assemble your halter. Sew them to the key ring as shown below.
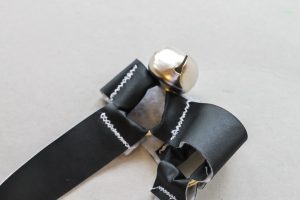
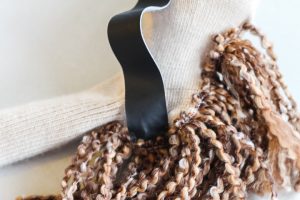
- After all the pieces have been sewn to both key rings you will have a halter for your stick horse as shown below.

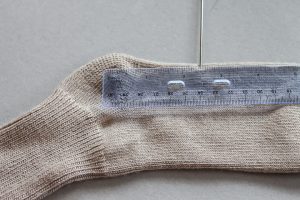
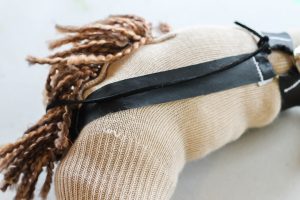
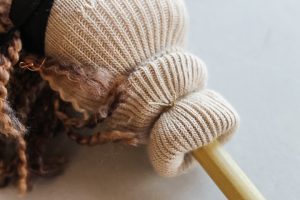
- Next is the mane. Cut your yarn into 9 inch pieces. You will need several cut pieces for the mane. Mark your sock approximately 2 1/2 inches in front of the heel.
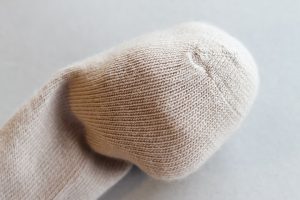
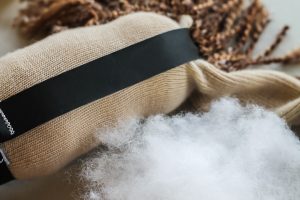
- Add a little fiberfill stuffing into the toe of the sock.
- Add your halter then add some more fiberfill to the sock. Stop when you get close to your mark for 2 1/2 inches.
- Using that same zig zag stitch, begin at your 2 1/2 inch mark. Fold each piece of yarn in half and sew the fold to the sock. Pull the sock tight as you go slowly adding in yard mane pieces. Be sure to stretch and pull the sock as you sew. The halter should fall right on the back of the heel of the sock. Sew it into the mane. Stop sewing when you reach the ribs of the sock.
- Add fiberfill until you get to the heel area of the sock. Then add in your Styrofoam ball.
- Add more fiberfill UNDER the ball to make that area of your horse wider.
- Continue adding fiberfill and work and shape your horse until he looks right. You can move the ball once inside the sock if you are not happy with the placement. It is looking a little like a horse now don’t ya think?
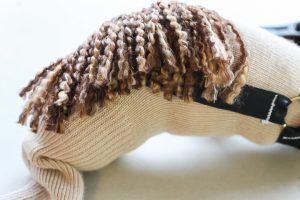
- Now that you have a horse head, we can give him a haircut. You can keep your mane long, cut it short, whatever you think looks best.
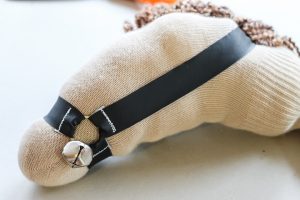
- Then add a lead rope. Tie the suede cording to the keyring.
- Leave a little room on the cording at the back of the head for a little hand to hold it. Then tie the opposite end to the other key ring.
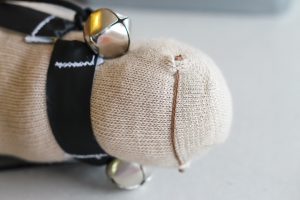
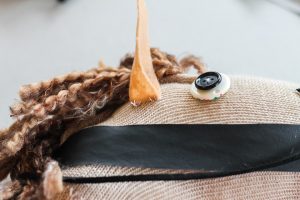
- It is time for the details! Use brown embroidery floss to go over the toe seam of your sock. This makes a mouth.
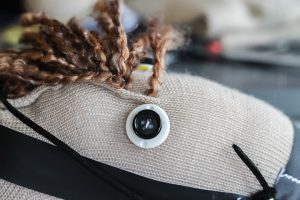
- One white button and one black button make a perfect eye. Just sew them into place.
- Cut ear shapes from brown felt then fold them in half and sew them to the head by hand.
- Now let's add the stick to our DIY stick horse. Fold up the length of the sock as shown.
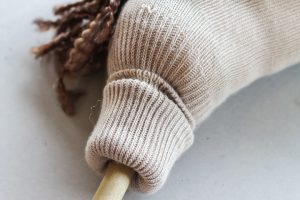
- Insert your stick into the horse head and push it INTO the Styrofoam ball that is in your head. Make sure you press firmly and that the stick goes into the ball a few inches. Determine where you will tie your horse head into place. Use a pen to mark that approximate location.
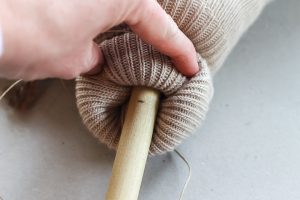
- Remove the stick and add E6000 glue to the marked area and also the very tip of the dowel that will be in the head.
- Insert the dowel back into the head and use hemp twine to tie the head firmly into place. Be sure to let the glue dry the recommended time on the packaging!
- Tear your red checkered fabric into an 8-inch square then tie around your horse’s neck to hide your twine. You can also use a bandanna for this step if you would like.