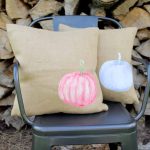
How to Make a DIY Pumpkin Throw Pillow
Make this adorable pumpkin throw pillow in just minutes! This tutorial includes the image files and step-by-step Cricut instructions!
Equipment
- Cricut cutting machine
- iron
What You Will Need
- Burlap pillow cover
- Printable heat transfer
- Parchment paper
- Printer and ink
- Pumpkin file of your choice (download the pink, blue, and orange)
Instructions
Uploading and Printing the Pumpkin File
- Download the pumpkin files that you would like to use to your computer as a jpg file. Use the upload button in design space to import. For the blue pumpkin especially, be sure to choose the complex image type. The other two imported fine with the moderately complex setting.
- Now you can select and erase any area that you do not want. This definitely includes the background but also say the inside of a curly pumpkin stem.
- Once selected those unwanted areas will turn into blue checks as shown below. You want to make sure that the entire pumpkin looks complete.
- Once you click continue, you will be given two options for saving the file. One for a print then cut and one for only a cut. We are going to need that print then cut option.
- You will now see it on your recently uploaded images area. You can then pick it from here to add it to your canvas.
- Once you add to the canvas, you can see that it is a print then cut by the layers menu on the right hand side.
- Resize to whatever size that you need for your pumpkin pillow. You will need to remember the size of your heat transfer. The Cricut will also print a border around the image in order to see it on the machine. It will prompt you however if the image is too large to fit with the border.
- Click make it and the software will prompt you to print then cut your file. Make sure that the material size is correct for your brand of heat transfer. Also, my brand does not require that you mirror the image. If yours does, be sure to pick the mirror option at this point.
- First the software will allow you to print your image. Be sure to use best quality printing no matter what brand of printer you are using.
- You will then have a paper that looks something like the below. It will print your image along with a black box all the way around.
How to Cut Your Pumpkin File Using Your Cricut Machine
- Now it is time to cut! With the Cricut Maker, you choose all of your materials manually. To access this screen on another Cricut model, just turn the dial to custom. Pick the heat transfer material.
- Then, on this particular brand, I found that setting the pressure to "less" worked best. You may find that this changes based on your brand.
Apply the Pumpkin Grphic to Your Pillow
- You then just use your cut out heat transfer and apply it to your pillow cover with an iron. Be sure to follow the instructions on your brand to get a good transfer.