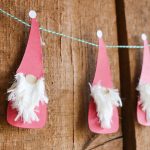
How to Make a Christmas Gnome Banner
Use our FREE gnome SVG file to create this adorable Christmas Gnome banner with your Cricut! This simple Cricut project is perfect for DIY Christmas decor.
Equipment
- Xyron® Mega Runner
- Xyron® 3" Disposable Sticker Maker or Xyron® 1.5" Sticker Maker
What You Will Need
- Cardstock in red white, and tan
- White fur yarn
- Baker's twine
- Scissors
Instructions
Download Gnome SVG & Cut Paper with Your Cricut
- First, take the gnome SVG you downloaded from your email above and upload it to Cricut Design Space. Size the gnomes to work for the type of banner you want to create.
- Then cut the pieces from the card stock. The main body and hat should be from red. The beard and hat topper should be from the white. And, finally, the nose should be from the tan.
Begin to Assemble Your Christmas Gnome Banner
- To assemble each gnome, add the main body piece under your baker's twine. The twine should run along the top portion of the hat.
- Run the hat, beard, hat topper, and nose pieces through the Xyron Sticker Maker. Put the pieces into one side.
- Then pull the strip through from the opposite side. You can add all of the pieces in a line.
- Use the serrated edge on the back of the unit to remove the strip. Then rub the top really well.
- Remove the beard from the backing paper first and stick right on your gnome. The pieces are just like stickers now so just peel and stick. The beard should be slightly above the hat line.
- Then put the hat into place sandwiching the twine in between the two pieces. The hat will cover the beard piece just a little bit.
- Then add the ball to the top of the hat.
- We need to do a few things before we add the nose. Use the Xyron Mega Runner to add adhesive all over the white paper beard.
- Then add two rows of the fur yarn starting with the bottom row. Just use scissors to cut it to length and press the pieces down well into the adhesive.
- Trim away any excess yarn with scissors. Make the beard into roughly the same shape as the paper cut out.
- Then add the paper nose to finish the gnome. Be sure it is half on the hat and half on the fur yarn of the beard.
- Continue adding as many or as few gnomes as you would like to complete your banner. Then just hang it up around your home this holiday season.
Notes
*Note: See blog post for images depicting each step of this Christmas Gnome Banner tutorial!
