
Thankful Sign for Fall
Make this cute fall sign from wood and add it to your home's decor this autumn.
Makes 1
What You Will Need
- 10.5 x 20 inch Wood sign you can make your own from pallets or buy one already made
- Unfinished wood pumpkins
- Unfinished thankful wood garland
- Craft paint in orange and a creamy white
- Wood stain
- Paintbrushes
- Adhesive I used Beacon Power-Tac
- Hot glue and glue gun
- Rag
Instructions
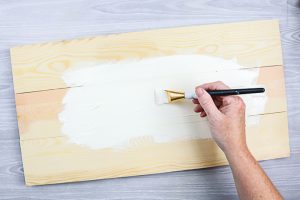
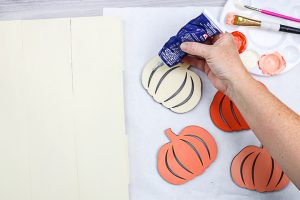
- Paint the sign with the cream paint and set aside to dry. For me, one coat on this sign was perfect as I love a rustic look. You can definitely add more coats if needed.
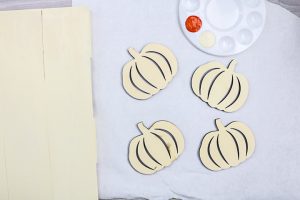
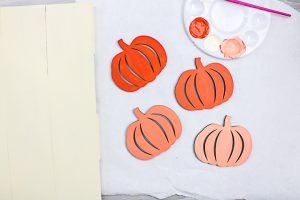
- While the sign dries, you can paint the wood pumpkins. I used an orange and cream paint to mix and paint all four of my pumpkin shapes.
- Paint the first pumpkin with just the orange paint that has no cream paint added. Again, I like the look of just one coat of paint and I left the edges of these laser cut pieces raw. You can choose to add more coats and paint the edges depending on the look you would like on your finished piece.
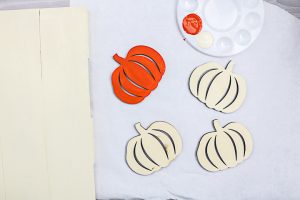
- Mix a little of the cream into the orange for a lighter shade and repeat the painting for your second pumpkin.
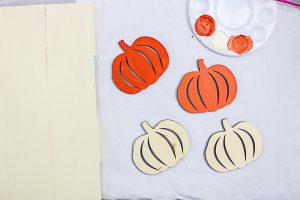
- Continue adding a little more cream paint to your mix to get progressively lighter colors for a gradient effect.
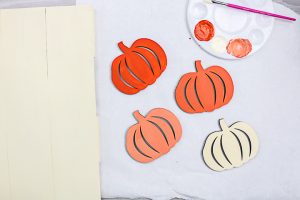
- Once all of your pumpkins have been painted, set them aside to dry.
- You can stain the wood pieces for your banner next. Just brush the stain on, allow to sit a few seconds, and wipe away any excess with a rag.

- Set these pieces aside to dry as you finish them. They should dry quickly. Add them to some twine in order so that they spell "thankful".

- Add adhesive to the back of each of the wood pumpkins.
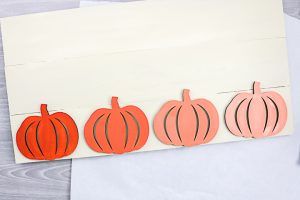
- Then add the pumpkins in a row at the bottom of your sign.
- Add the banner to the top of your sign and make the ends of the twine into a bow. Use hot glue to secure the bow into place on each side. Then just add your completed sign to any room of your home!