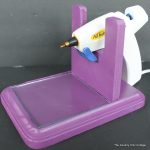
DIY Hot Glue Gun Holder
Learn how to make your own hot glue gun holder. This quick and easy project will keep your hot glue handy and your craft room mess free.
Makes 1 stand
Equipment
- Hot glue gun
- Jigsaw
- Router, optional
What You Will Need
- 1 Glass Tile Square 4 x 4 inches
- 1 Wood Plaque 5 x 7 inches
- 1/2 inch Plywood
- 1 Wood Carving Tool Set
- 1 Sandpaper
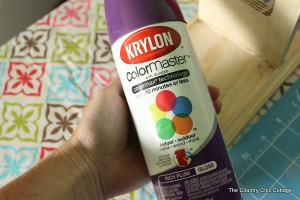
- 1 can Krylon Rich Paint Any color! I used the color "plum."
- 1 Wood glue
- 2-5 Nails
Instructions
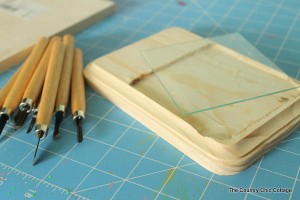
- Use the router to remove an area large enough for the tile. I used the wood carving tools to finish off the corners. I sanded everything smooth and made sure the tile would fit into place.
- Cut a "U" shaped piece of wood from the 1/2" plywood. The size of this piece is determined by the size of your glue gun. I used a jigsaw to cut out this piece.
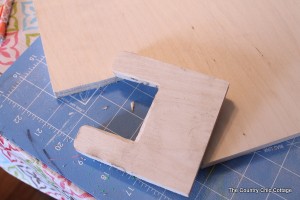
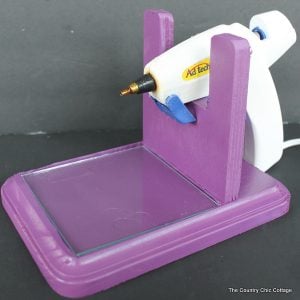
- Dry fit everything together and you should have something that looks like the image below. This image may also help you determine what measurements you need to use for your "U" shaped piece in the holster step above.
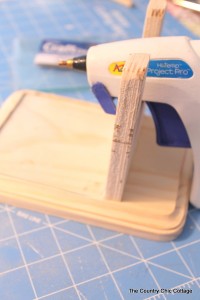
- Next we are going to glue and nail the two pieces together. Measure and mark on the back where your “U” shaped piece will sit on the front. This will allow you to get the nails started before you glue. Then, add wood glue and nails.
- Allow your DIY hot glue gun holder to dry completely. Then start in with Krylon paint in the color of your choice. After a couple of coats and some time to dry, my hot glue gun holder is ready for the craft room. Add in your glass tile when everything has dried completely.
Notes
IF YOU DO NOT HAVE A ROUTER: You can skip the first few steps if you do not have a router. You can attach the tile to the wood with glue instead; however, it will not be recessed into the plaque. If you have a router, lay out the tile where you want it on the plaque and mark around with a pencil.
PLEASE NOTE: I am not a professional wood worker and there may be mistakes in my project. However, I am thrilled with the result of my DIY hot glue gun holder. Just jump in and do it y’all!