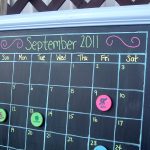
Magnetic Chalkboard Calendar
Make this fun and creative magnetic chalkboard calendar to keep your family organized and on schedule! Instructions include how to make fun magnets too!
What You Will Need
Materials needed (for chalkboard):
- Frame
- Sheet of metal cut to size for your frame mine is 20 inches by 24 inches
- Metal Cleaner
- Metal Primer
- Chalkboard Paint
- Spray Paint for frame
- Chalk Markers
Materials needed (for magnets):
- 1 1/2 inch wood circles or metal washers I will show you how to use both
- Paint craft paint or spray paint
- Scrapbook paper
- Mod Podge
- PSA Essentials stamps and ink
- Self adhesive magnets
Instructions
To Make the magnetic Chalkboard
- First take your metal piece and clean it really well. I used engine cleaner for cars. Anything that is made to clean metal. Rinse it really well and follow all package directions.
- Next paint one side of your metal piece with one coat of primer plus two to three coats of chalkboard paint. Again follow all directions on your paint. Chalkboard paint generally has to cure for 24 hours before use so please be aware of that.
- Now for the frame. I bought mine at a thrift store. I used a spray primer plus paint in one in Sky Blue. Paint whatever color you want. You can of course use a brush and regular paint instead if that is what you have.
- After the chalkboard paint has cured, be sure to follow the directions on the paint for conditioning it. Generally you rub chalk all over your surface and clean it back off.
- Do you know what chalk markers are? They are chalk but they are more permanent than regular chalk. You can find them at your local craft store. They come in white or fluorescent colors. I picked the colorful pack! Chalk markers only come off when they get wet. So no worries about smudging or accidentally wiping off your calendar. Plus the lines are so much more crisp! If you have ever wondered how those boards at your local restaurant look so great, the secret is chalk markers!
- I used a ruler as a straight edge. I calculated so that my calendar was roughly centered and the squares are all the same size. Be sure your magnets will fit inside your squares. Leave an area for your month and days of the week. Plus add your numbers to the squares. Remember at the end of the month, you just use water to wipe off and you can draw on an whole new month. Bonus: If you mess up your calculations and your calendar looks awful, you can clean it off and start again.
To Make Magnets for Your Magnetic Chalkboard
- For the first set of magnets we are going to use the wood circles. This is the pack I purchased at the craft store...
- Paint the edges of your wood circles with craft paint (you could also just spray paint the entire circle). I used paint colors that matched the scrapbook paper I had on hand.
- Trace your circles onto the craft paper and cut out.
- Using various colors of ink, stamp your paper circles with your PSA stamps. See how the paper matches the paint I used for the edges...
- Layer on a few coats of mod podge.
- Once dry, add your magnet to the back. I used the self adhesive magnets but I actually added some glue to the adhesive. I admit it, I did not trust the adhesive that came with them. You can always glue them later if you self adhesive strip fails.