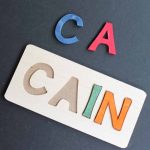
DIY Personalized Name Puzzle
Name puzzles make fun gifts and great children's bedroom decor pieces. Whether you're giving them as gifts or making them to sell, here's how to easily make a name puzzle.
What You Will Need
- Cricut Maker
- Knife Blade
- 1/16″ Basswood sheets
- Cricut Strong Grip Mat
- 2 mm chipboard
- Masking tape
- DAP RapidFuse Wood Adhesive
- Americana Color Stain in as many colors as you would like
- Paintbrushes
- Rags
Instructions
Designing a Wooden Name Puzzle in Cricut Design Space
- Search the image tab for “rectangle”. There is a rounded corner version that said “free” on my version of CDS. Choose that and add it to your canvas.
- This particular rectangle has two pieces. Ungroup and delete the one without rounded corners.
- Turn the rectangle so that it's long width-wise.
- Next, add your text. I like using the “Birthday Cakes” font for this project.
- Then, pick your text and click the 'eye' next to the black version of the text. Move the font to your rectangle and resize everything to fit. Then ungroup the text into 2 pieces.
- Move the top (gray) letter piece off. This will ensure that your letters are slightly smaller than the cut out in your puzzle.
- Make a copy of your rectangle.
- Choose the name on top of your first rectangle along with that rectangle and pick slice. This will remove the letters from the actual rectangle. Move the two words off and delete them.
- Now turn your second rectangle a different color and make your name pieces the same color as the rectangle with the name cutout.
- Then duplicate the name. Ungroup both of the names into letters.
- If the name has centers to any letters, pick the rectangle with the name and click contour. Pick any centers here then press the “x” on the screen. This will remove those from the cut.
Cutting Out Your Personalized Name Puzzle
- Click “make it”. You will probably want to move your pieces around as once again your basswood probably came in weird size sheets.
- Then pick your machine and material type and begin your cut with your knife blade inserted. You will need to use the strong grip mat when cutting and use masking tape on all corners when cutting.Cut the name pieces from the 1/16 basswood and the plain rectangle from the 2 mm chipboard.
Assembling Your DIY Wooden Name Puzzle
- Use wood glue (any kind that dries quickly) to put the rectangles together.
- Now glue the letters together. Then allow all of your pieces to cure before continuing.
- Stain or paint your glued letters.
- Allow the letters to dry completely. You now have a completed DIY puzzle.
Notes
Please note that cuts with the knife blade can take a while. This is considered “hands off” time so you can still make the puzzle in minutes. Just do other things while the Cricut Maker is cutting the pieces.