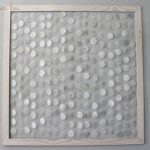
Capiz Shell Wall Art
Looking to add something beachy to your home's decor? Make faux capiz shells with this tutorial!
What You Will Need
- Wax paper
- Parchment paper
- Iron
- Crayons
- Hole punch
- Circle punch
- Craft knife
- Wood
- Miter box
- Hand saw
- Fishing line
- Wood glue
- Stain
- Cotton Fabric Strips
Instructions
How to Make Capiz Shells
- Basically, you need wax paper, parchment paper, and an iron. Take three pieces of wax paper, place them between two pieces of parchment paper (to protect your ironing board and iron), and iron them together. The heat of the iron causes the wax to melt the papers together and creates a stiff, bubbly-looking paper.
- You can also add a bit of color to the shells by using crayons. I rubbed bits of crayon onto my wax paper sheets to create a marbled look in my shells.
- I think the crayon gives the shells character and a more natural look. Then I used a 1 1/2 inch circle punch to cut out my shells, although that was not the ideal tool. A circle cutter would probably work much better. I often had to go back with my craft knife to trim off edges that did not punch cleanly through.
Stringing Fake Capiz Shells
- Once my shells were all punched out, I used a 1/16 inch hole punch to create two small holes in each end of every shell.
- Next, I used fishing line to string up my shells. I tied the shell to the line through the hole at the top and then passed the line behind the shell and out the bottom hole.
- My finished piece used 17 strings of about 12-14 shells each. Once I had all my shells on strings, I needed a frame to hang them from.
How to Make a Wood Frame
- Making the frame was definitely the part of this project that was most outside of my comfort zone, but it was very easy. AND I did it all myself, completely sans-husband. It took three steps:
- Cut the wood and miter the corners. I started with about 12 feet of 1 1/2 inch wood molding from the home improvement store and ended up with a frame 34 1/2 inches square. I used a simple miter box and hand saw (which you can pick up for about fifteen bucks) to cut my wood. Glue the corners together. If you don't get your corners mitered at just the right angle, this may be a bit tricky. I just used Elmer's wood glue, and it is holding well. Stain the frame. I used some pickling stain that I had leftover from my paneling wall hanging project.
Assembling the Capiz Wall Art
- Finally, I attached my strings of faux shells to the frame using white glue, a paintbrush, and strips of cotton fabric. I painted glue onto the back of the frame and pressed the strips of fabric over the fishing line. When saturated with glue, the fabric becomes a bit like tape.
- Using this method, I was able to get the lines securely fastened to the frame without tying it or drilling into the frame.