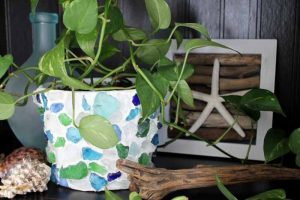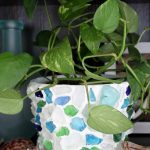
Decorative Flower Pots with Sea Glass
These flower pots decorated with sea glass will look great around your home anytime of the year. I am in love with how this project turned out and I think you will love it as well. Whether you collected sea glass this summer at the beach, or you picked some up from the craft store, be sure to use your collection to create this one-of-a-kind planter pot!
Makes 1 flower pot
Equipment
- 1 Paint Brush
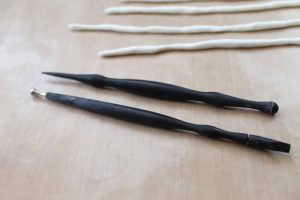
- Clay tools (optional)
- Glue (should be able to bond to clay and dry clear)
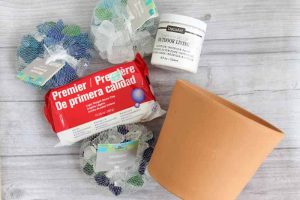
What You Will Need
- 1 Terracotta Pot I used one without a lip and smooth sides as shown below
- 1 jar White Outdoor Paint My favorite is Outdoor Living
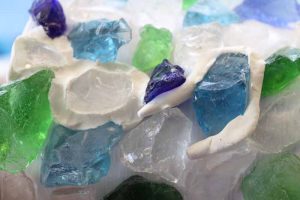
- Sea Glass
- Air Dry Clay (White)
Instructions
- Start by painting the pot with a good quality outdoor paint. This will require several coats. Be sure to paint both the inside and outside of the pot to seal it completely. This will prevent moisture from ruining your sea glass finish.
- Once your paint has dried completely, start gluing the sea glass to the outside of your pot in whatever design you want. I added my pieces with the pot lying on the craft table. I would then turn it once the glue had dried.
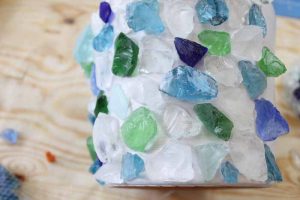
- Once your pot has sea glass all over the outside and the glue has dried, you can add your air dry clay. Start by working it into long snakes.
- Then work those snakes around each piece of sea glass. Make sure it weaves through all the cracks and crevices.
- I found the clay tools pictured here useful for this task. They helped me to work the clay into the gaps and also smooth it down. These are optional but very useful.
- Once every gap has been filled, allow your clay to air dry.Then, your decorative flower pots are ready for planting and display around your home.