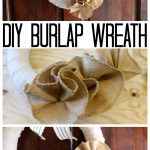
Burlap Wreath Tutorial
You are going to love this simple burlap wreath tutorial! It is so easy to make and will look great on your front door anytime of the year.
Makes 1 burlap wreath
Equipment
- Glue gun
- Hot glue
What You Will Need
- 1 Wreath form
- Scrap canvas fabric
- Ticking fringe
- Jute cord
- 3 Burlap 8" round shapes
Instructions
- Start by ripping some scrap canvas into strips. Ripping the fabric gives you that tattered edge. You can snip the edge and rip and you will get the perfect strip with the grain every time. Repeat until you have enough strips to cover your entire wreath form.
- Wrap your wreath form with the strips securing the ends with hot glue. Let the rough edges stay exposed as shown in the image below.
- Set the wreath aside and work on your burlap flowers. Gather up the burlap circles and secure with some of the cording to make a freestyle flower with finished edges. These rustic flowers are the perfect addition to a burlap wreath.
- Work the burlap circle until it resembles a flower and then add to the wreath with additional hot glue. Repeat with three of the burlap circles as shown below.
- Can’t find the pre-made burlap circles? Try cutting burlap into 8-inch circles and stitching the edges on your sewing machine so they will not fray.
- To make centers for your flowers, start with a pool of hot glue on some scrap canvas. Carefully add the jute in a circle as shown below.
- Trim the excess canvas away from the jute with scissors and add the flower centers to the wreath using hot glue.
- Now you can find something to use to hang your burlap wreath. You can use canvas fringe as shown below for a hanger for your wreath.
- Then just hang your easy burlap wreath on your door or anywhere else in your home.
