
How to Sublimate on a Cotton Shirt
Make gorgeous watercolor designs on your shirt with these two hacks for sublimating on cotton.
What You Will Need
- Sublimation ink or print I am using Artesprix markers
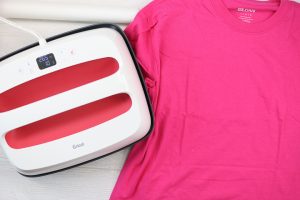
- Cotton shirts
- Glitter or polyester flock heat transfer vinyl I am using B-flex products
- EasyPress or Heat Press
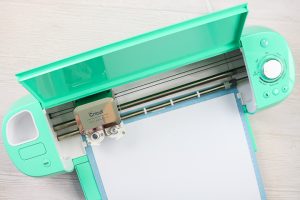
- Cricut machine
- Copy paper must be rated for use in a laser printer
- Water
- Plastic bag this is only if you are using the exact same watercolor technique
- Paintbrush I like to use disposable
Instructions
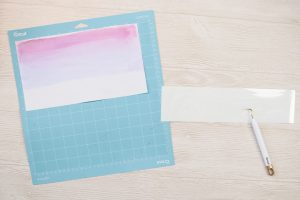
- Pick three coordinating colors of the Artesprix markers.

- Color on the plastic bag with each of the markers. Add a bit of water to each one. You can also mix the colors together to create new colors. Start adding the watered-down sublimation ink to your paper with a disposable paintbrush. Continue with all of your colors and make an area larger than you want to make the design for your shirt. Be sure to let the paper dry completely before continuing.

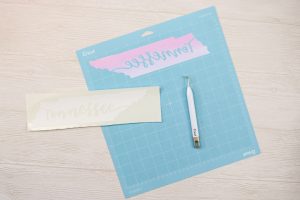
- Then cut your design from both the glitter HTV and paper with the sublimation ink. If your material is face down on the mat, you will want to mirror your design before cutting.

- In the case of the glitter HTV, I put my material good side down on the mat and mirrored my design. Then I cut it on my Cricut machine.
- Put the paper with the sublimation ink with the ink side up on the mat. You will need to cut the design with the mirror on. The ink side of the paper goes against the HTV. Please note that I am using a Cricut Explore for this but it can be done on a Cricut Maker or Joy.

- You will then need to weed both the glitter HTV and the paper.
- Remove all excess from both the glitter and the paper.

- You will want to repeat these same steps for the flocked heat transfer vinyl. Please note that the polyester flock that I used does NOT need to be mirrored. I did the exact same process with the paper, however.
- Start by heating up your material to remove any moisture and wrinkles.
- Press the glitter HTV according to the directions from the manufacturer for both time and temperature. Then remove the carrier sheet and allow to cool.

- Then put the paper with the sublimation ink DOWN onto the glitter HTV. Tape down really well with the heat resistant tape. Be sure to add the centers of the letters back to your design.

- You will want your stack to be as follows from the bottom: EasyPress mat, back of the shirt, EasyPress mat (a second one), protective paper, front of the shirt, glitter HTV that has been pressed, sublimation ink paper with tape to secure, and protective paper. Press according to the instructions on the package of Artesprix markers.

- Be sure to allow to cool completely then remove the paper to reveal the sublimated color on the glitter heat transfer vinyl. Your design is completely permanent and ready to wear!

- Repeat basically the same procedure with the flocked heat transfer vinyl. However, this particular brand is made for sublimation printing so it is face up on the carrier. That means you will need to peel from the backing and apply it to your shirt. For intricate designs, you will want to use transfer tape to do this. You can even use a piece of transfer tape you have used on another HTV project. It just needs to be rated for use with HTV. Apply to the front and peel away your backing.

- Then apply to the shirt with your EasyPress following the recommendations from the manufacturer. Remove the carrier sheet after pressing and allow it to cool.

- Then repeat the very same procedure with the paper that has the sublimation ink. The process is the same as with the glitter HTV.

- After you press, allow to cool completely then remove the paper. Again, your shirt is permanent and ready to wear.