
Cricut Maker Engraving Acrylic
Did you know that you can engrave acrylic with a Cricut Maker? Follow along to see how and start making your own projects today!
What You Will Need
- StrongGrip mat
- Masking tape
- Brayer
- Cricut Maker
- Acrylic blank I'm using a four-inch circle blank that already has a hole punched in it.
- Engraving Tip
- Knife blade if you want to cut the acrylic
Instructions
- The first thing you need to note about the acrylic blanks is that they will most likely have a protective film on both sides. For engraving on the Maker, you need to remove that protective film from one side. You can leave the protective film on the back. Then locate the blank on your mat. Locate somewhere where you know where it is, so when we're in Cricut Design Space, you can move it around. I located my circle on the three-inch line in both directions.

- Press it down really well and then run the brayer over it to make sure it's stuck.
- Add some masking tape all the way around the edges. Make sure not to add the tape in any of the areas where you will actually be engraving. For instance, my engraving is actually a little over three inches, so I'm just going to tape the edge of my four-inch circle. I like the extra security of going all the way around with the tape.
- Open Cricut Design Space and pick your design. The designs that work best with your engraving tool are going to be ones that are draw files. When searching designs, click art type and draw only, that will sort your results by ones that are draw files. These will make a better engraving.
- Insert the design onto the mat. For my project, I'm making a gift tag. I did a circle with flowers all the way around and then some text. So what you can do is insert a circle, just for illustration purposes, and make it the four inches. Send the circle to the back and make it gray. This will help you to see what the engraving is going to look like on your tag. Delete the circle from your canvas once you're happy with the design.
- For text, do the same thing. Go to fonts, and filter those for writing. Type your text and make sure that this is set to draw for now.
- Once you're pleased with the design, pick the image as well as the text and attach those together. Then, with them both chosen, change your line type to "engrave". NOTE: Make sure that your machine type is on Maker, otherwise, this option will not show up.
- Locate your design in Design Space exactly where your blank is located on your mat. In my case, that is at the 3 inch mark in both directions.
- Set the base material. For acrylic, there are actually two options when you're engraving. There's two-millimeter thick and one-millimeter thick. These blanks that I'm using are fairly thin, so I'll pick one millimeter. But if you're using a thicker blank, just pick the two millimeter.
- Load the engraving tip in Clamp B and load your mat to start. Be sure to move the star wheels along the bar all the way to the right so that they won't scratch the face of the acrylic. Press the arrow button to load, and the C button to start. Once the engraving is finished, unload the mat, and remove the blank.

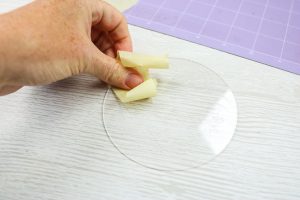
- Once done, there are all kinds of little bits and pieces of the cut acrylic. Since you've already wasted the tape, take the tape and run it across the acrylic, and pick up all those little pieces.
- Remove your blank from the mat and then remove the protective sheet from the back. Your project is ready and you just engraved acrylic with your Cricut Maker.