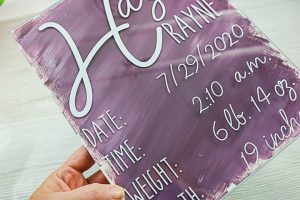
Dollar Store Sign for Baby
Make this cute acrylic sign with supplies from the dollar store and your Cricut machine.
What You Will Need
- Acrylic sign from the dollar store
- Heavyweight White Card Stock
- Paint in a few colors
- Paintbrush
- White vinyl
- Transfer tape
- Weeding tools
- Cricut machine
Instructions
- Add paint to cardstock. Use a variety of shades and mix the paint to create different layers. The paint should go almost to the edge of the paper on all sides. Heavyweight cardstock is best here so that your paper lies flat. Set aside and allow to dry.

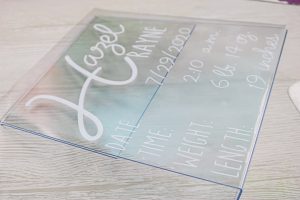
- Cut the vinyl with the sign details. I created my version right in Cricut Design Space or you can search for "birth announcement" for some premade options. If giving as a gift before the baby is born, leave off the stats and put a note with the gift that you will personalize later.

- After the vinyl is cut, you will want to weed away all of the excess around the outside as well as the centers of the letters. Then add the vinyl to transfer tape for application. You can see the basics of working with Cricut vinyl here.

- Use the transfer tape to add the vinyl to the front of the sign. Burnish it down well then remove the transfer tape.
- Assemble the project by adding the painted cardstock to the acrylic frame. If your cardstock is not flat, you may have to tape at the bottom. Otherwise, this gift is complete and ready to give to anyone that has had a baby!