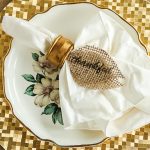
DIY Burlap Leaves
Make leaves from burlap for Thanksgiving with this easy craft idea.
What You Will Need
- Freezer paper
- Computer and printer
- Printable words for leaves
- School glue
- Scissors
- Paintbrush
- Iron
Instructions
Preparing Burlap for Printer
- Trim the burlap and freezer paper to the size of a regular sheet of printer paper using the scissors.
- Place the shiny side of the freezer paper down on the burlap and iron on the other side of the freezer paper. Be sure that all edges completely fuse with the freezer paper. You should not be able to lift them off of the paper. Trim any excess burlap you have around the edges and any loose strings.
- Run the entire sheet through your printer so that the leaves print on the burlap side.
Make the Leaves
- Leave the freezer paper attached. Lay a bead of glue around the inside edge of each leaf. Then use a paint brush to spread out and flatten as shown below.
- Lift the burlap from the freezer paper while the glue is still wet on the leaves. Leave the burlap loosely laying on the freezer paper until it dries. This will protect your work surface.
- Allow to completely dry. I recommend over night. Then trim around the inside edge of the leaves with your scissors. The glue made the burlap where it will not fray and you are left with adorable burlap leaves with words on them for your Thanksgiving decorating.
