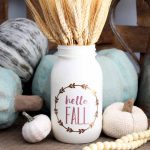
How to Add Vinyl on Mason Jars
Make decorative glass jars for fall with this easy technique and your Cricut machine.
What You Will Need
- Smooth sided quart jar
- Cricut Cutting Machine
- Hello fall design
- Vinyl in two colors
- Transfer tape
Instructions
- Start by painting the jar with spray paint and set aside to dry completely. TIP: Paint the jar upside down to get completed coverage without getting paint inside the jar. You can also paint the inside of the jar if you prefer but I would not do that if you are going to use the mason jar as a vase.
- Next, cut your designs from two different colored pieces of vinyl. TIP: You can use this tip to cut two different colors at one time with your Cricut machine. Be sure to size the design to fit the jar you are using before cutting.
- Weed your vinyl of any excess and middles in the letters. Apply transfer tape to the wreath first and remove from backing then center the wreath over the letters. You can see the basics of working with vinyl here.
- Press well and remove the backing from the letters as well. You are now ready to apply your words to the mason jar.
- Center it on the front of the jar and press well to apply. Carefully lift transfer tape to remove and you are left with a gorgeous addition to your fall decor. NOTE: You will want to make sure your paint is completely cured before attempting to apply the vinyl. I recommend allowing to dry for at least 24 hours before adding the vinyl to the jar.
