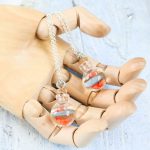
DIY Fishbowl Necklace
Make a cute necklace that includes a goldfish in a bowl for anyone that may love fish or just loves something a bit different.
What You Will Need
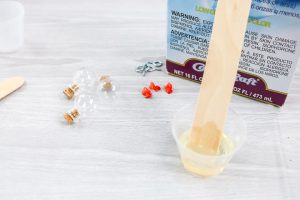
- EasyCast Clear Casting Epoxy
- Mixing Cups
- Measuring Cups
- Stir Sticks
- Protective Gloves
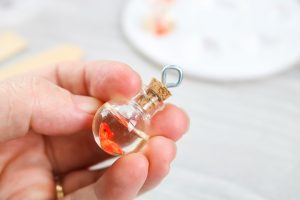
- Mini globe containers with corks
- Eye hooks
- Miniature goldfish
- Necklace chain
Instructions
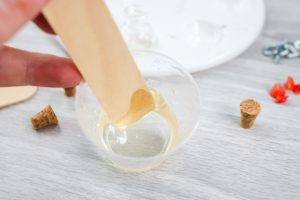
- Start by measuring and mixing your 2 part epoxy resin. You will want to wear protective equipment and follow all instructions that come in the box. One of the main reasons for resin failures is this part of the process. You will then add the mixed resin to a small measuring cup. These bend more and will make pouring into the small glass globes easier.
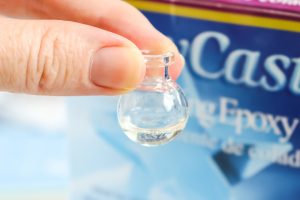
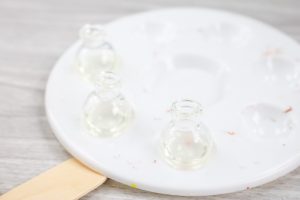
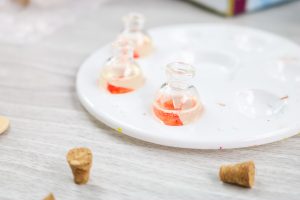
- Pour some into one of the glass globes. You want to just add about half of the total amount now as we will be adding more later.
- You will need to prop them upright to cure. I had this paint pallet but anything will work as long as they are held up and down instead of laying over.
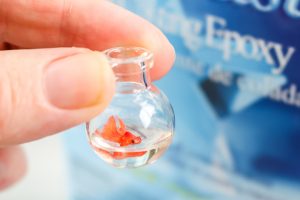
- Allow your resin to cure a while. You want to set up a little bit so your fish will drop in and "float" inside. So hard enough so it won't sink to the bottom but liquid enough so it will embed into the resin. I recommend leaving some in your cup so you can use it to check before adding your goldfish to the bowls.
- Once the resin has started to set up, you can drop in your fish and arrange it however you would like. If you drop this too early, it will sink to the bottom. But you want to drop before it sets up completely so that the sticky resin will hold it in place. Use needle nose pliers and even a needle to arrange everything.
- Then put the jars back into an upright position and let them cure completely.
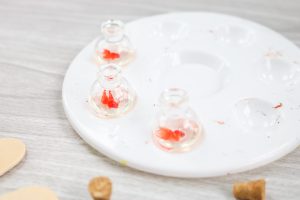
- Once the resin is cured, you will repeat the mixing procedure for a second batch and add that to the jars. This time you will want to cover up your fish completely. Allow these to sure with the jars in an upright position.
- Add the eye hooks to the corks by screwing them into the top.
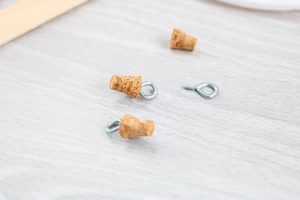
- Add the corks to the top of the bottles and thread in a necklace chain to complete your fishbowl necklace. NOTE: You may want to glue your cork into place to ensure it doesn't come off.