DIY Lego Travel Case
This DIY lego case is the perfect storage solution for legos! With three different surfaces combined with Mayka tape for building, you can have an easy and custom lego travel case ready in no time.
Makes 1 box
What You Will Need
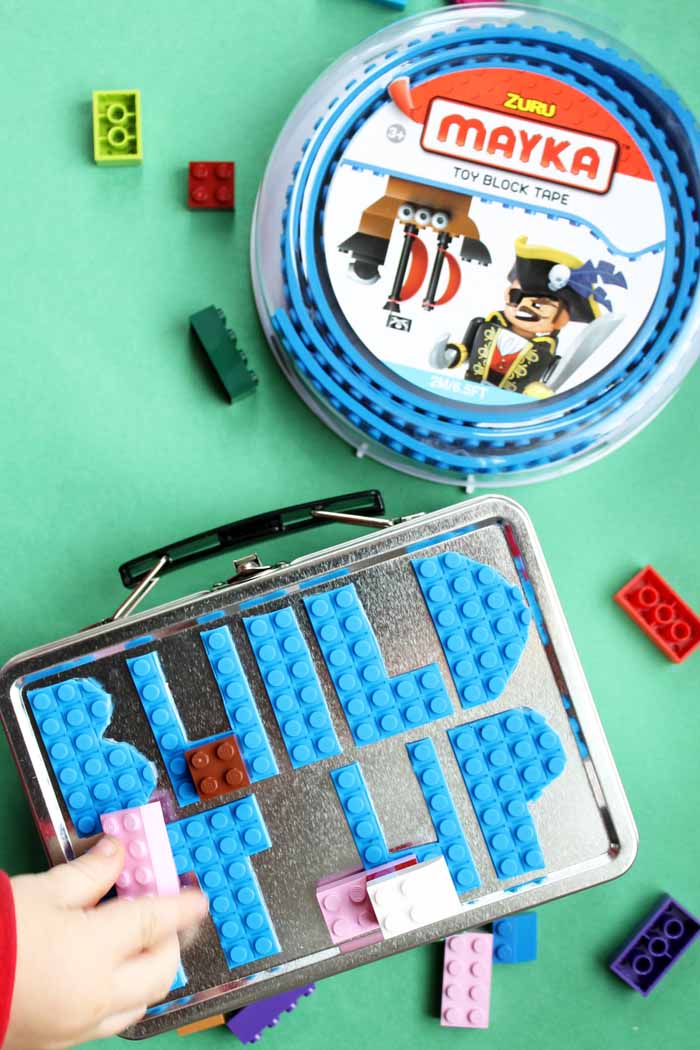
- Mayka Tape Your choice of colors and both the two studded and four studded types of tape.
- 1 steel lunchbox plain
- scissors
- Legos Your choice of Legos
Instructions
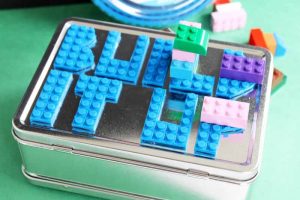
- First, lay out the design before you start to get an idea of how big the letters should be. You can easily customize the letters and trim them to make them look just right. I used the tape that has four studs across for this portion. All you do is just peel the backing from the letters and stick it to the lunchbox!
- Next, I made a surface for building on the inside of the lid. For this surface, I used a combination of the four and two stud tape. I just cut it to the proper length, peeled the backing, and stuck it to the surface by pressing firmly.
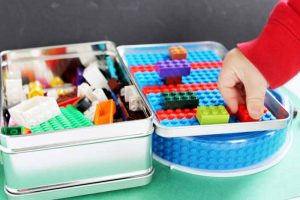
- Then, I created a third play surface inside the lunchbox. Here I used all two stud tapes in different colors designed in stripes.
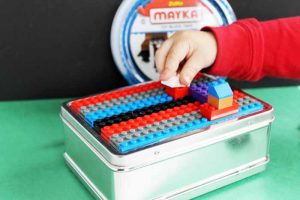
- Finally, you are ready to play after you have peeled the tape and stuck it to all the surfaces. The Lego brand of bricks stick to the Mayka tape and there are endless ways of playing on the surfaces with this lego travel case!