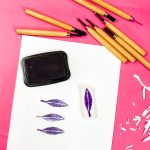
DIY Eraser Stamps
Learn how to make your own stamps by carving erasers into shapes!
What You Will Need
- Eraser
- Wood Carving Tool Set
- Stamp Ink My favorite for crafting is Staz-on, however, it is permanent.
- Pencil
Instructions
- Start by sketching a rouch outline of the stamp shape you want to make directly on the eraser with a pencil. You can get as detailed as you would like with your sketch.
- Then start using wood carving tools to remove the eraser material. I like to start by removing as much material as possible from around the outside.
- Once your outside is fairly clean, you can start adding details to your stamp. Again, use whatever size and shape of wood carving tool works best for you.
- Once you think you are done, test the stamp with some ink on some scrap paper. You may find you need to remove more material in some areas to get a clean impression. Keep working with the stamp and the wood carving tools until you have a stamp you love!
