Custom Lunch Box with Your Cricut Machine
Learn how to make a custom lunch box with your Cricut! A fun donut cut file to make with heat transfer vinyl for back to school!
What You Will Need
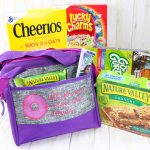
- Lunch box
- Iron-on in the colors of your choice
- Cricut machine
- Cricut EasyPress
- EasyPress Mat
- Iron-on Protective Sheet
- Weeding tools optional
- Donut cut file
Instructions
- Access the donut cut file we used (above) or create your own. Resize to fit the area on your lunch box and cut from heat transfer vinyl. Remember to mirror the image before cutting and cut with the shiny side down on the mat.
- Then, weed away all excess until you have something that looks like the image below.
- We are doing a layered design on our custom lunch box but you can just do one color if desired. You will want to put your EasyPress mat inside the lunch box for protection then add your first color to the front.
- Cover with the protective sheet to protect any areas that the EasyPress may touch as you don’t want them to get too hot.
- Then press for the recommended time and the recommended temperature. Be sure not to let the EasyPress rest on any seams on the lunch box as this could cause uneven heating.
- Allow to cool then peel back the liner to reveal your design. You can press a second time if needed.
- Then add your second color over the top of the donut. Be sure to replace the protective sheet over your entire design before pressing to protect it.
- Press using the same method as before with the protective sheet in place. Then allow your design to cool.
- Peel back the liner to reveal your completed custom lunch box!