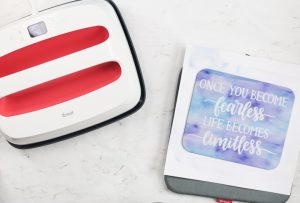
DIY Mouse Pad with Cricut Infusible Ink
This tutorial teaches you everything you need to make your DIY Mouse Pad! Made without cork and ready in just a few simple steps with Cricut Infusible Ink, you can transfer any design you'd like! This tutorial is super easy and requires just a handful of crafty materials that are usually super easy to find.
Makes 1
Equipment
- Cricut EasyPress
What You Will Need
- Cricut Infusible Ink
- Mouse pad needs to be rated for sublimation
- Butcher paper
- White cardstock
- Heat resistant tape
- Tweezers
- Cricut cut file
Instructions
Cutting Cricut Infusible Ink
- First, cut a design from an Infusible Ink sheet. A few things to keep in mind:
- Place the sheet liner side down on the mat.
- Mirror your image before cutting. You can see how to do that here.
- Be sure that your hands are clean and dry before handling Infusible Ink.
- You will want to locate your cut so that you have enough of the sheet to cover your entire mouse pad and the design will be in the center.
- I have so many more tips and tricks over on my guide to Infusible Ink if you have never worked with it before.
Weeding Cricut Infusible Ink
- Once cut, you will need to weed away all of the excess.
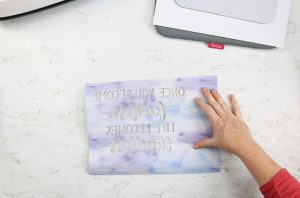
- Crack the piece by bending several times before weeding.
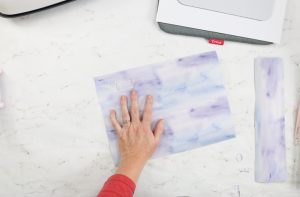
- Remember not to use traditional weeding tools with Infusible Ink. If you have issues with any of the pieces, just use tweezers to lift.
- I used a reverse weeding technique on this project where I left the background but removed the letters themselves. In this case, you will want to leave the centers of the letters in place.
Making a Custom Mouse Pad
- Now that you have your Cricut Infusible Ink sheet ready, you can add it to your mouse pad. Start by covering the EasyPress mat with white cardstock. Then lay on your mouse pad and put the weeded sheet into place. You will need to tape this down really well. I found that taping to my cardstock worked best as the tape did not stick well to the mouse pad itself.
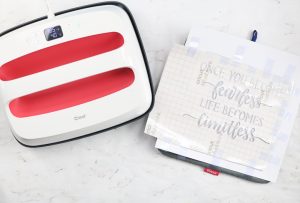
- Then cover your design with butcher paper and press with the Cricut EasyPress according to the instructions in the Cricut heat guide. Pick a substrate close to the mouse pad like a tote bag. I used my large EasyPress so I could do this all in one press. I have made projects like this Infusible Ink blanket where I pressed more than once so a smaller size EasyPress will definitely work in this case.
- Allow your project to cool completely as it will be really hot! Then peel away your design from the DIY mouse pad to reveal the magic! NOTE: Remember to discard the cardstock as it will have some excess ink on it and you don't want that to get on other projects you make.