
Make a DIY Photo Canvas
Transfer a photo to canvas in just a few simple steps with our DIY tutorial.
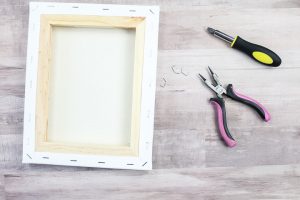
What You Will Need
- Canvases remember that if you only have a standard printer your picture itself cannot be any larger than 8 1/2 x 11
- T-shirt transfers or printable heat transfer vinyl
- Staple gun and staples
- Screwdriver
- Pliers
- Craft knife
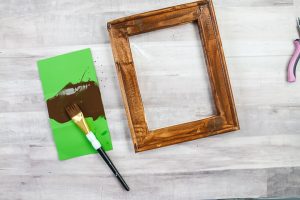
- Wood stain
- Rag
- Paintbrush
- Printer and ink
Instructions
- Start by removing the canvas from the frame. Flip it over and remove the staples with a screwdriver and a pair of pliers. Then separate the canvas from the frame.
- Stain the frame with the color of your choice. Paint on the stain, allow to sit a few minutes, then wipe off any excess with a rag. Allow this to dry completely.
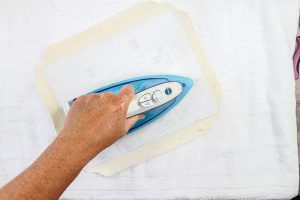
- While drying, you can transfer your picture to the canvas piece. Print your photo onto your transfer paper using a printer. Be sure to mirror your design and print with the best quality for your printer.

- Then put the t-shirt transfer face down onto the canvas. I am transferring this to the creamy off-white site but this same method will work with either side. Please note that you can see directions for printable heat transfer vinyl here if you are using it.

- Then follow the directions on your package of transfers to complete the process. I had to iron in both directions for a certain amount of time.
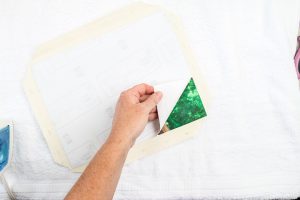
- Then just start slowly peeling back your carrier sheet to reveal the design on your canvas.
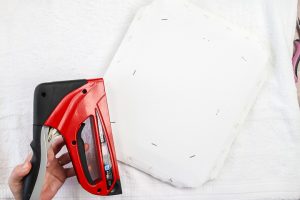
- Once the backing is removed, it is time to add the frame to finish this one off!

- Add the frame where you want it on your picture. Then secure with staples in the back. I like to secure with one staple in the center of each side as well as one in each corner.
- Then cut away all of the excess canvas with a craft knife.
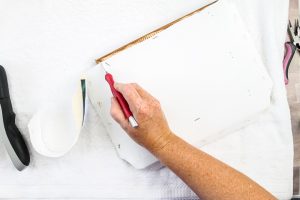
- Once this is removed, add additional staples to completely secure.
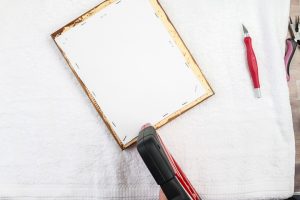
- Then your project is ready to hang or display.