Making Coasters with Sublimation Ink and a Cricut
Use your Cricut machine to cut designs into stamped sublimation ink for a unique look!
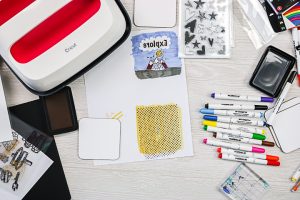
What You Will Need
- Sublimation ink pad These are currently only available in black. You can get just the ink pad or there is also a refill bottle to refill the sublimation ink inside.
- Stamps Here I am using Kingston Crafts stamps.
- Acrylic block unless you have stamps that are already on the block
- Protective mat
- Protective paper
- Sublimation coasters
- Heat tape
- Artesprix sublimation markers
- Cricut EasyPress or a heat press
- Cricut machine
- Copy paper
- Pencil
Instructions
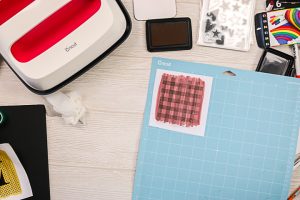
- As with the first project we made, trace around the coaster onto the copy paper. This time we'll do the entire coaster in color with the sublimation markers. Just use the broad tip to color over the entire surface.
- For this design, I'm going to take a stamp, that's an all-over pattern, like dots. Attach it to the acrylic block and press it in the sublimation ink. Line up on the copy paper and press down really well and lift up. You'll end up with a polka dot pattern on paper with sublimation ink.
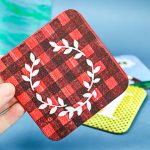
- Allow to dry a few minutes then use your Cricut to cut out a mirrored design. I made a monogram as well as a wreath design using two different patterns. Tip for cutting: Use SnapMat on iOS to locate your design or use the markers on your mat to locate. Once cut, remove all of those inside pieces before pressing.
- When you press this design on the coaster, the monogram or design will show through white and everything around it will be the pattern. Once again, you will want to cut around the outer edge of your design but not on the line. Add protective paper on your mat, then the coaster, then your design face down.

- Apply the heat resistant tape around the outer edge as well as holding the design down in the center.

- Add protective paper over the top and heat with the EasyPress to 400 degrees and press for 90 seconds.

- Allow to cool and pull back the paper to reveal the design!