
How to Make a Gift Box with Your Cricut | Craft
Learn how to make DIY holiday gift boxes and lids with your Cricut! These cute Christmas house gift boxes are like presents all by themselves and have never been more fun for gifting.
Makes 3 boxes
Equipment
- Cricut Maker (you can see why I love my Maker here)
- Cricut TrueControl Knife
What You Will Need
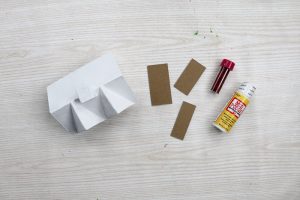
- Cricut paper and poster board (you can use a variety of finishes and colors here)
- Paper mache house boxes (I purchased a nested set of three boxes)
- Cricut Adhesive Foil (or vinyl)
- Cricut Metallic Iron-on
- White paint
- Cricut Heavy Chipboard
- Cricut Felt
- Decoupage
- Cricut EasyPress 2
- Cricut Iron-On Protective Sheet (or parchment paper)
- Glitter (I used red and white)
- Adhesive (you can use any that you love)
- Bottlebrush trees
- Snow paint
- Paintbrushes
- Pallet knife
- Scissors
- Cricut TrueControl Knife
- Twine
- Cricut Cut File (you can click here to access)
Instructions
- Start by painting your paper mache boxes with white paint. Just add one coat and allow to dry. It doesn’t have to be perfect as we are covering most of it up. This is just so any areas that do show through look white.
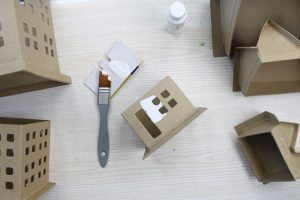
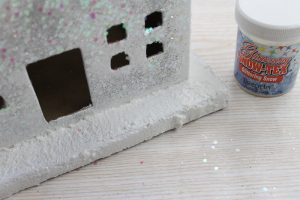
- Once dry, we are going to add a glitter coating. I actually mixed a bunch of different sizes of white and a little silver glitter to get a really interesting look.
- Paint on the decoupage, sprinkle on the glitter, and remove any excess. Add glitter to all four sides of the houses and the four sides of the roof. Leave the top of the roof with no glitter and the lip on the bottom of the house portion without glitter as well. Set aside and allow to dry. Hate shedding glitter? Add a second thick coat of decoupage over the glitter after the first one dries. Then allow that to dry as well.

- I used a pallet knife to apply a thick snow paint to the lip. This adds a look of winter to the piece but is optional. You could glitter this surface instead. This will need to dry for several hours.
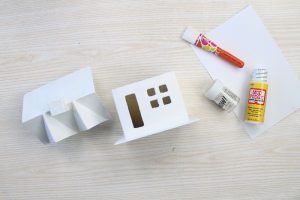
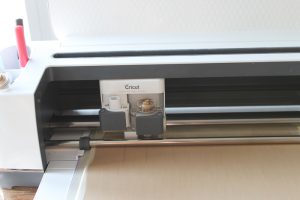
- While your pieces dry, you can cut all of your embellishments with your Cricut machine. Learning how to make a gift box is easy when you have the Cricut Maker to help you!
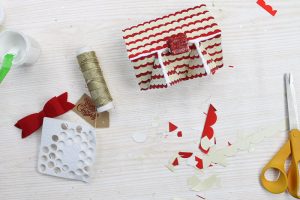
- I cut the doors and gift tags from heavy chipboard using the knife blade. You can see tips and tricks for using your knife blade by clicking here.
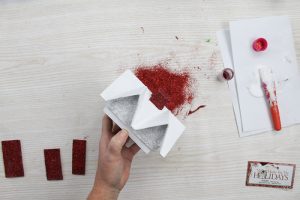
- Cover the front and side of the door with decoupage and cover in red glitter. Set aside to dry.
- I also added red glitter to the chimney of each house in the same manner.
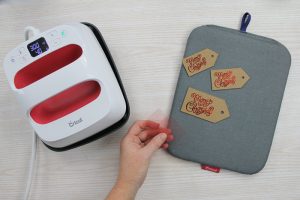
- While those pieces dry, you can make your gift tags. Cut and weed your iron-on material. Then set your EasyPress 2 to the recommended settings for wood.
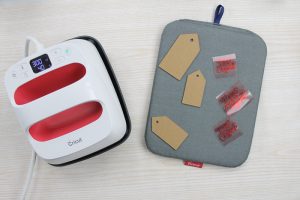
- Be sure to cover the chipboard with the iron-on protective sheet or parchment paper while pressing. Press at the recommended temperature for the recommended amount of time.

- You will then need to allow these to cool before peeling back your carrier sheet.
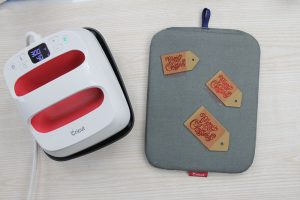
- Then your cute chipboard gift tags are ready for your gift boxes.
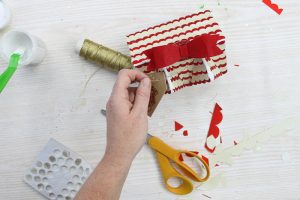
- You can also make your bows while your pieces are drying. The bows are cut from felt using the rotary blade on the Cricut Maker. I always change my blade to the rotary blade when cutting felt. Each bow will have three pieces.

- Fold the first piece with the ends to the center and glue to secure.

- Wrap the small piece around the center.

- Fold the ends to the back and secure with more glue.

- Then add glue to the center of your third piece.

- Secure the bow into place. We are well on our way to making a gift box!

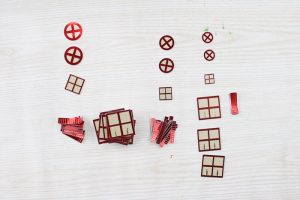
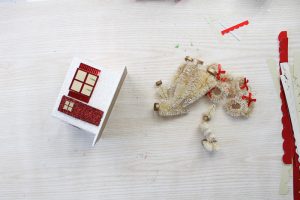
- You can also prep your window pieces while the houses dry. You will have quite a pile of cut pieces for this project. The window frames, inner windows, and shutters. I actually used the scoring wheel to add lines to the shutters for additional detail. If using a material that asks for the double scoring wheel, be sure to use the single instead.

- Add the frame to the inner window piece with some adhesive. Then in each large square window, add two candles out of adhesive foil or vinyl. The knife makes it a bit easier to lift and place the small candles. The round windows only get put together. Then there are three small windows for the doors that also do not get candles. You will have piles that look like the below when finished. Remember that the windows for the large and medium house are the same size. The shutters, however, are different for each house.
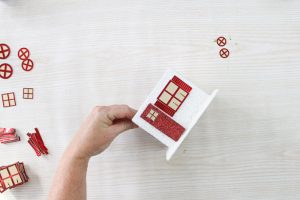
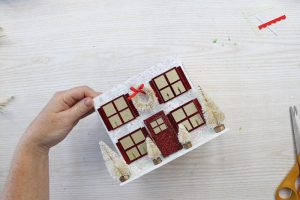
- Once everything is dry, start adding the windows over the holes and the shutters on the sides. Use any adhesive you like for this. Repeat for each window. The long and fat shutters are for the largest house. The long and skinny ones are for the medium. And finally the short and fat ones are for the smallest house.
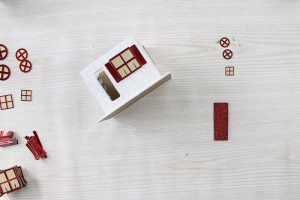
- You can also glue the window to the door and the door to the house.
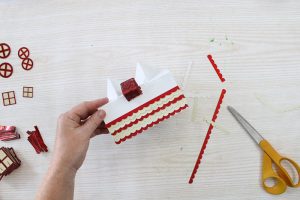
- For the roof portion, the round windows go in both eves. Then there are scalloped strips that go on the roof like shingles. I did a red, two white, red pattern but you can do whatever you like. Secure these with any adhesive and just trim to size with scissors as you cover the entire roof.
- You can also add bottlebrush trees and wreaths to the houses if you wish. They are not required for a tutorial on how to make a gift box, but they do make them super cute!
- The wreaths were placed in the middle of the upper windows on the medium and large houses.
- Once you finish the roof scallops, there will be areas that are not perfect. You can add some more snow paint to these areas if you wish. I put it along the eves and seams. Allow it to dry.
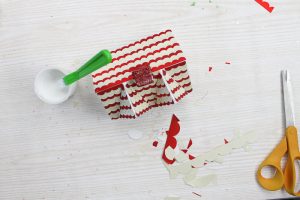
- Then you can tie on a gift tag with some twine.
- And pop the bow on the very top with some adhesive. You just learned how to make a gift box with your Cricut!
- Just add in your gift and write on the back of the gift tag your to and from.