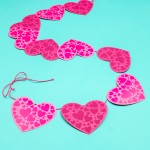
How to Create an HTV on Cardstock Heart Banner
You can use HTV on cardstock to create intricate projects like this heart banner.
Equipment
- Weeding Tool
- EasyPress
- Protective Project Mat
- Hot Glue Finger Tips
- Glue gun
What You Will Need
- HTV
- Cardstock
- String or Twine
- Protective Sheet
- Heart Cut File
Instructions
- For my project, I am using two different colors of HTV and two different cardstock colors. You can use whatever you want for your project.I also suggest you use a firm mat as your protective mat instead of something soft like the EasyPress Mat so you don't deform your paper. The heat-resistant mat from Artesprix is a great option.I also like to make sure my entire image is covered by protective paper. Yes, the carrier sheet does help but I like the extra assurance when dealing with paper.
How to Make a Banner with HTV on Cardstock
- To make a banner using HTV on Cardstock we're going to begin by cutting out the designs. If you've never used your Cricut to cut out cardstock or HTV check out my video for using HTV and my post all about using Design Space to create paper banners.Following those processes, I cut out the hearts from cardstock and HTV. Once everything is cut out you will need to use the weeding tool to weed out the excess HTV.This is a great example of a time when using HTV is preferable to cardstock. Removing all those hearts from the mat would be a nightmare. Applying them individually to the banner piece would take forever and keeping them in the right place while applying is something I struggle with and with this project it's necessary.
How to Apply HTV to Cardstock
- Now that we have everything cut out and weeded we can start pressing the HTV to the paper hearts. I am using Siser EasyWeed, it calls for a temperature of 305 degrees and to press for 10-15 seconds.
How to Find the Right Time and Temperature to Press Cardstock
- Generally, when you're pressing on paper you can press for about half the time. I am setting my EasyPress for 8 seconds and will test that first. You can always increase the time later if needed but using less time or less temperature is better with paper.If you're using a higher temp HTV, like something that calls for a temperature of 350 degrees I would decrease the temperature and try pressing for the full time. You want to make sure you don't get the paper too hot.
Use EasyPress to Apply HTV to Cardstock
- With the excess HTV weeded I can easily locate all the hearts at once onto cardstock heart.HTV does have its own carrier sheet. Because I don't want to risk burning the cardstock I am going to use a piece of butcher paper to protect the surface.I am using the Artesprix Protective mat under the cardstock. It's a nice firm mat that won't warp the cardstock.I am using my small EasyPress for ease, you can use any EasyPress or heat press, even the EasyPress Mini would likely work.Using medium to light pressure apply heat for 8 seconds at 305 degrees.
How to Peel Carrier Sheet from HTV
- Siser EasyWeed is hot or cool peel. You can peel back the carrier sheet right away if you want. Make sure you check what your HTV material settings call for.I peeled mine back hot and everything stuck down beautifully.Because hot cardstock can curl I suggest placing something on top to help it cool flat. I am using the corner of my mat but you could also use a book or a box.
How to Assemble a Heart Banner
- I love the feel of HTV on paper because you can barely feel it at all, nothing is standing off the surface and it's adhered really well. Once you have all your banner pieces complete you can proceed to add a string to make a banner.To assemble my banner I am using a piece of string and some hot glue. I am adding my hearts to the string alternately with a little dab of hot glue in each curve of the heart.To keep the string in the hot glue I am holding the string in place with my finger using my little fingertip cover. Once it's cool enough the string doesn't move you can continue on to the next heart until all the hearts are attached.