
Need to organize your jewelry? Skip the boring (and expensive) organizers and turn it up a notch with a custom organizer you can make in minutes for less than $5! These flat trays, bowls, and party platters are the perfect way to get a trendy look for less. Plus, all of your jewelry will be easy to find and organized!
This is a sponsored post written by me on behalf of Dollar General for IZEA. All opinions are 100% mine.
Organizing your home can get expensive! But, with this simple craft, you can have a beautiful jewelry organizer for a fraction of the price.
If you want to know the secret, head to your local Dollar General!
How to Make an Inexpensive Jewelry Organizer
Supplies you'll need:
- Metallic gold spray paint (or a color of your choice)
- Clear plastic bowls, party trays, or platters in the size and shape of your choice
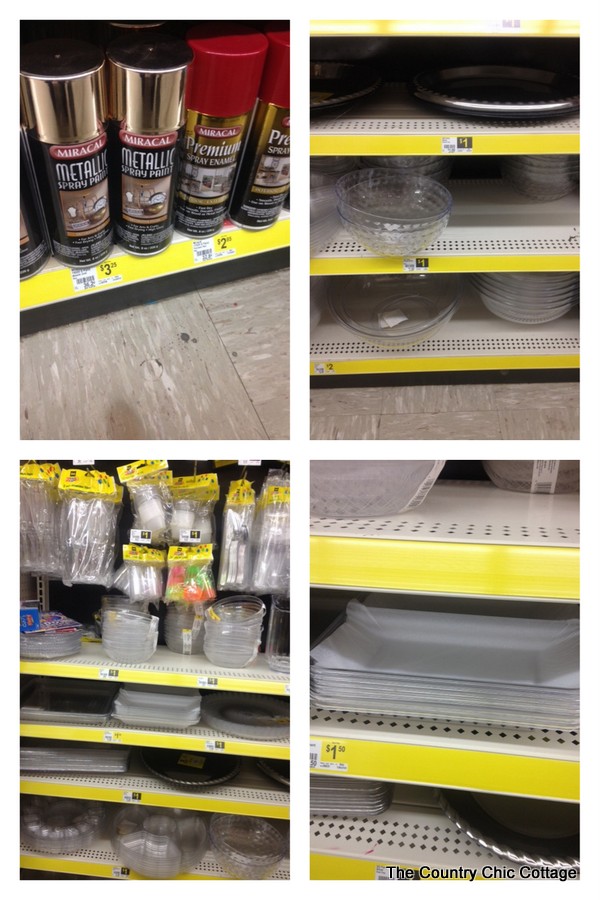
At the Dollar General, pick up some great metallic gold spray paint then head to the party section. The party section has plastic bowls and trays of all shapes and sizes.
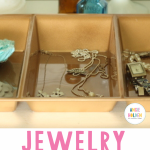
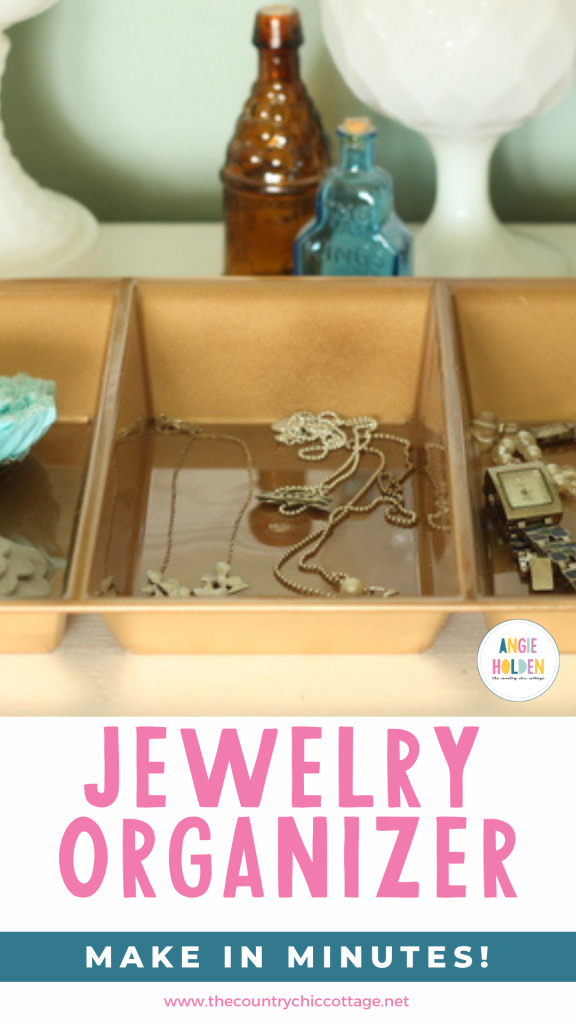
A simple way to store jewelry is with a flat tray, but sometimes we need a little bit more organization to avoid all of the jewelry thrown in together. Party platters like a chips and dips platter or another platter with dividers is great for even more organization.
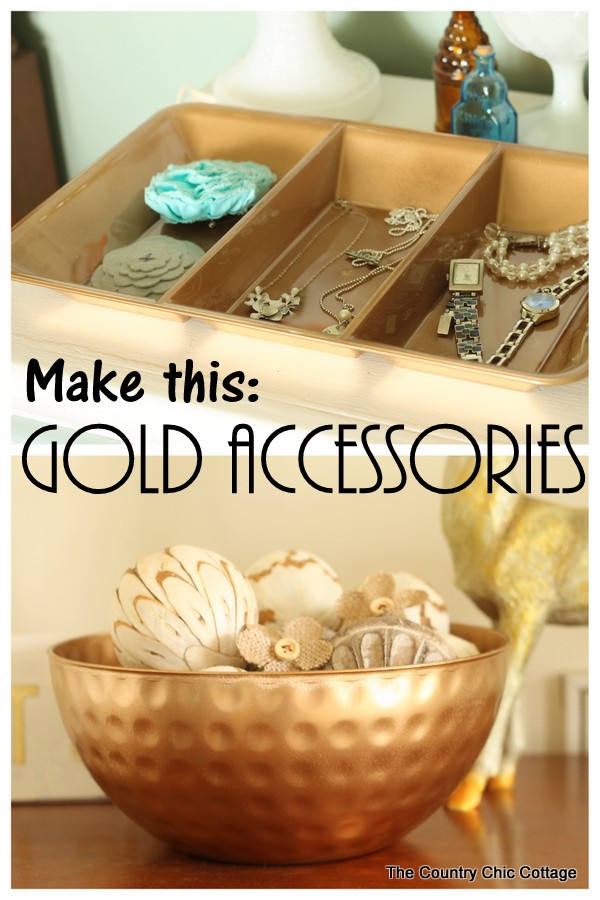
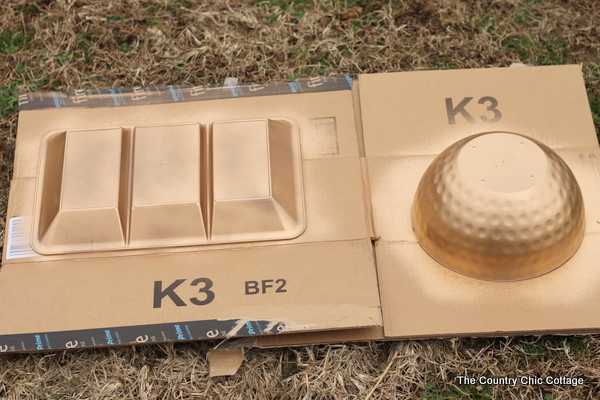
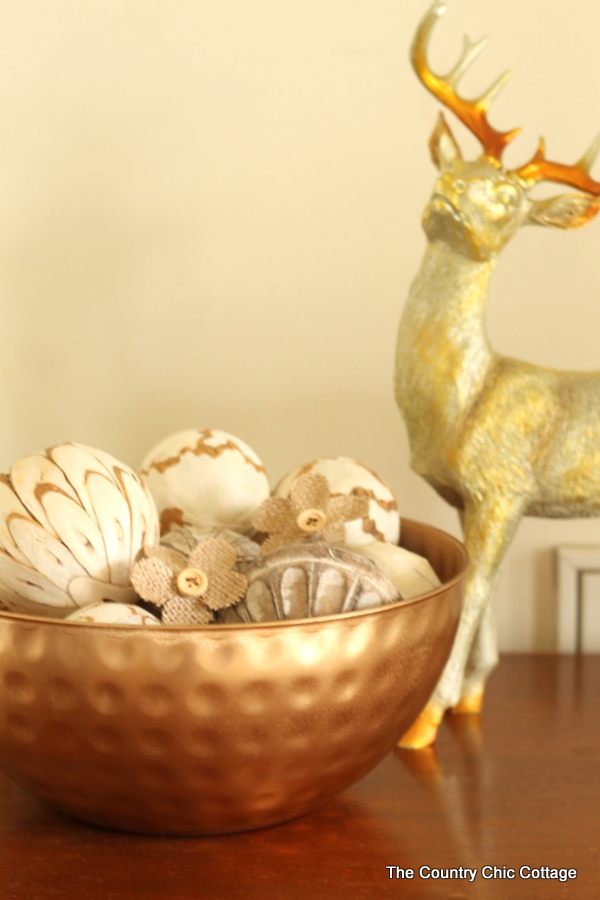
I chose the hammered-looking bowl and a three-compartment tray. I got my cost numbers at the beginning of this post from these items. However, if you find a different clear plastic party tray you love, grab it to use for this project!
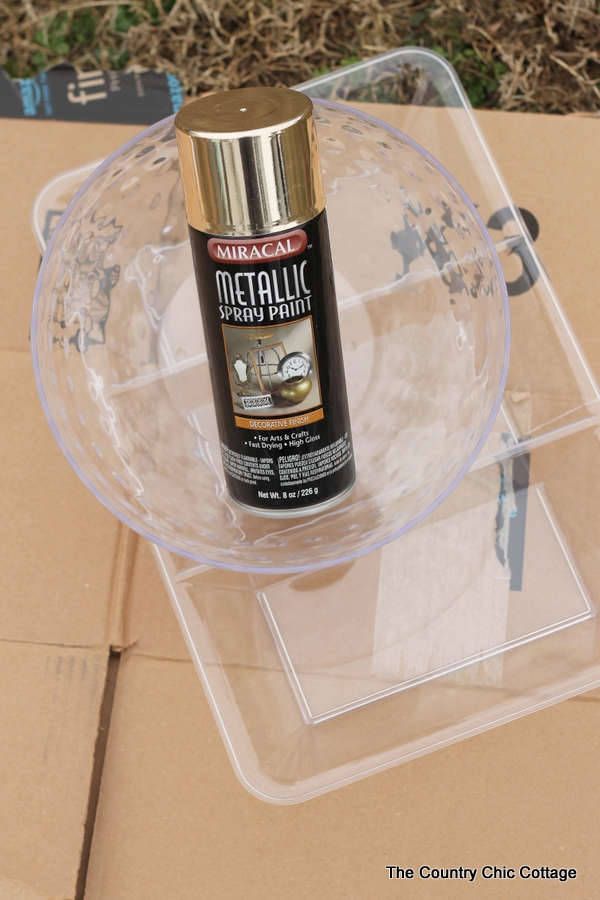
Place some scrap cardboard down to protect your painting surface. Spray painting is best done outside and away from anything you don't want overspray on.
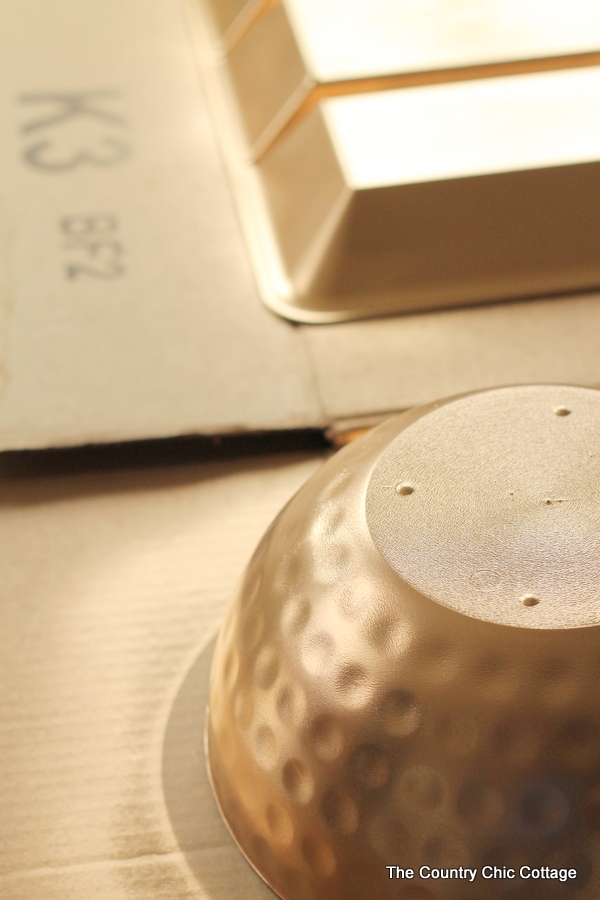
I turned my purchases upside down on the cardboard and began spray painting.
The secret for this project is to paint the underside of your items with metallic gold spray paint or whatever color you choose. Then, anything added to the trays won't damage the paint. You can put anything you want inside of your finished crafts without the worry of scratches.
I used 2 to 3 light coats of metallic gold spray paint. Be sure to follow the package instructions when using a product like this. You want complete coverage so it looks great from the top when you flip it over.
Allow it to dry completely. Overnight is best so the spray paint has time to cure out and harden. If you place this on top of furniture before it's had a chance to cure, the tackiness of the paint could stick to other surfaces. When it is completely dry and no longer tacky to the touch, fill your creations up with anything.
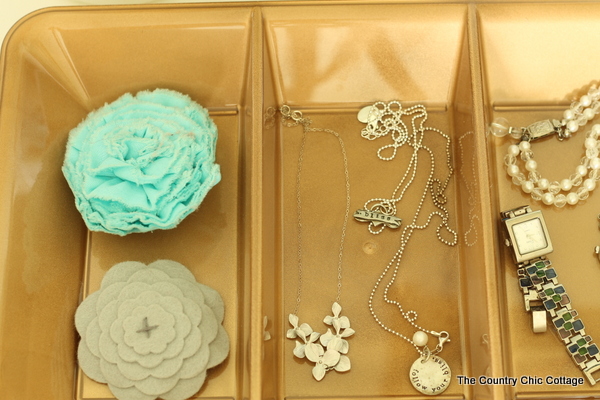
I personally love that metallic gold but you can change this up to any color that you love. And no worries about your jewelry scratching this great jewelry organizer. There is NO PAINT on the inside so you can throw whatever in this divided compartment tray from Dollar General.
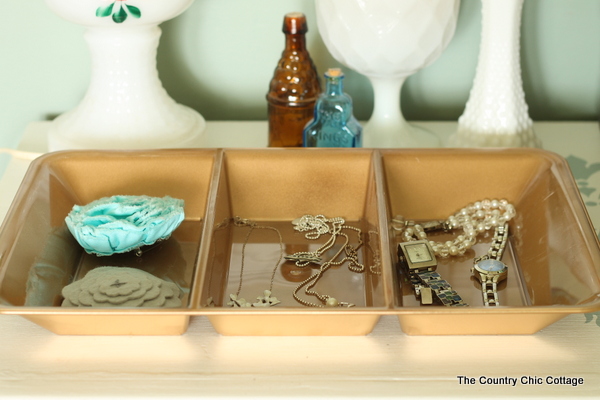
For the bowl, I just used it in my home decor but if you have something it would be great at organizing then have at it. Maybe a collection of a few of these on your counter would make great drop bins for keys and change?
Whichever clear plastic item you grab from Dollar General, the painting of these is super easy and you will have an inexpensive organizer for jewelry or anything else in just minutes! Plus, for less than $5 how can you go wrong?
Supplies
- Metallic gold spray paint or a color of your choice
- Clear plastic bowls party trays, or platters in the size and shape of your choice
Instructions
- Head to your local Dollar General and purchase the spray paint of your choice and a shape and size platter that will work for your jewelry organization. See the post above for other ideas.
- Wash your purchases and remove any stickers from the platters.
- Place scrap cardboard down to protect your painting surface. Spray painting is best done outside and away from anything you don’t want overspray on.
- Turn items upside down on the cardboard and begin spray painting. Apply 2-3 coats of spray paint or until there is complete coverage on the items. Be sure to follow the package instructions when using a product like this. You want complete coverage so it looks great from the top when you flip it over.
- Allow the spray paint to dry completely. Overnight is best so the spray paint has time to cure out and harden.
- When it is completely dry and no longer tacky to the touch, fill your creations up with anything.
Notes
Declutter Your Home in 31 Days!

Clear the clutter and organize your home with our daily emails! Every day for a month we will send you a prompt to declutter! Sign up for our email list below to get started.


It’s amazing what you can do with spray paint!
What?! That’s a dollar store bowl? Get. out. I love it. It looks so chic, like something you got at Anthro, not the dollar store! Way to go!
The compartment tray is a fantastic idea for holding accessories! Pinning!! Also love the texture on that bowl and how the metallic spray paint brings it out!
These look great! You would never guess they were plastic. Love!