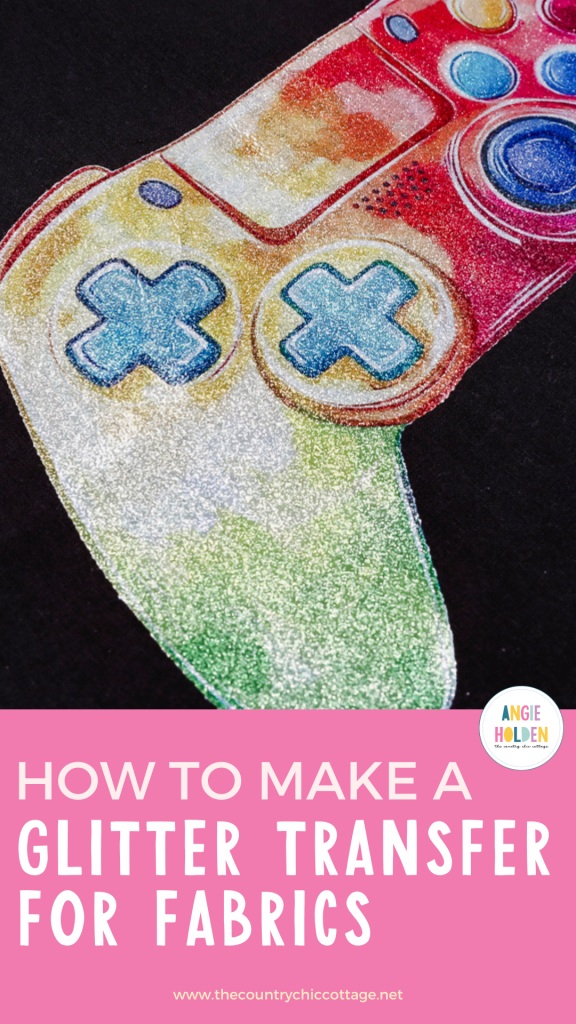
Are you ready to learn how to create a glitter transfer using your iColor 560 white toner printer? You're going to love the smooth finish and the ability to have multiple colors in one glitter design. And you can make these right at home!
You do need the iColor 560 for this project because it's the only printer that has the clear toner cartridge.
You need clear toner for glitter effects. Clear toner allows your design to pick up the sparkle from the glitter adhesive sheet, making the entire print shimmer, especially areas that would otherwise be white or light-colored.
You can watch me make this project and learn more about clear toner and glitter adhesive sheets by pressing play on the video below.
Glitter Transfers with iColor 560 White Toner Printer
The iColor 560 is a white toner printer that has the ability to do more than just white toner. You can learn all about this printer and the different types of projects you can make in my iColor 560 review.
I consider this an all-in-one printer. By changing cartridges, you can do white toner printing, sublimation printing, regular laser printing, and with clear toner, you can create these glitter transfers.
Supplies Used:
- Free Game Controller File
- iColor 560 Printer
- iColor 2 Step Paper
- iColor Glitter B Paper
- Clear Toner Cartridge
- Glossy Finishing Sheet
- ProWorld Heat Press
- Protective Paper
- Heat Resistant Gloves

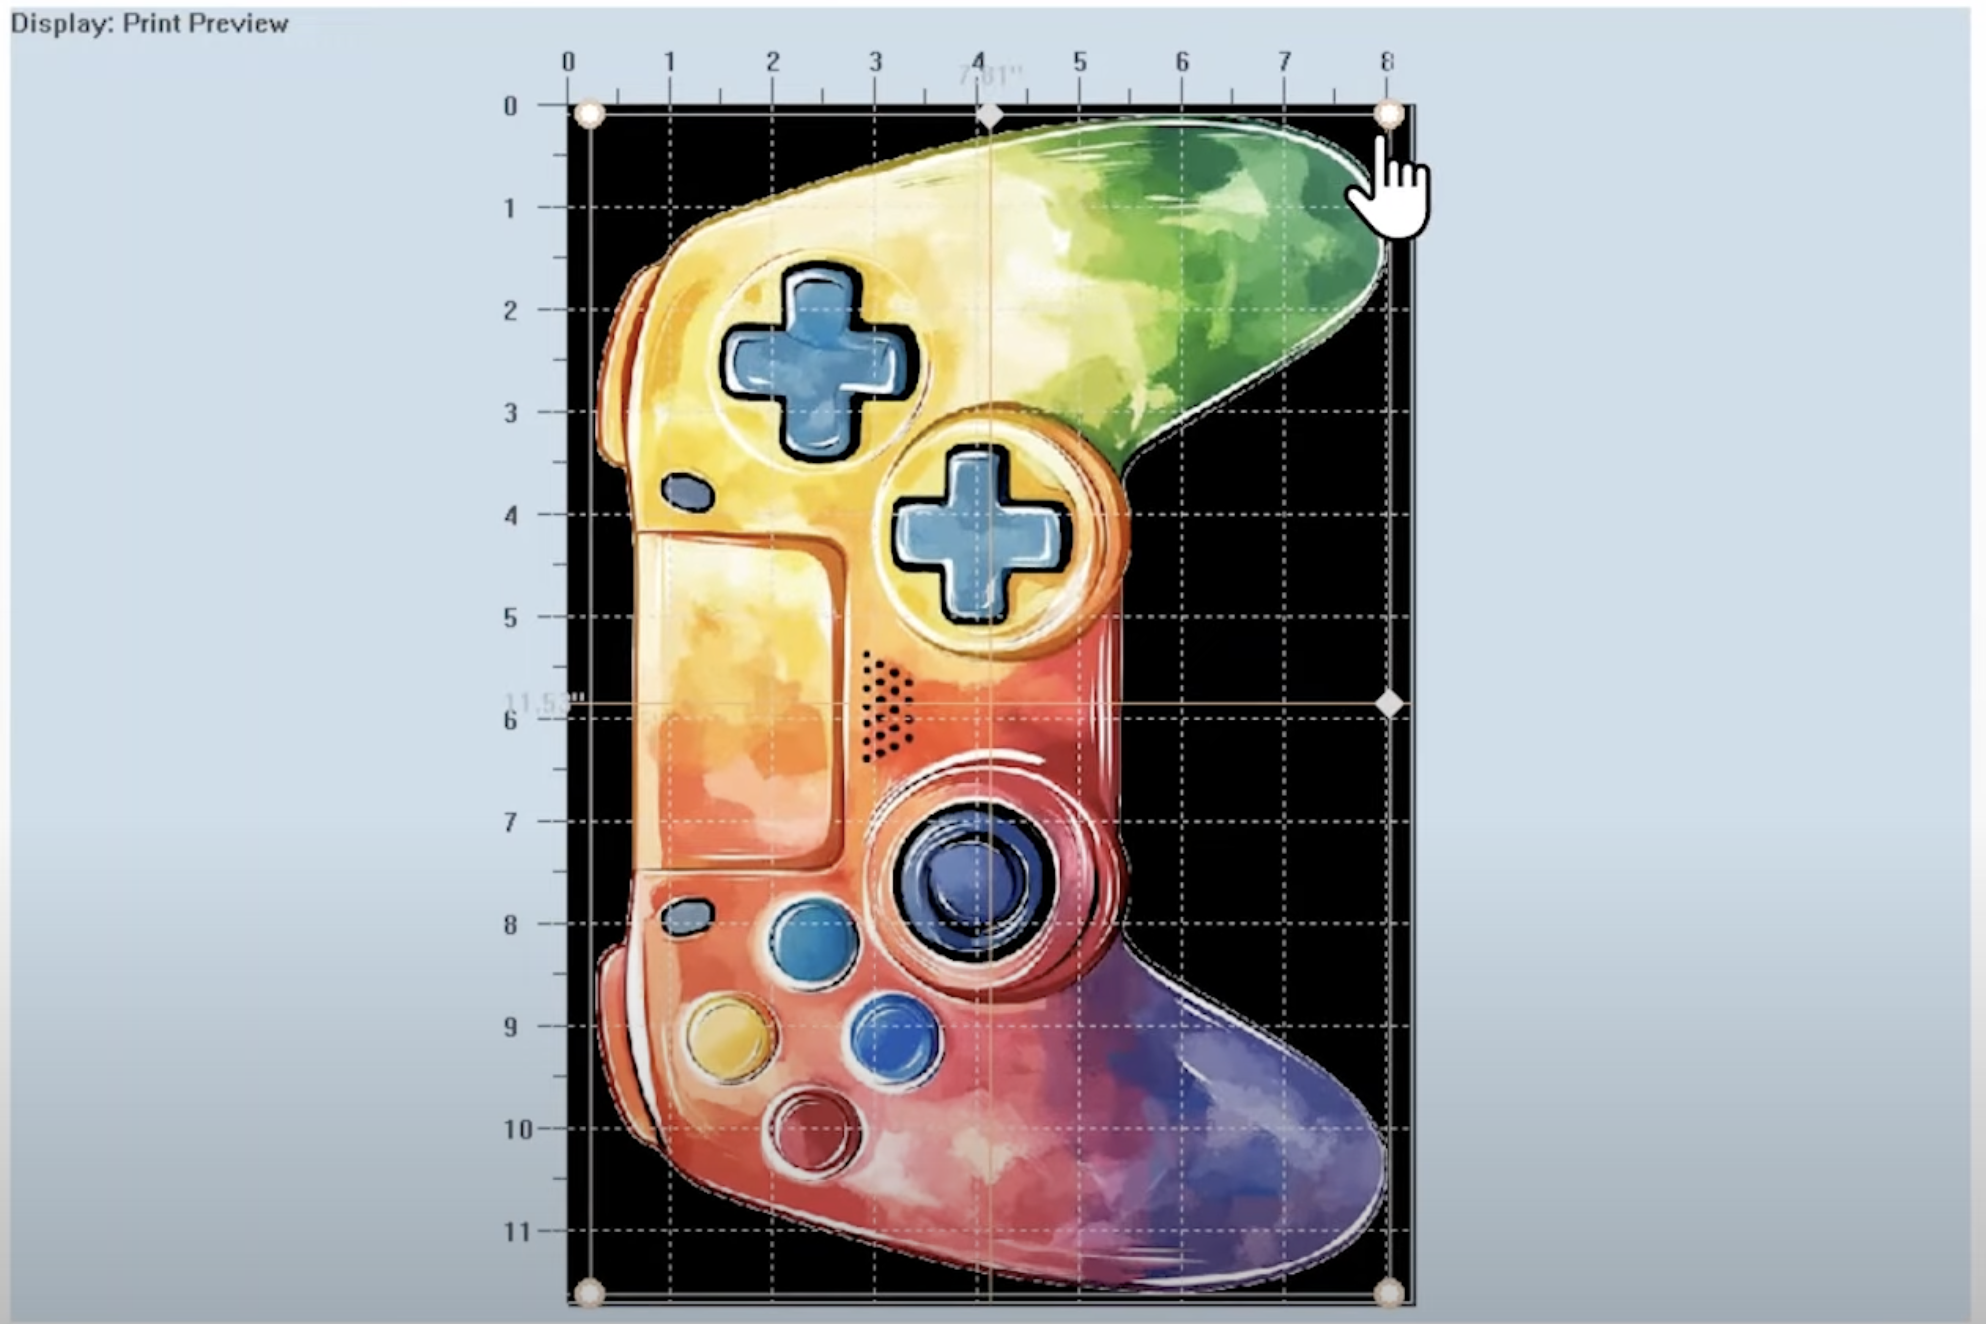
Step 1: Upload and Prepare Your Glitter Transfer Design
Using iColor ProRIP Essentials software, start by importing your design.
For the best results, choose a design that doesn't have a lot of white. Because we're not using a white toner cartridge, white parts of the design will not be as vibrant.
Rotate the design as needed and remove any extra space around the design. Resize the design to make it whatever size you want it. I am putting my glitter transfer on a black tote bag, so I'm making my design a bit larger.
Settings Used for Clear Toner Printing
- Under Print Settings, make sure everything is set correctly:
- Overprint Mode: ON
- White Creation (Choke): 2
- White Toner Coverage: 300
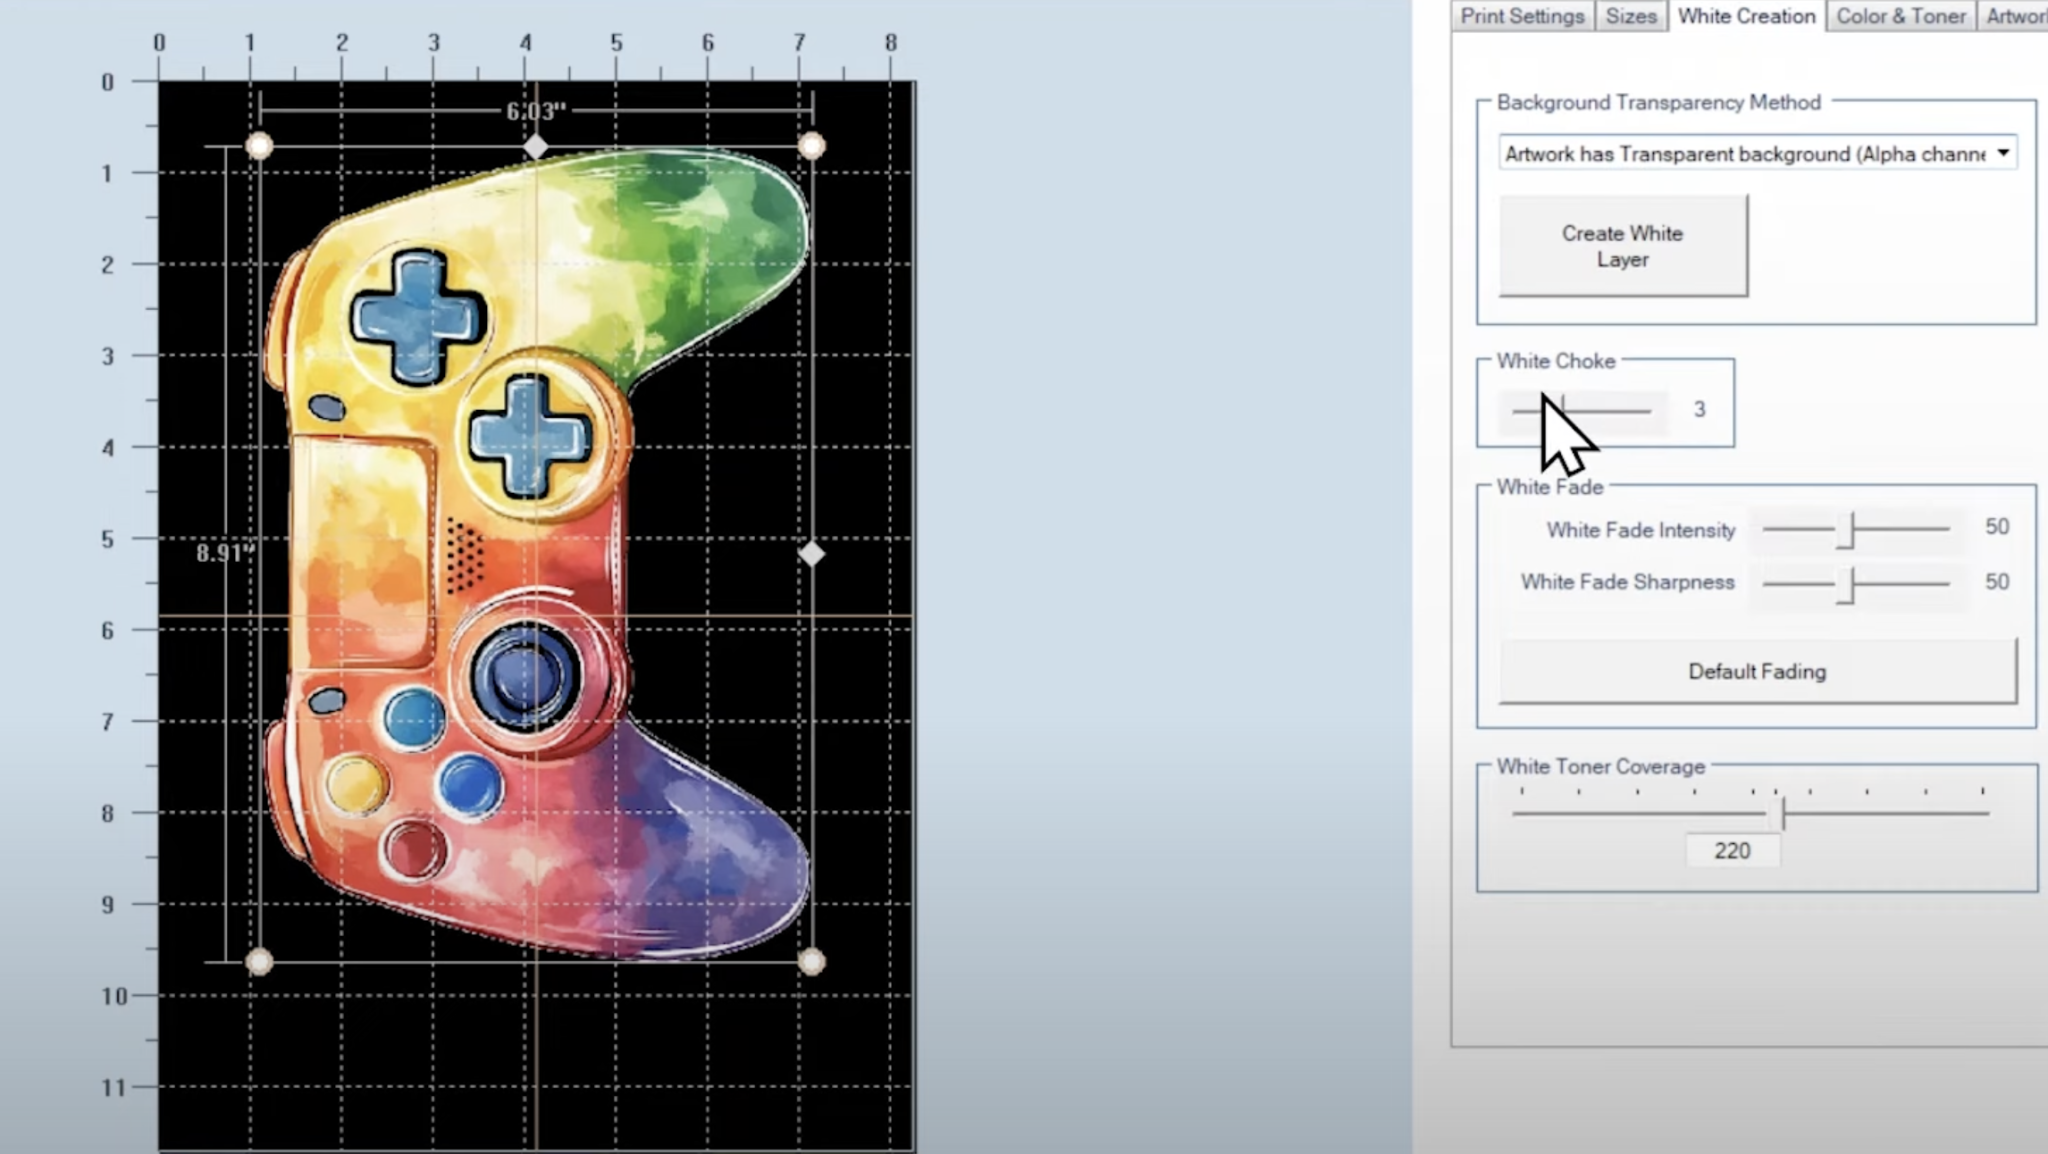
Although the software still references a “white layer,” remember: you're using clear toner, so those areas will just become transparent in the print, allowing the glitter sheet to show through.
Step 2. Set up the Printer
Head to the printer and change out the cartridges. For overprinting from back to front, the order is Cyan, Magenta, Yellow, and Clear.
If you had it set up for white toner printing, you would swap out the white toner cartridge for the clear toner cartridge.
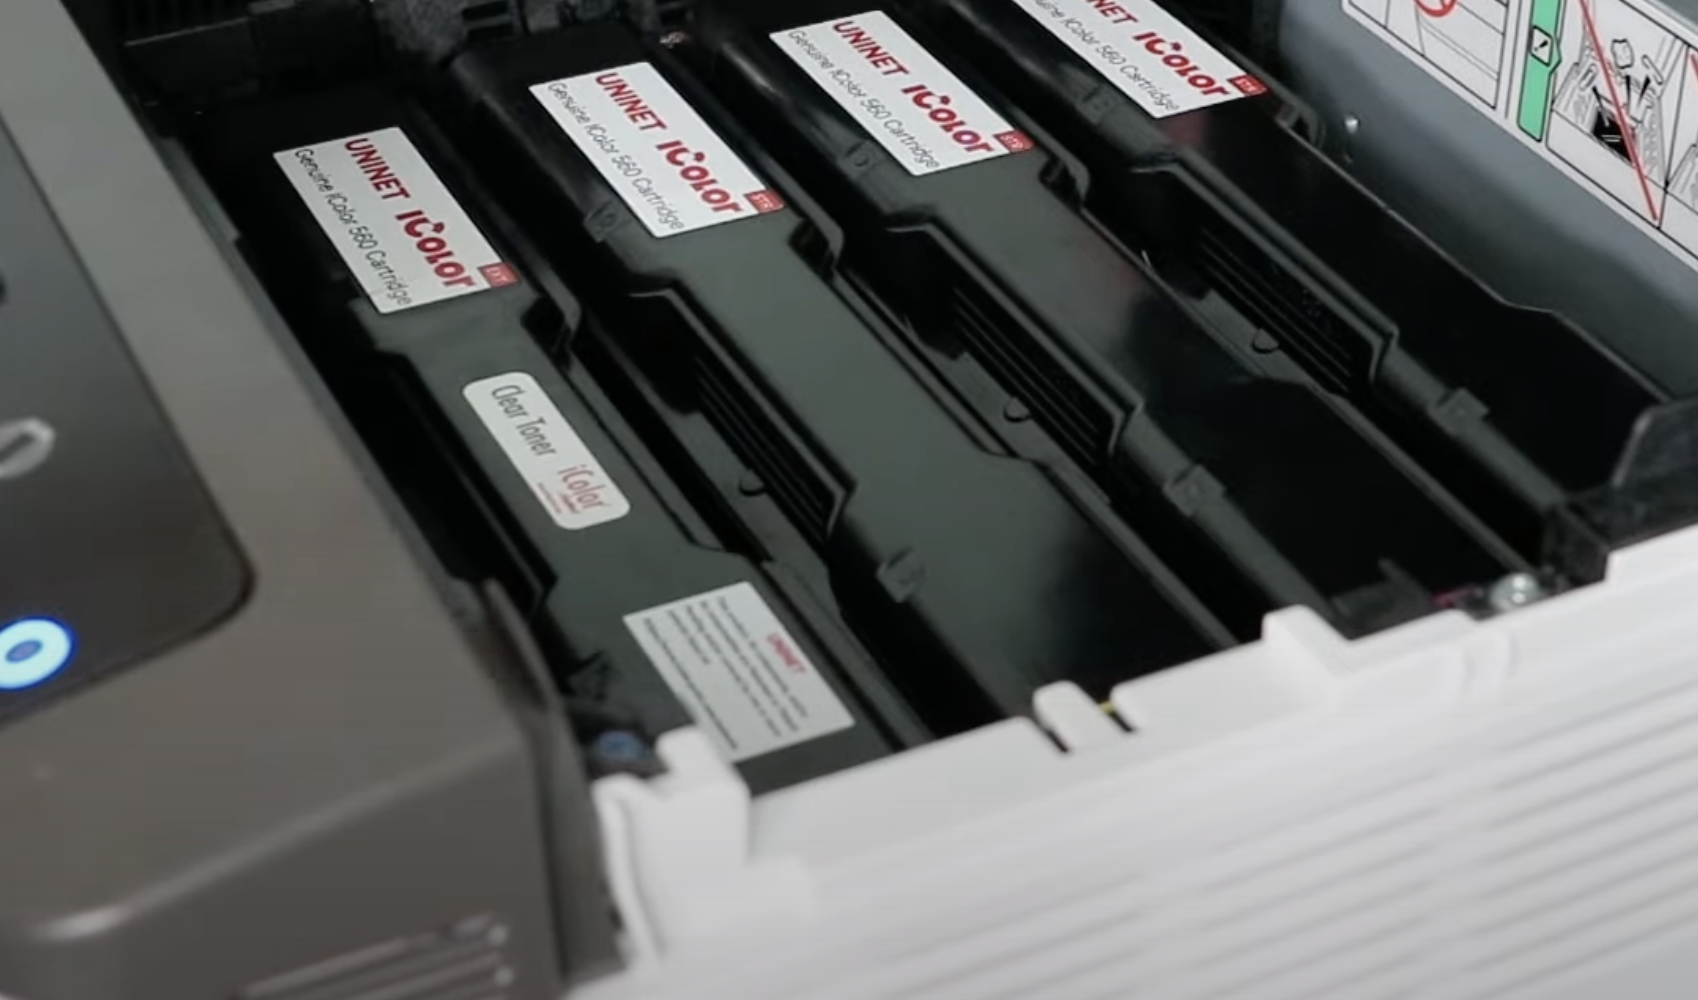
If you haven't used the clear toner cartridge, make sure and shake it 5-6 times before putting it in the printer.
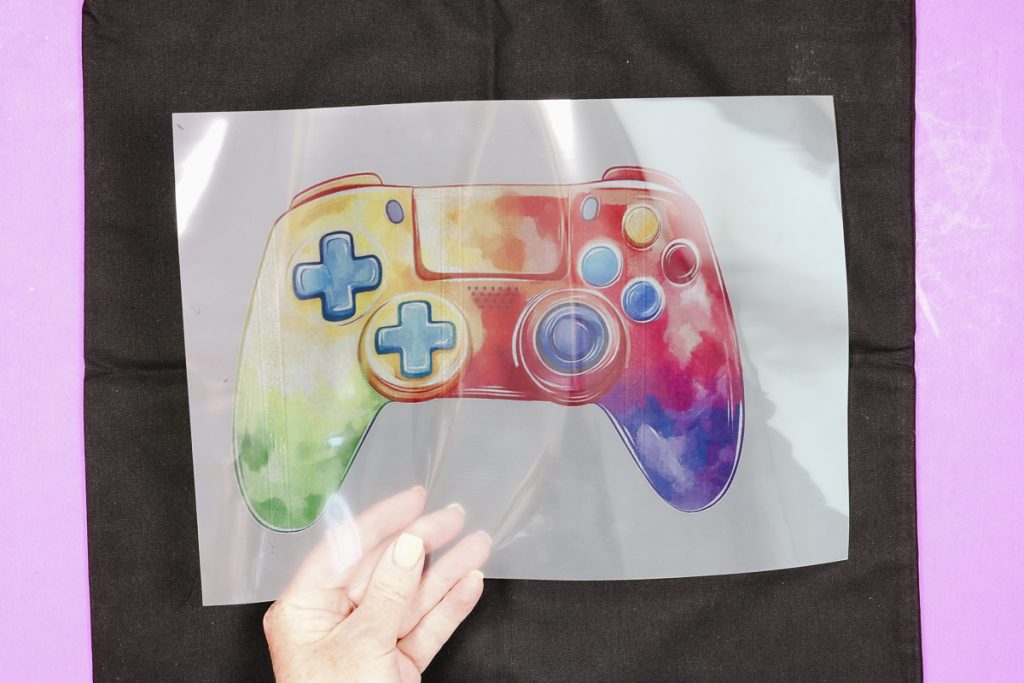
Step 3. Print the Design
Because I am only printing one sheet, I am using the bypass tray. With the bypass tray, you load the film print side down.
Click Print in ProRip Essentials, and that will send the design to the printer.
The print is dry when it comes out of the printer. You can see that there is no white; the design is clear anywhere there is white in the design.
Step 4. Add Glitter Adhesive to Print
Now we're ready to apply the glitter adhesive to it.
To get a glitter transfer, you need to use the glitter adhesive sheet. You can see the glitter on the sheet even before we add it to the print.
Preheat the heat press to 310 degrees with the heat press closed. You want the press closed for at least 5 minutes before starting the process. This heats up the bottom platen.
Set the time on the heat press to 120 seconds and make sure it's set for heavy pressure.
Place the design on the bottom platen, ink side up. Add the adhesive sheet on top of the print, glitter side down.

Cover with protective paper and press for 120 seconds.
These next steps need to be done when everything is still very hot.
When the time is up, open the heat press and remove the protective paper. With the print still in the heat press, using a piece of cloth, rub the print for about 5 seconds.
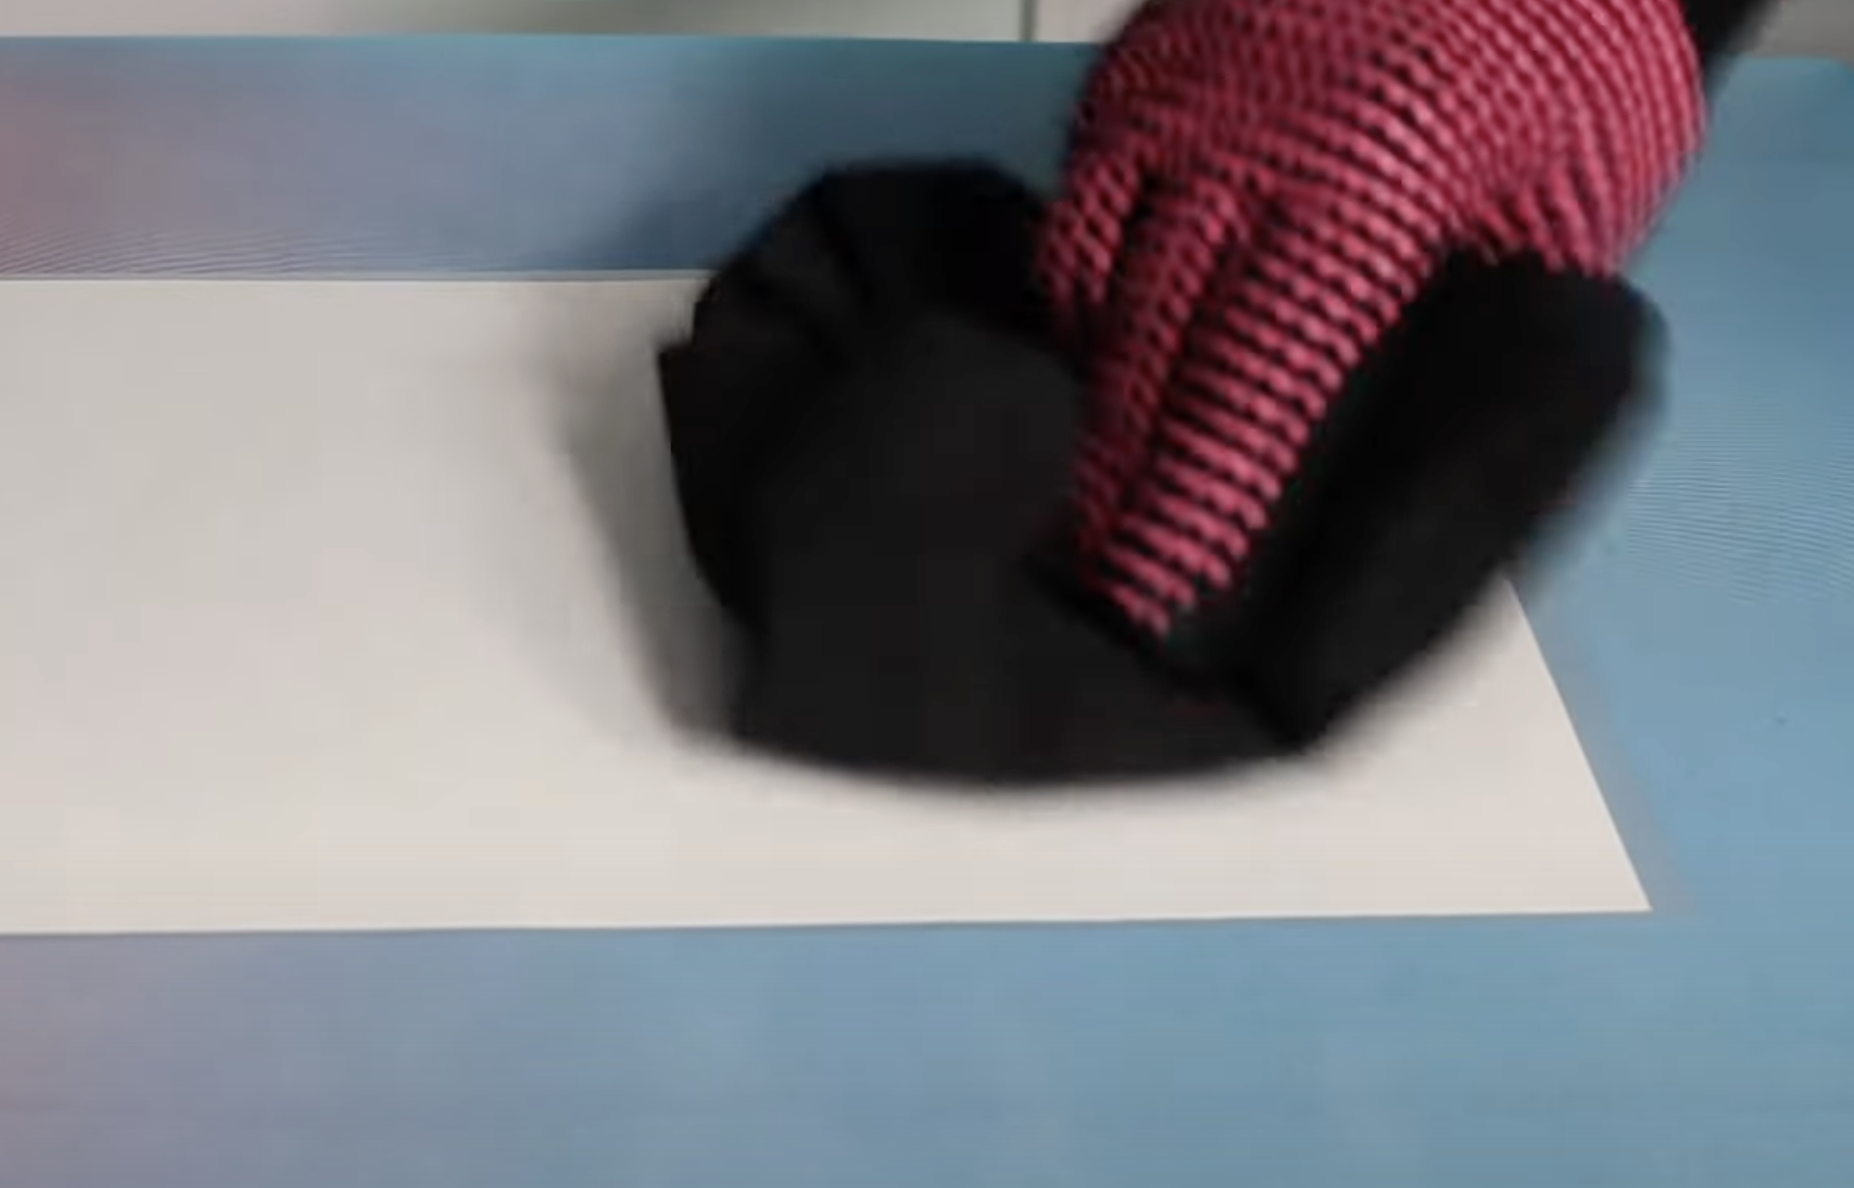
You may find it helpful to use heat-resistant gloves during this process.
Hold the corner of the print and gently peel the adhesive layer away from the print.
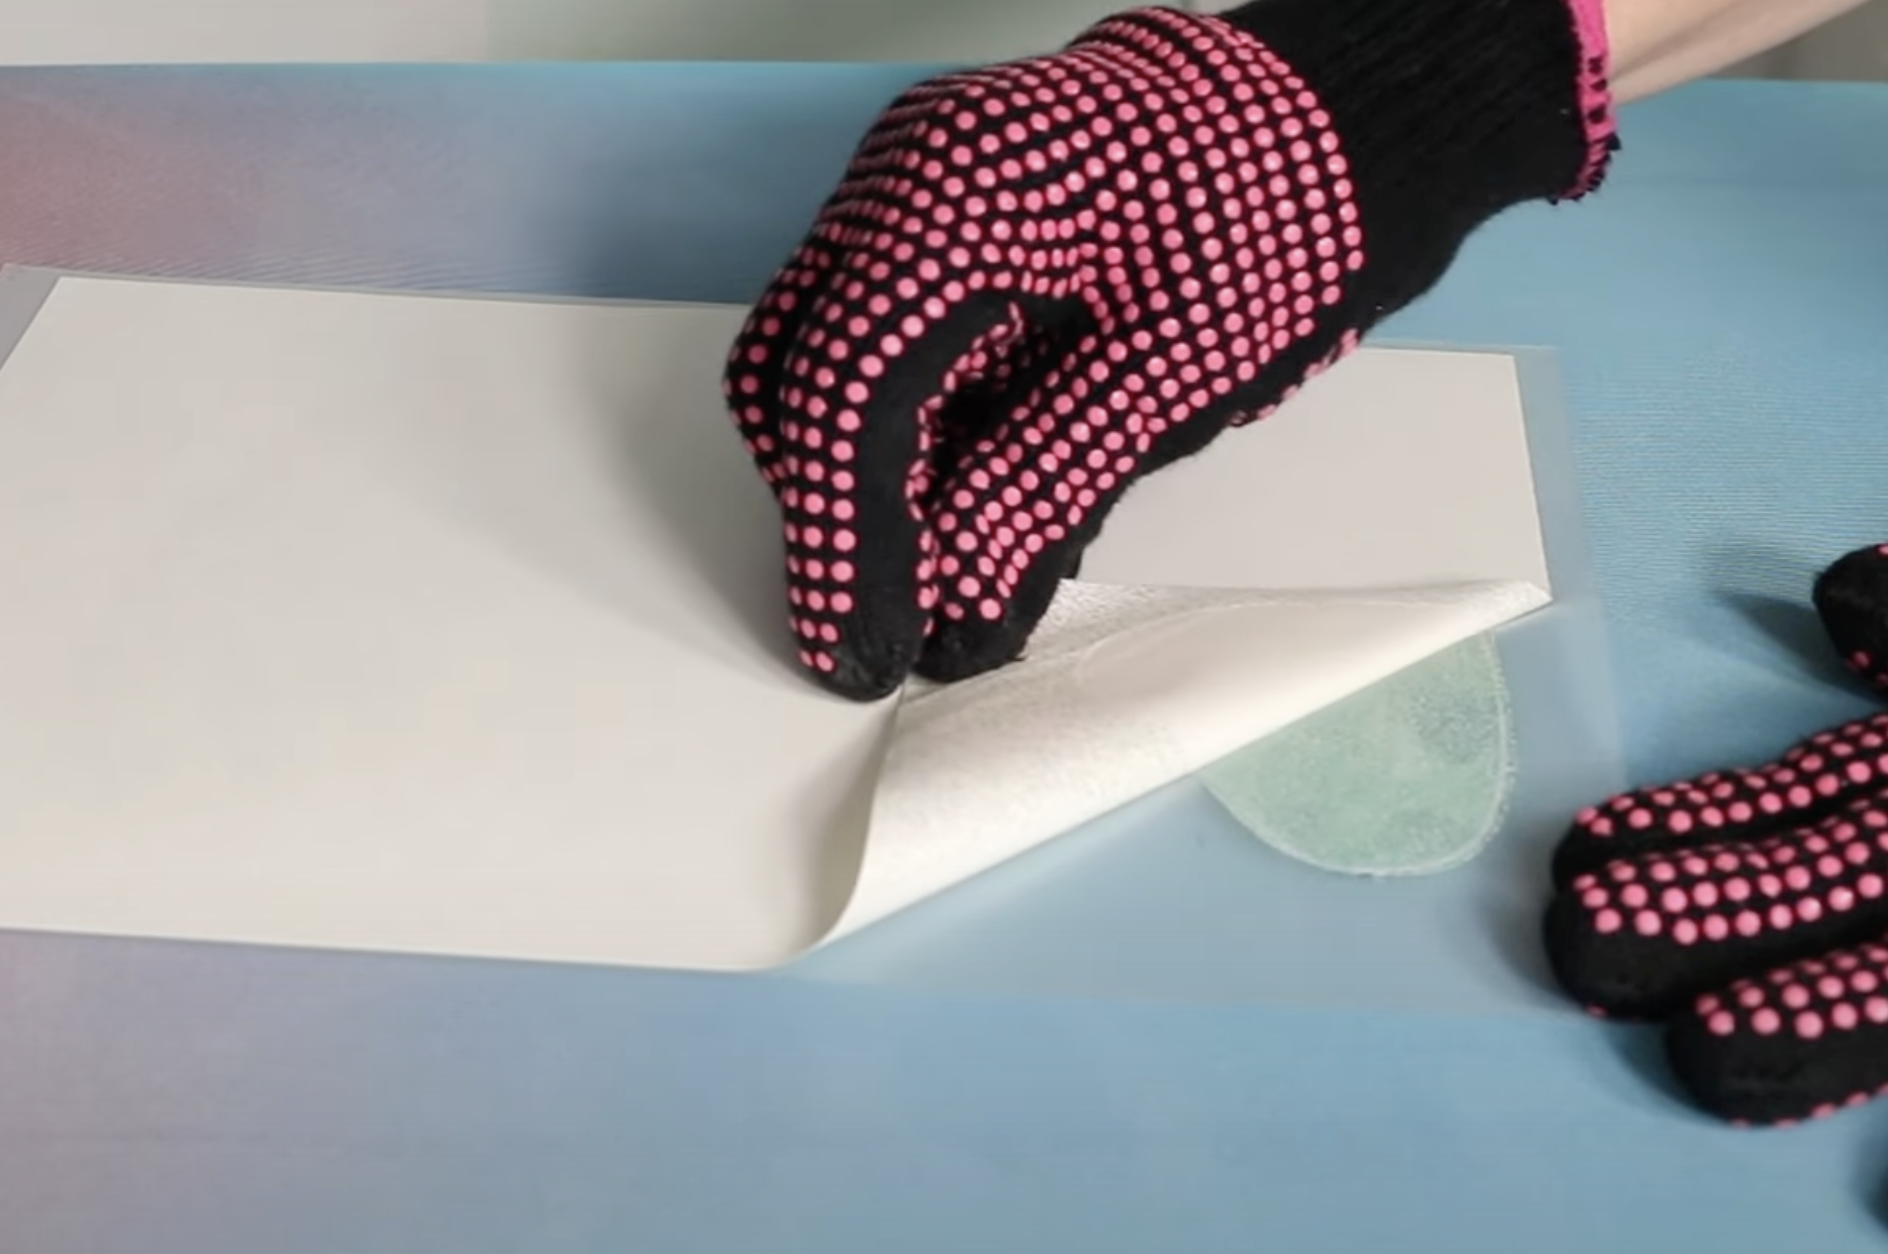
Peel the adhesive sheet back in a slow, fluid motion, and let it fall off at the end.
You should see the adhesive sticks everywhere there was ink.

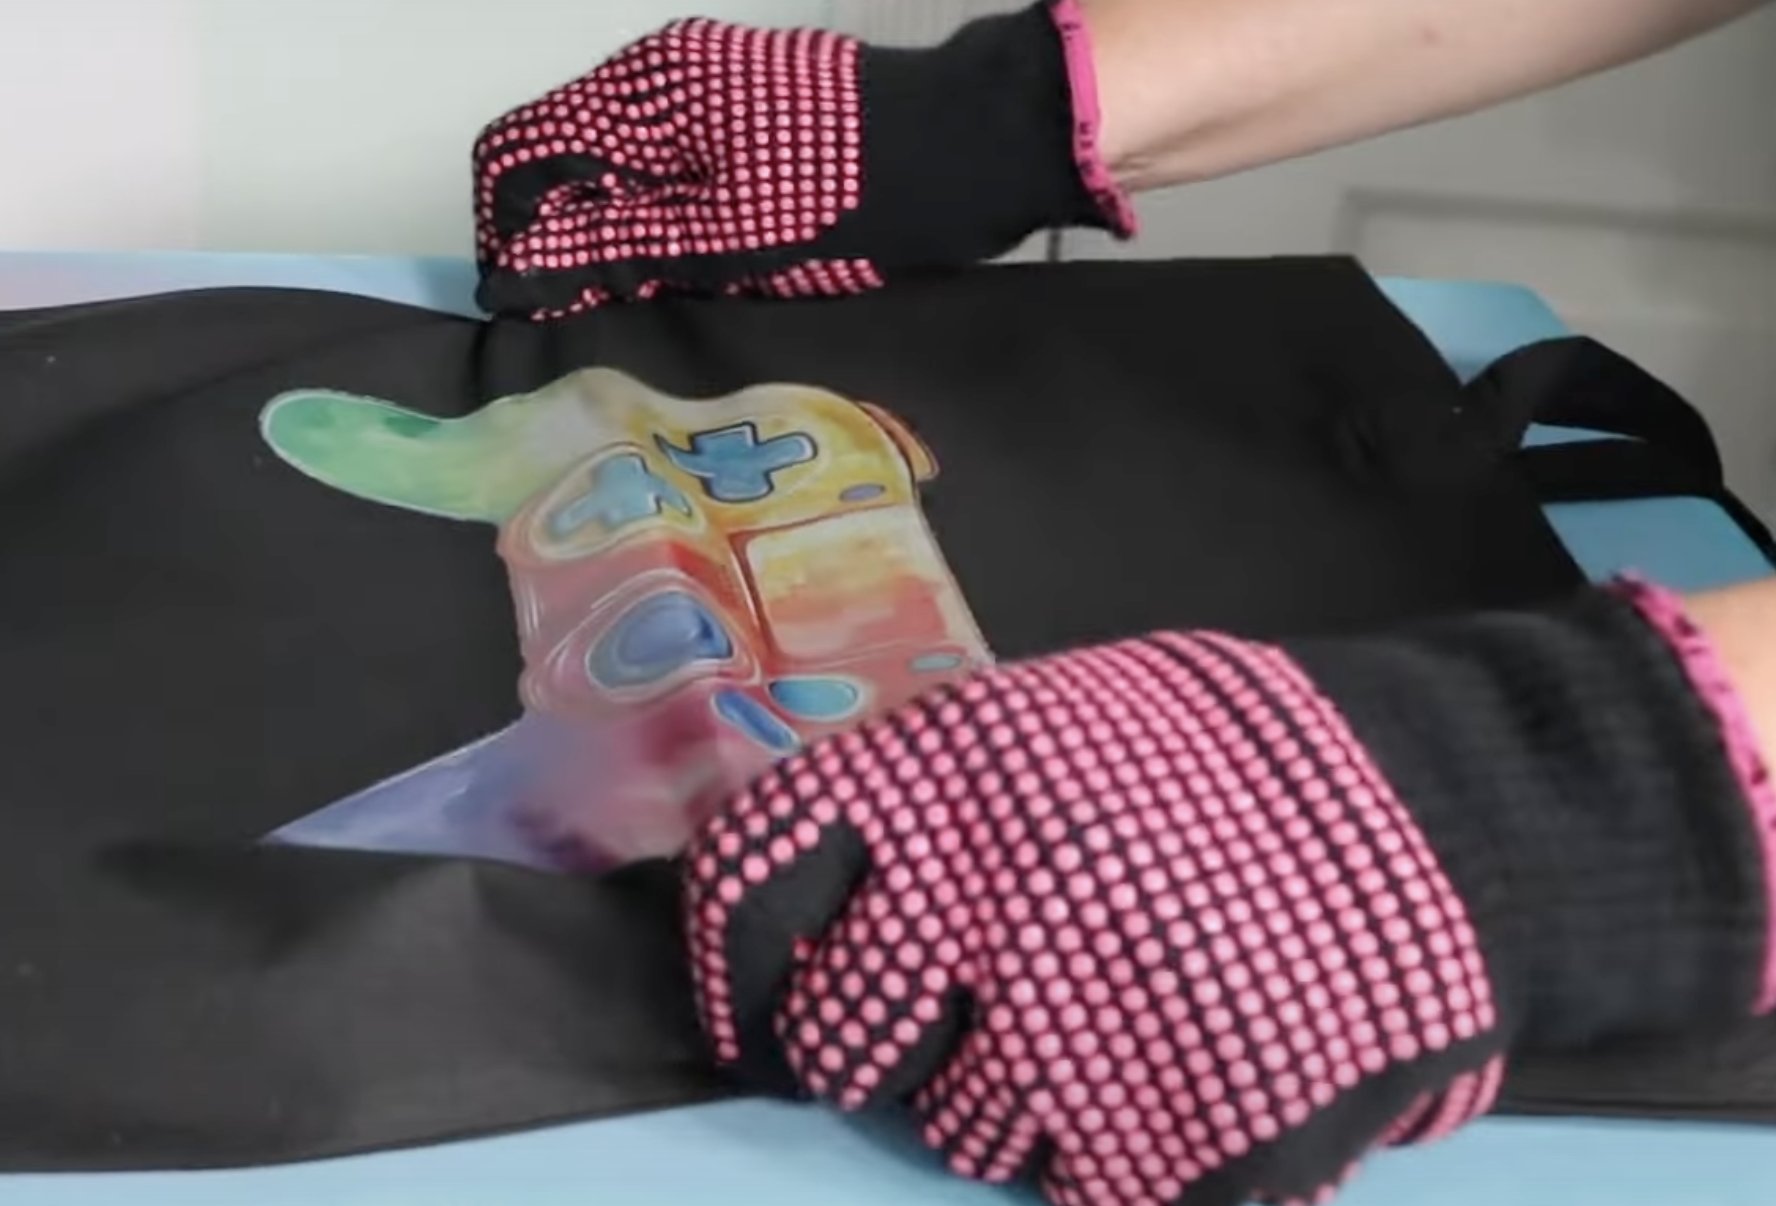
Step 5. Prepare Glitter Transfer for Pressing
With the adhesive sheet removed, you can lift the print off the heat press.
You should see that the adhesive stuck everywhere there is toner. If everything looks good, use a pair of scissors to trim around the edge of the print
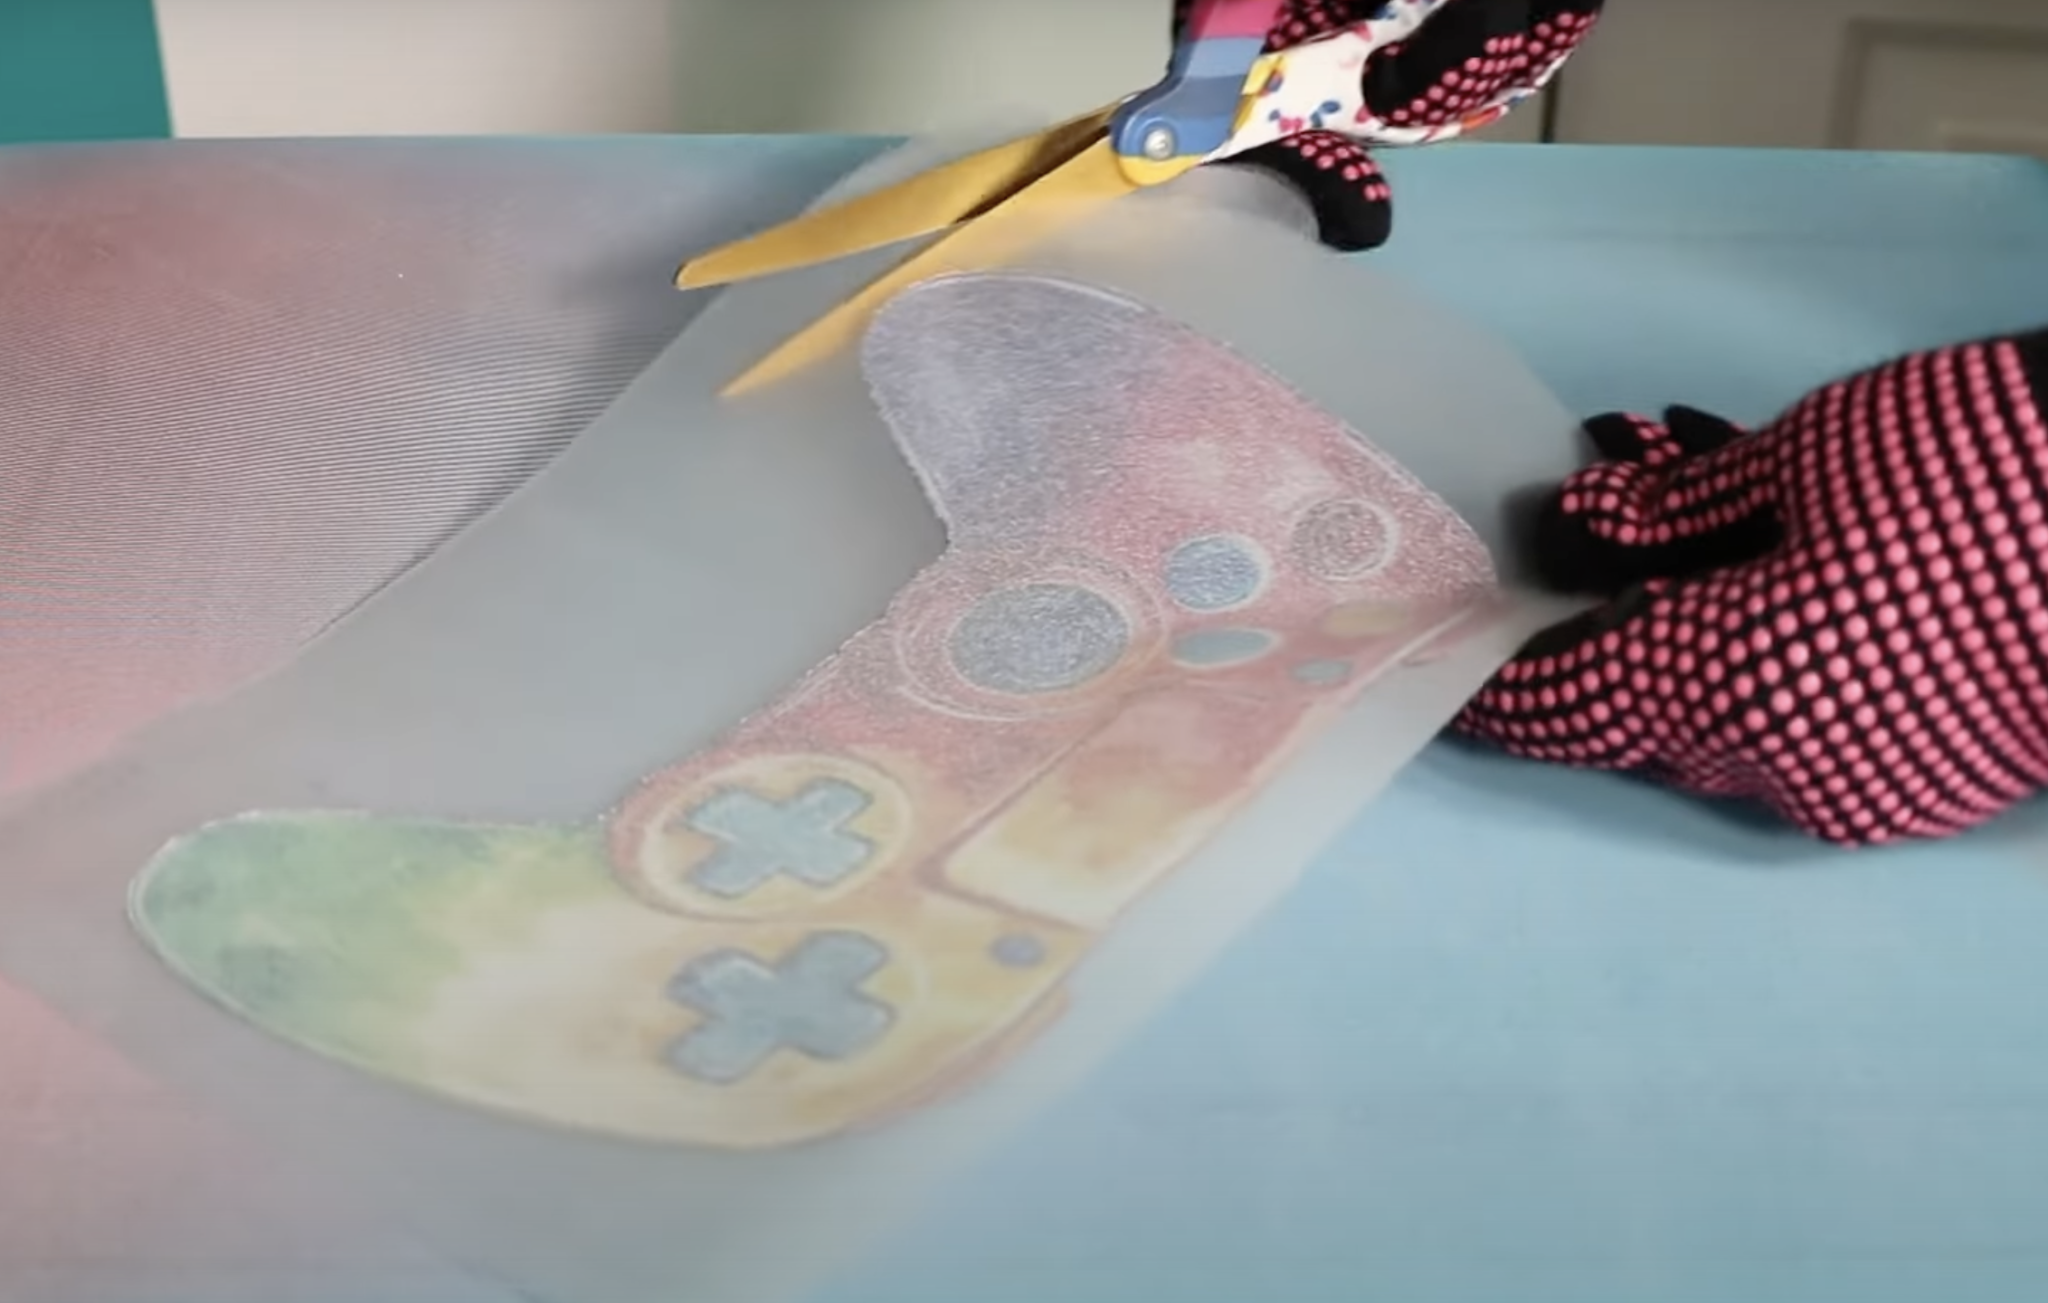
Adhesive from the edge of the adhesive sheet can transfer to the print, and we do not want that on our finished project.
Step 6. Prepare the Bag for the Glitter Transfer
Place the bag in the heat press and preheat for a few seconds.
This step removes wrinkles and moisture from the bag and allows you to adjust the pressure. You want the pressure to remain heavy.
My tote bag is cotton, so I have my press set to 310 degrees for 30 seconds. If you're using a different material, check the settings for the material you're using.
Step 7. Press Glitter Transfer to Tote Bag
Locate the glitter transfer where you want it on the tote bag, and if needed, use heat-resistant tape to hold it in place.
Cover the design with protective paper and press for 30 seconds with heavy pressure.
When the time is up, open the press and remove the protective paper.
The design and tote need to cool completely before removing the carrier sheet.
Remove the tote bag from the heat press and allow it to cool. You can use a DTF cooling block to help speed up the process, but you want it completely cool before trying to remove the carrier sheet.
Step 8. Remove the Carrier Sheet
When everything is cool, we're ready to remove the carrier sheet.
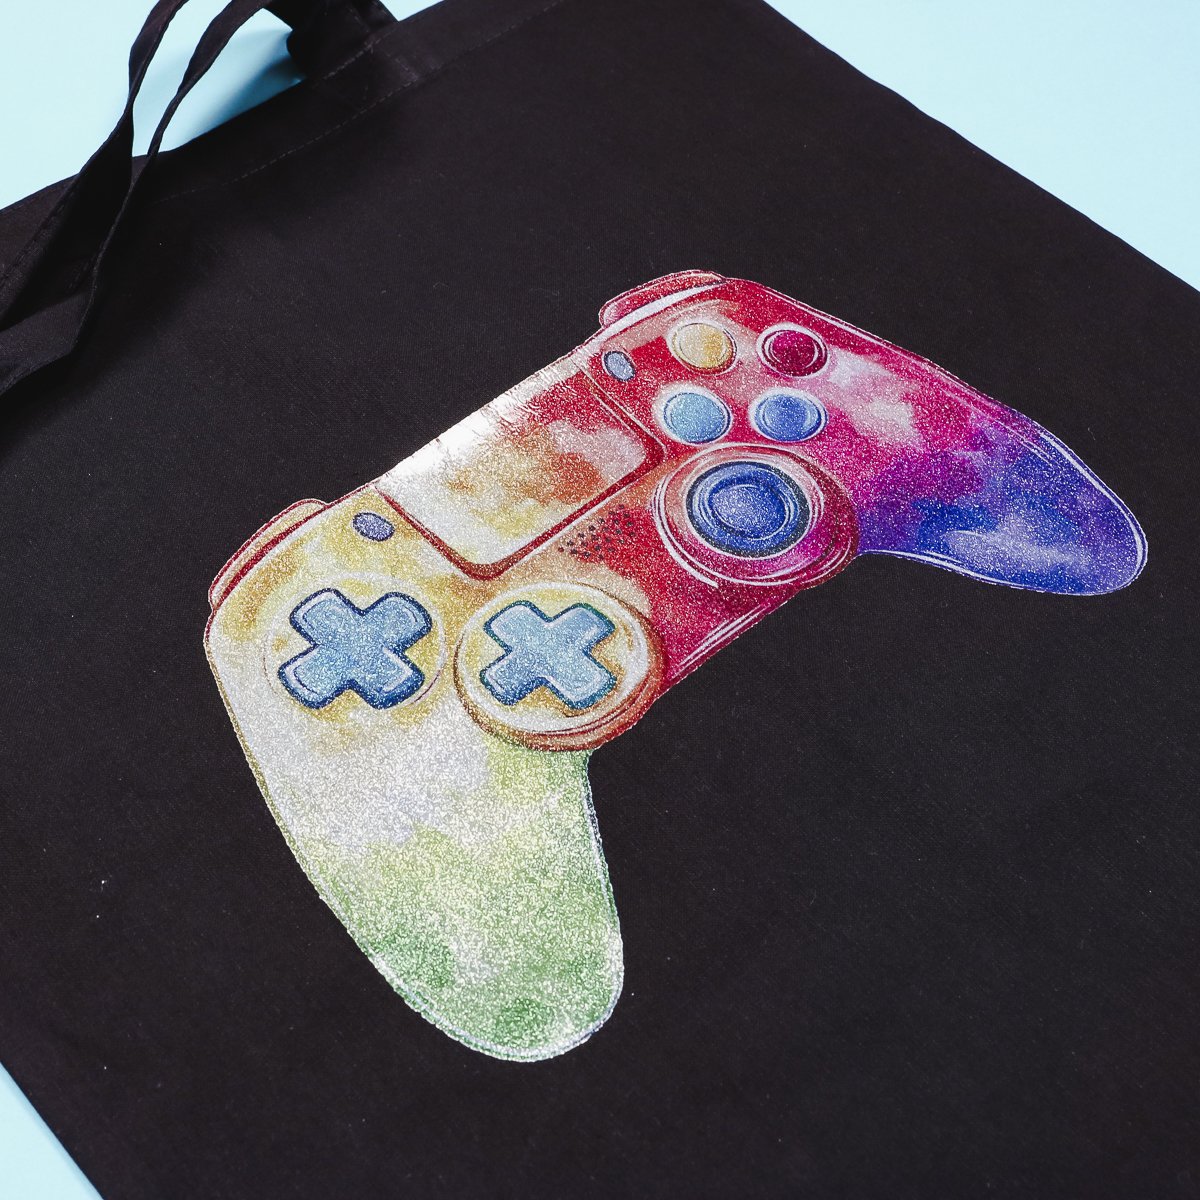
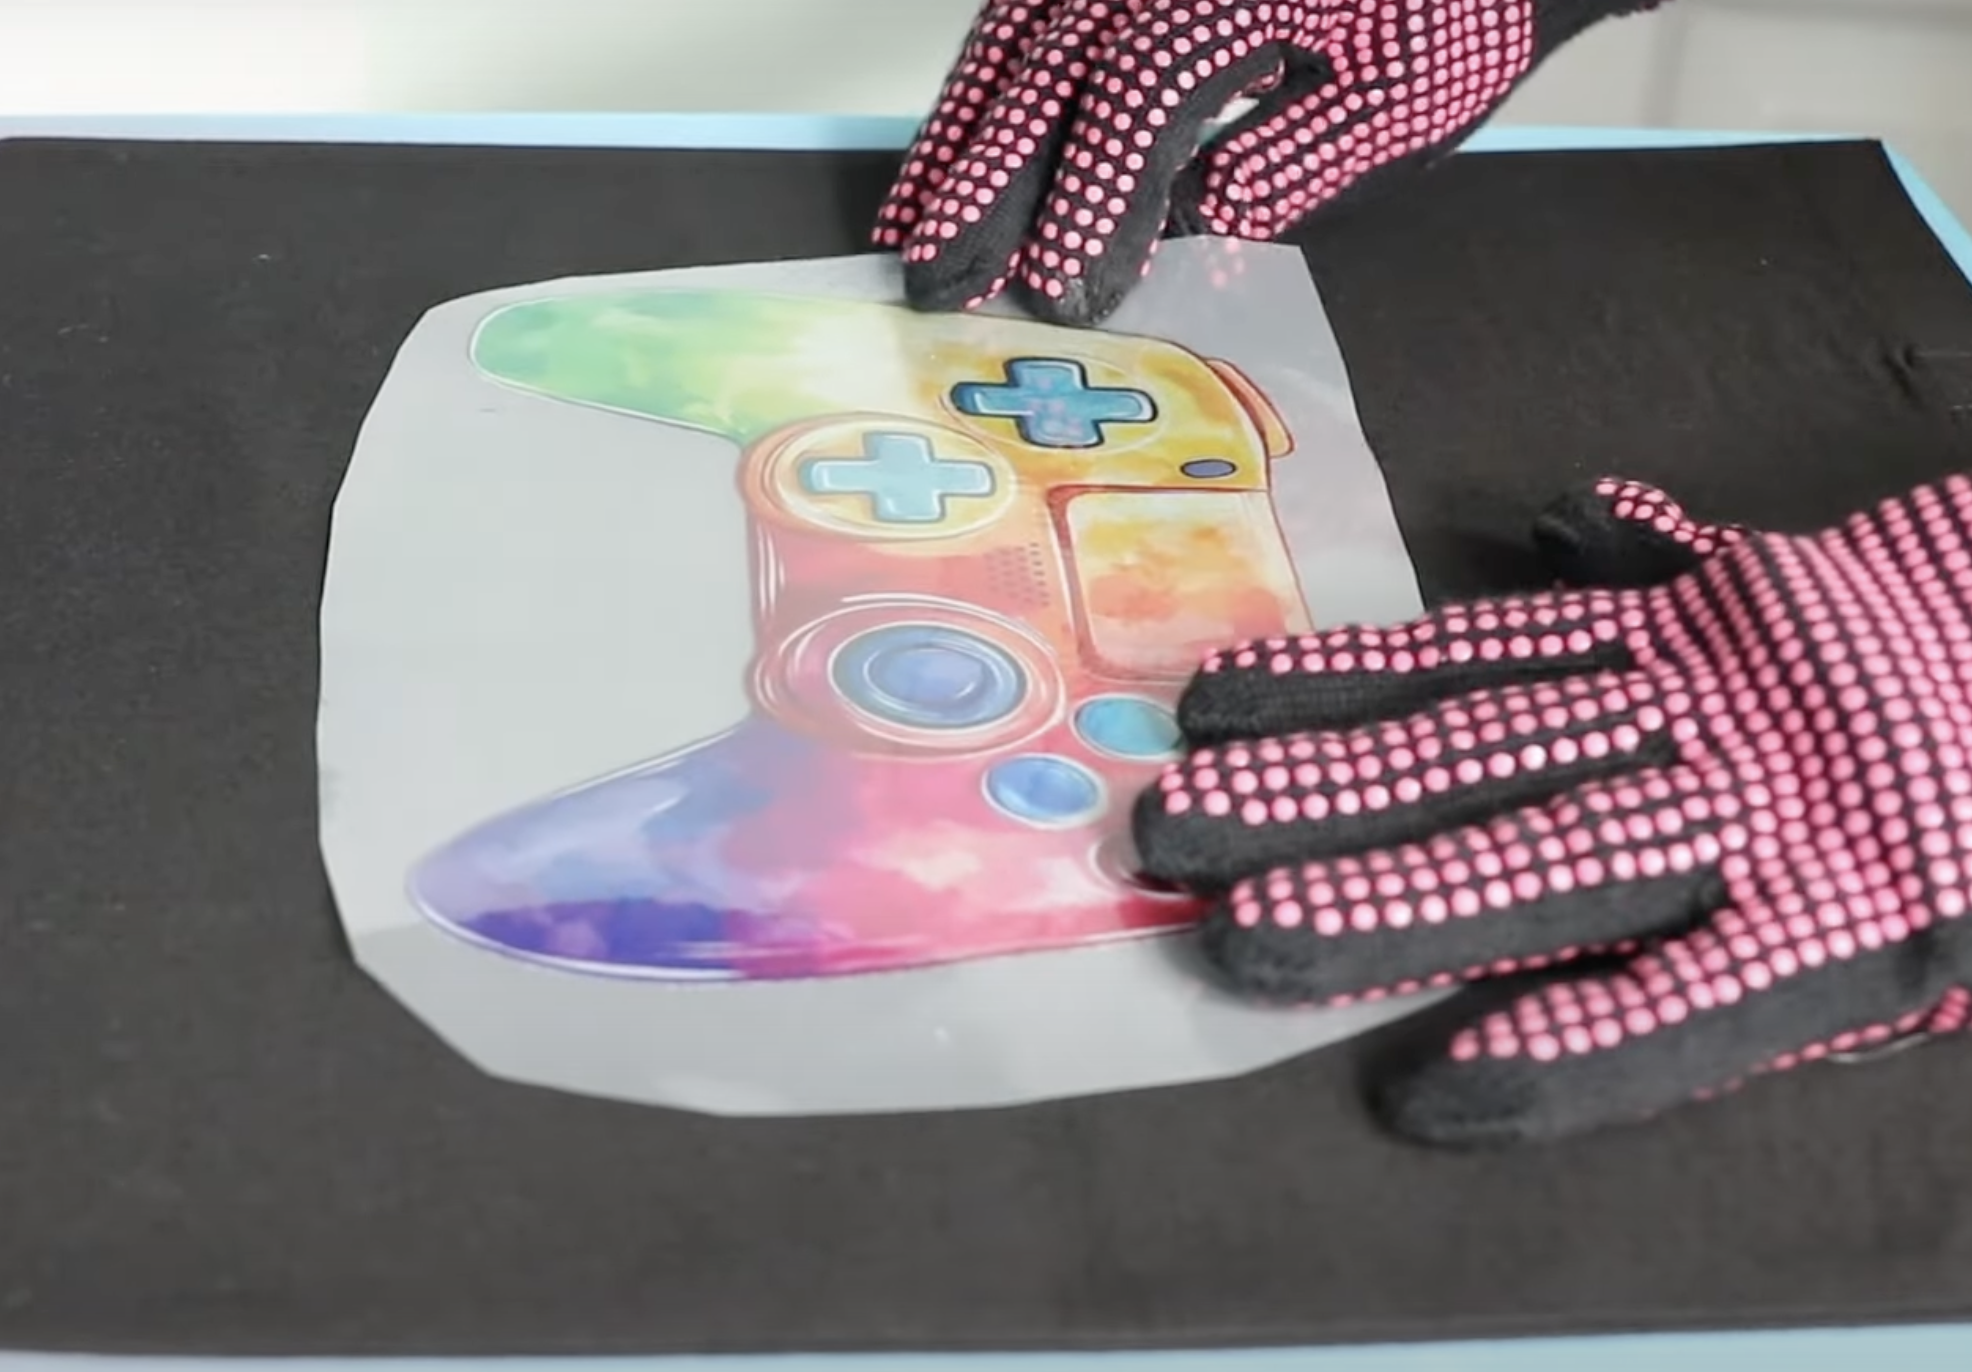
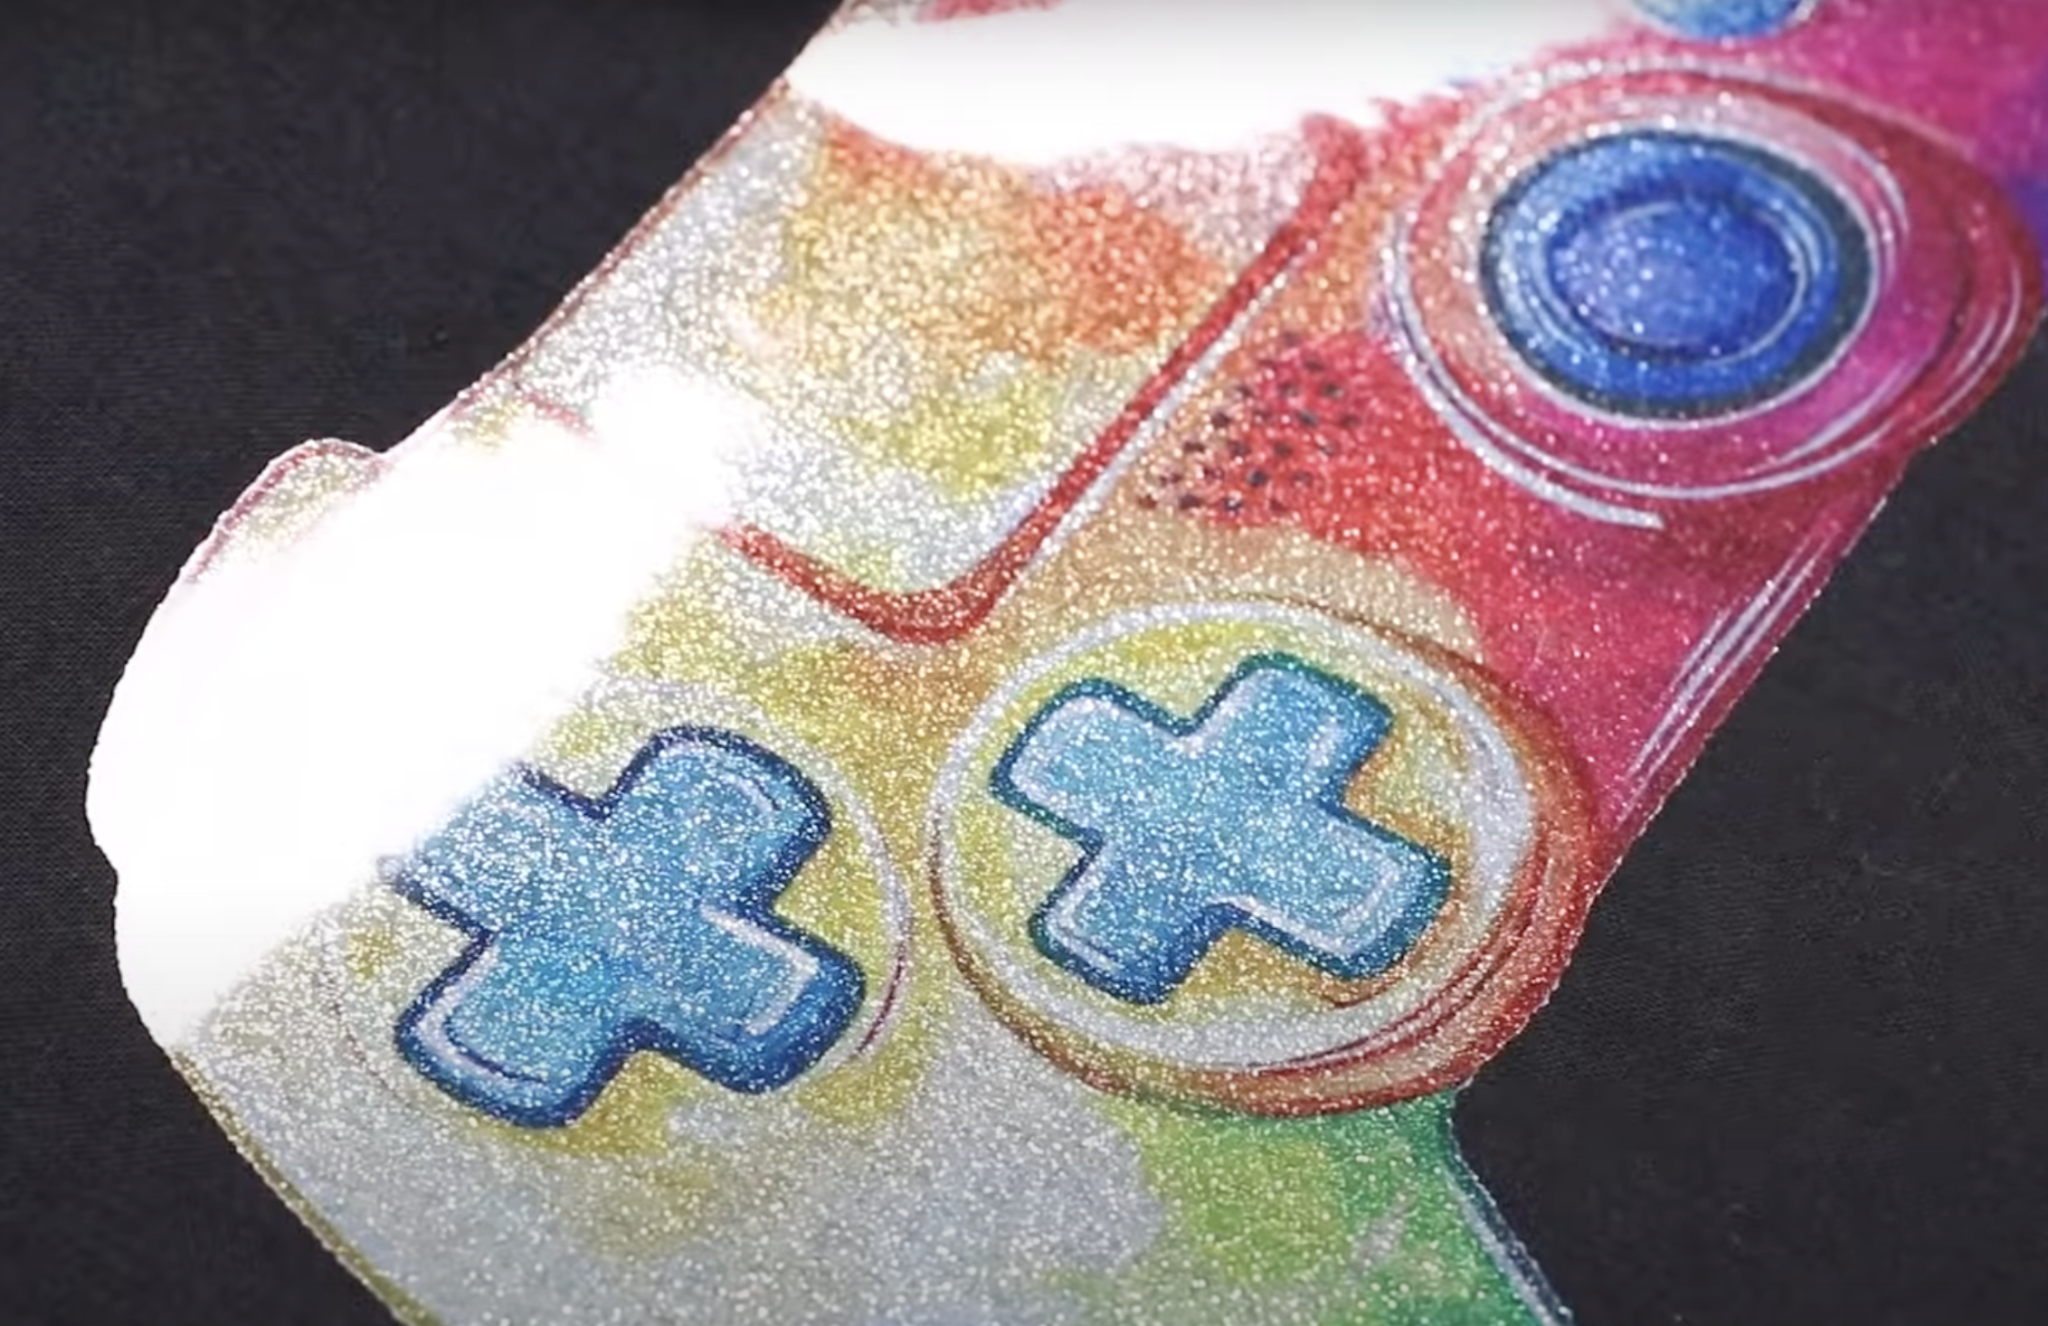
Lift the carrier sheet in one corner and roll it away from the print. If the project is cool, it should remove very easily. Now we can see the gorgeous glitter transfer.
Anywhere the design was white now has a silver glitter finish to it. You may see the black show through, but it won't be entirely black.
The design looks really great, even where it had light colors or was white.
OPTIONAL: Repress the Tote Bag
Here you can see that the design is very glittery and shiny. It feels very smooth to the touch.
You can repress this design to increase the washability and longevity of your final product.
For the repress, I set my heat press to 265 degrees and set the timer for 20 seconds.
When using the Glitter B paper, you need to use the glossy finishing sheet. This finishing sheet has a shiny side and a matte side.
Place the tote bag in the heat press and add the glossy finishing sheet, shiny side down, on top of the design.

Make sure you cover the entire design.
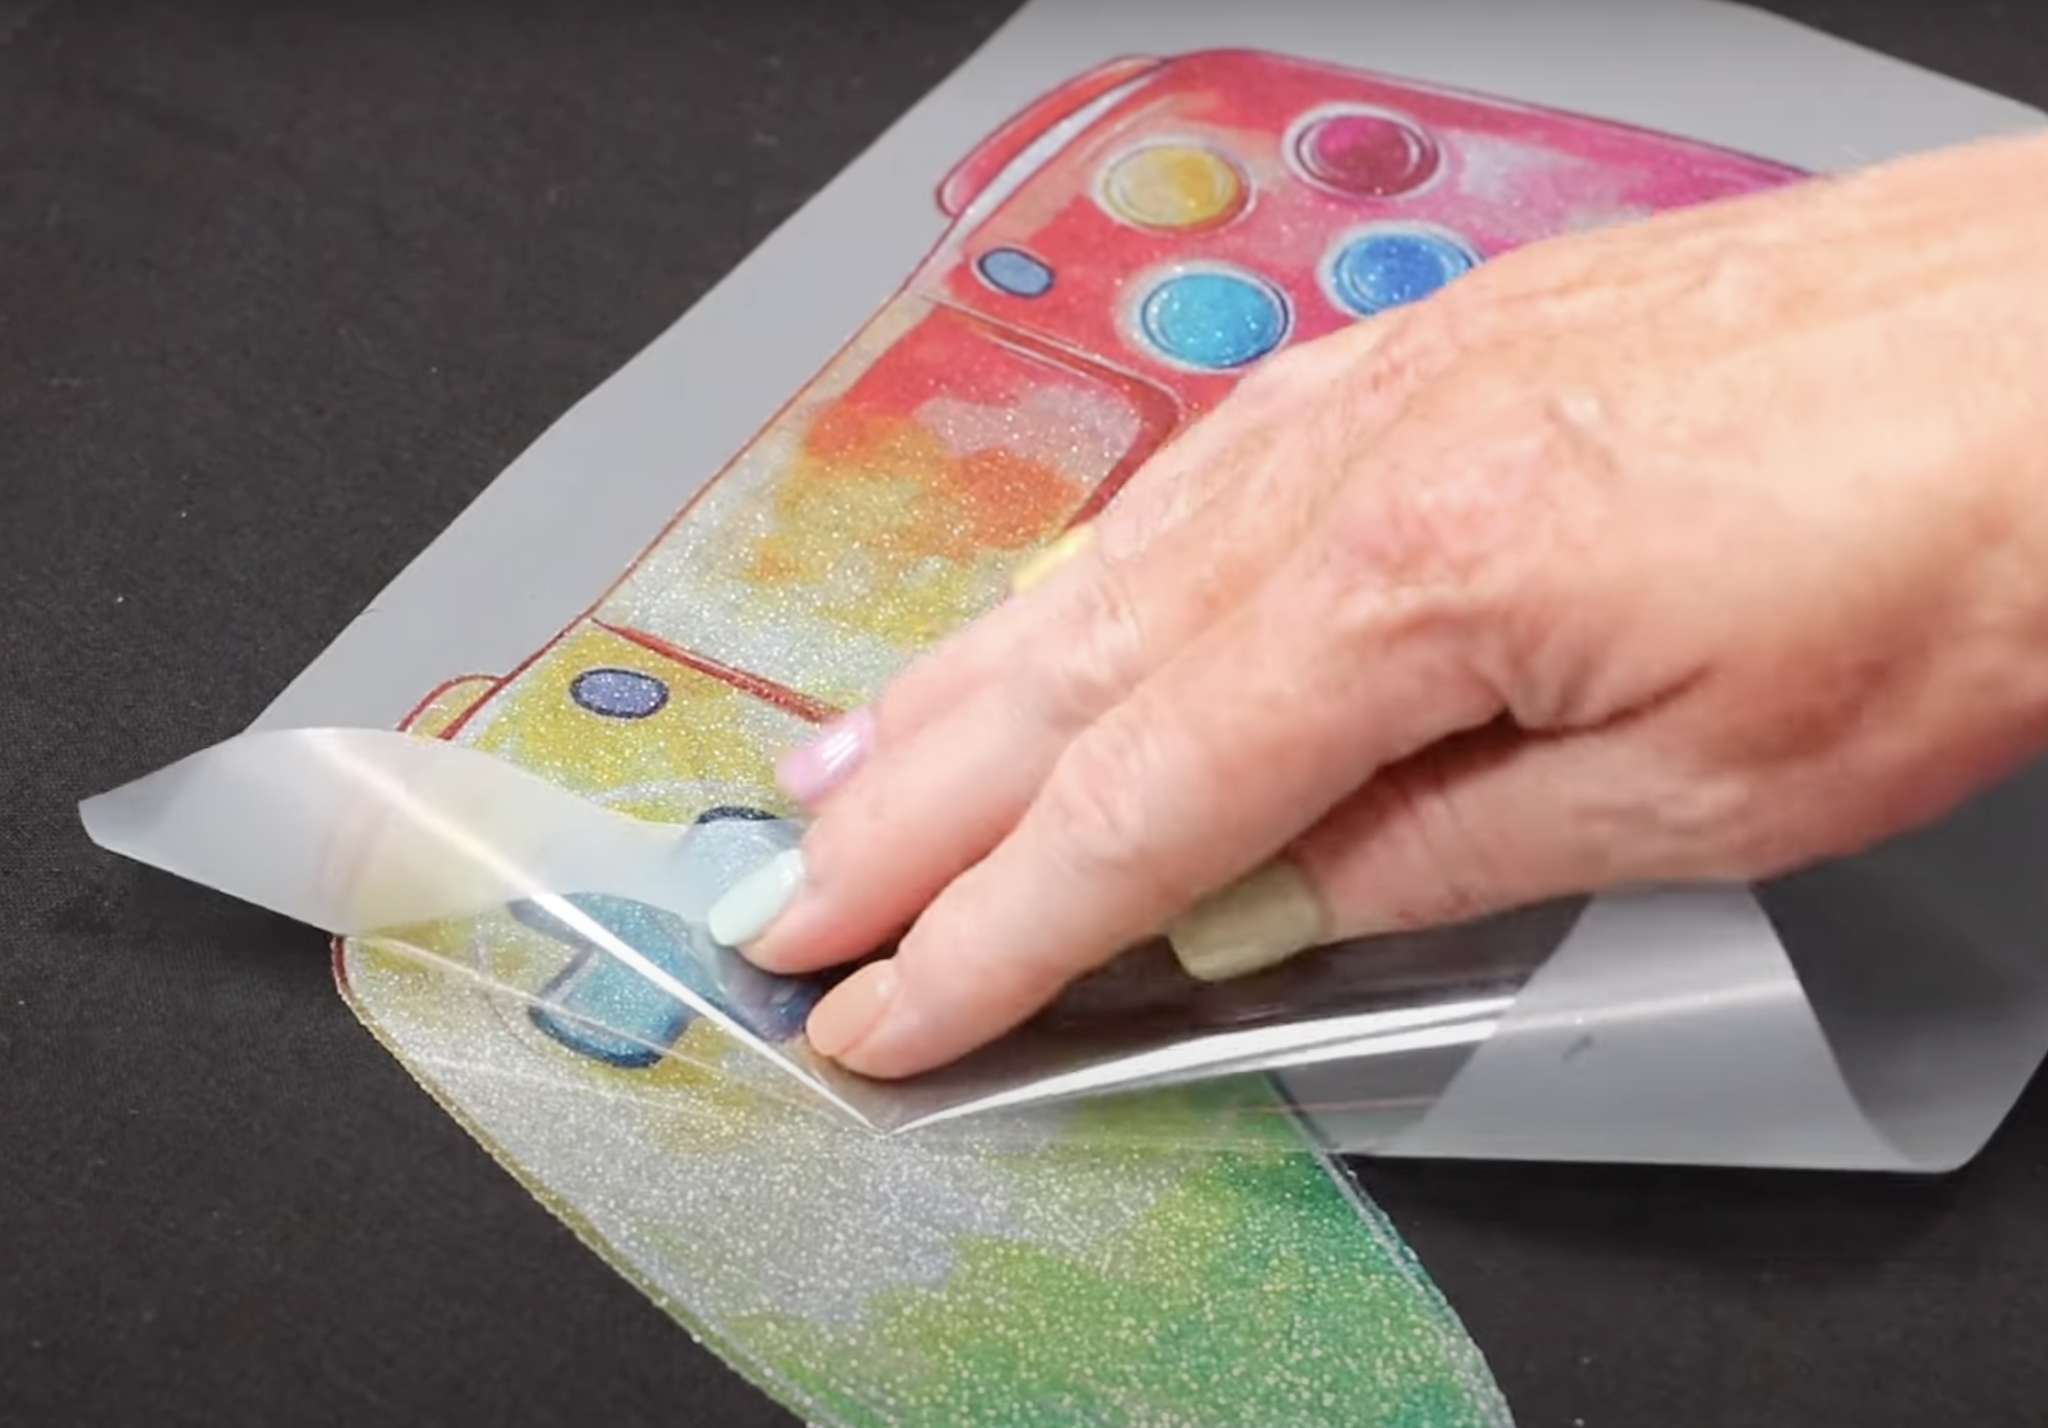
Press for 20 seconds. When the time is up, open the press and wait for 10 seconds before peeling back the finishing sheet.
To finish the project, gently stretch the design in all directions while it's still hot.
Should You Make Glitter Transfers with the iColor 560 Printer?
I wanted to show you the difference between a white toner project and a clear toner project with glitter.
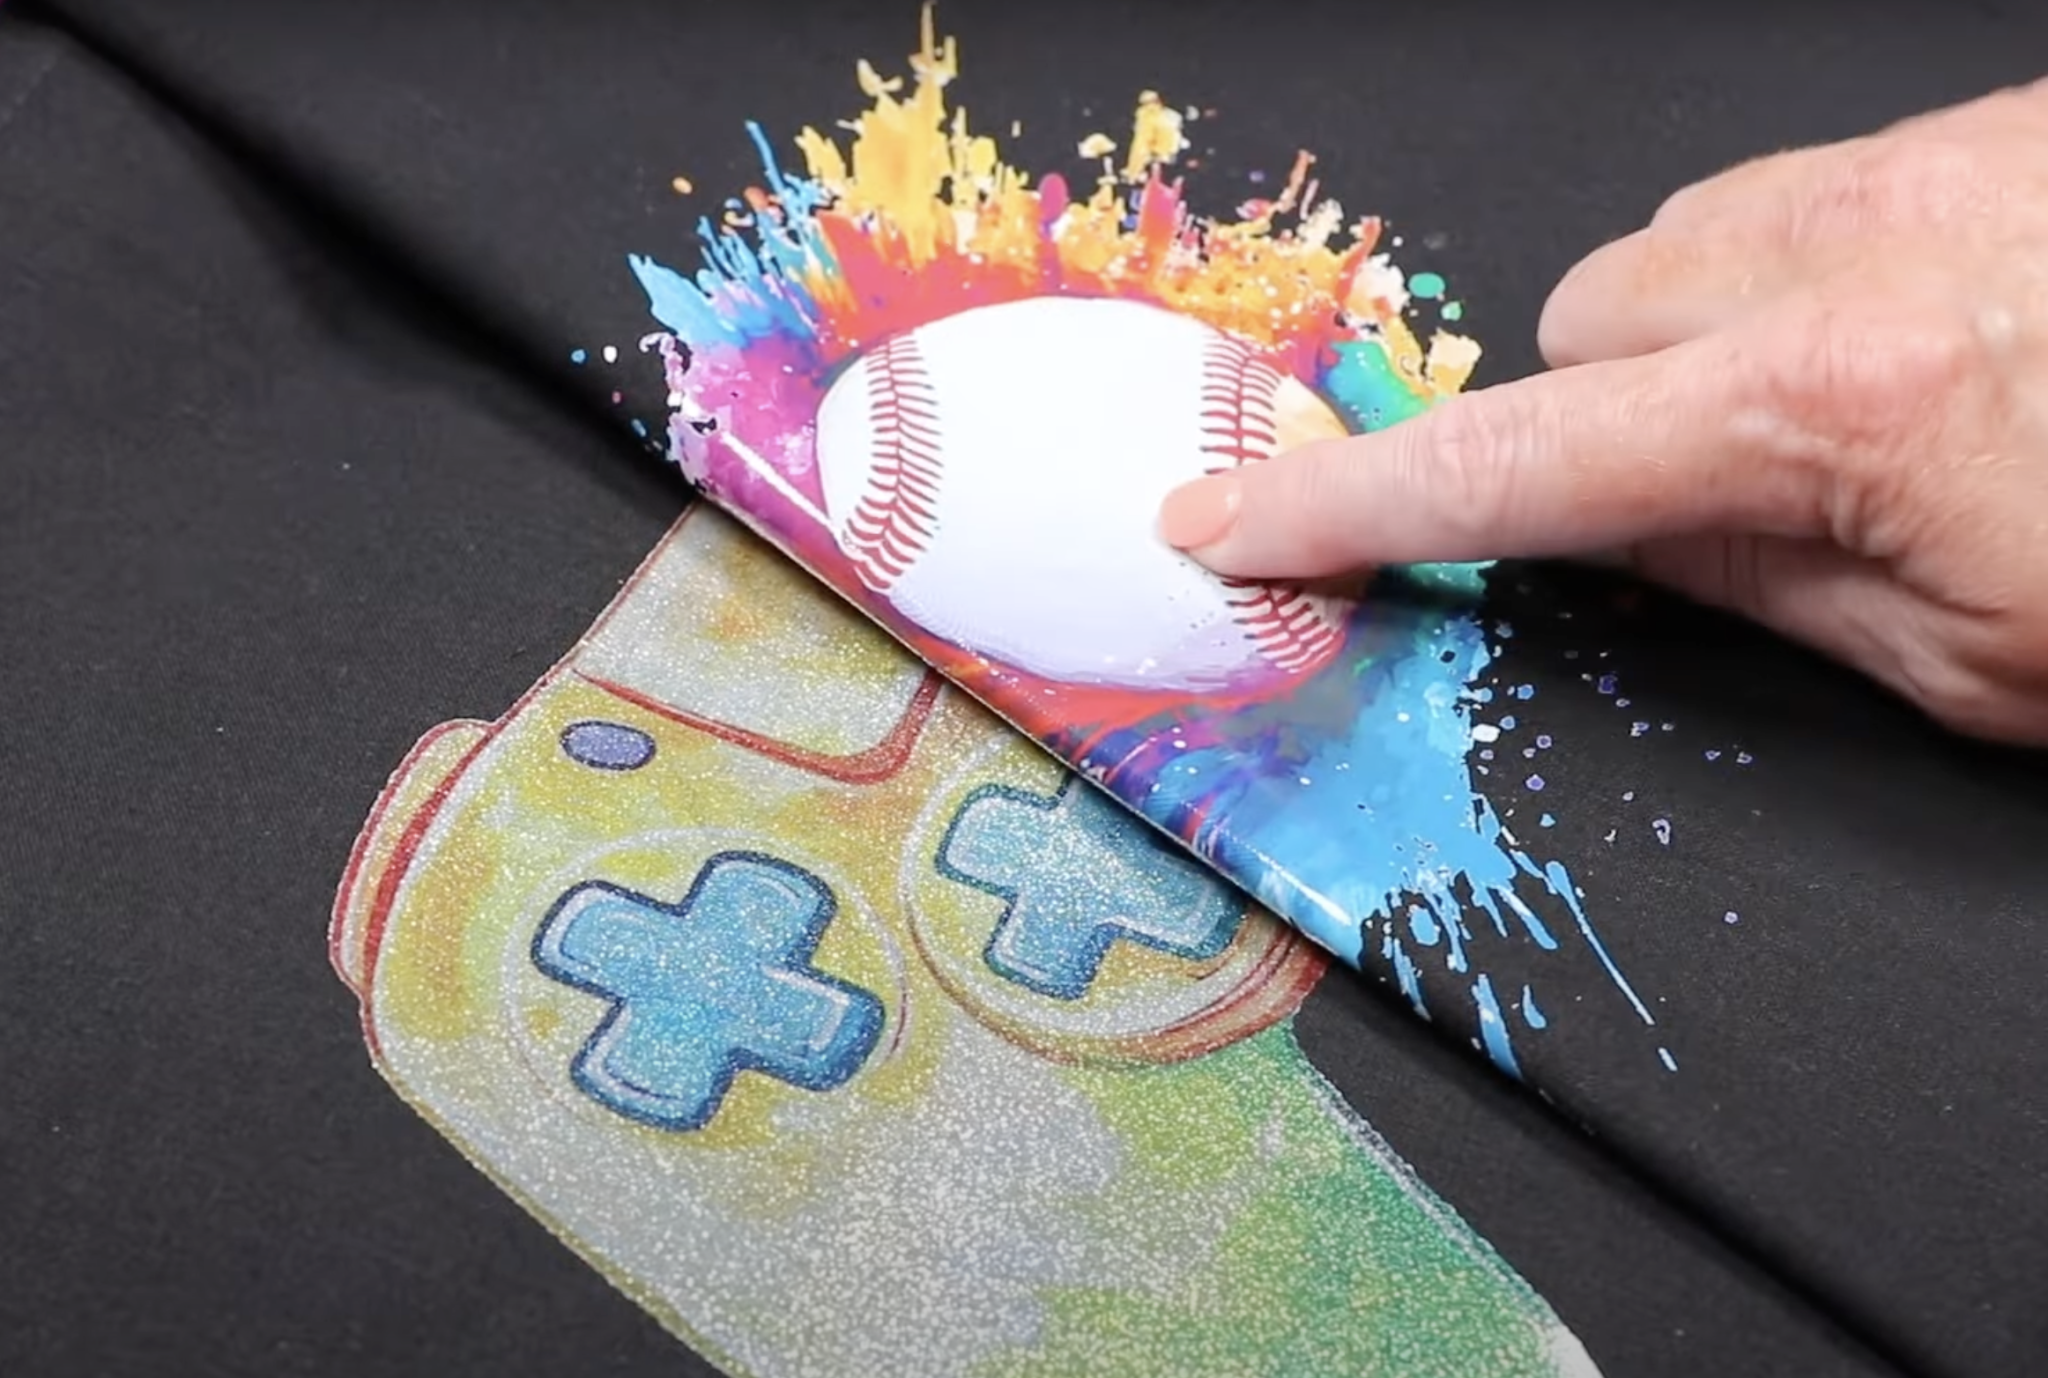
You can see that the white toner project is brighter and really pops off the shirt.
The glitter transfer isn't as vibrant, but it looks really good, and I love the glitter look.
There are definitely a lot of projects I can see making with the glitter transfers.
I absolutely love the results of this project. Even after the post-press, the design looks really glittery. I am definitely impressed.
One of the things I like the most is that even though it looks like glitter, it doesn't feel like glitter. It's smooth and not at all scratchy.
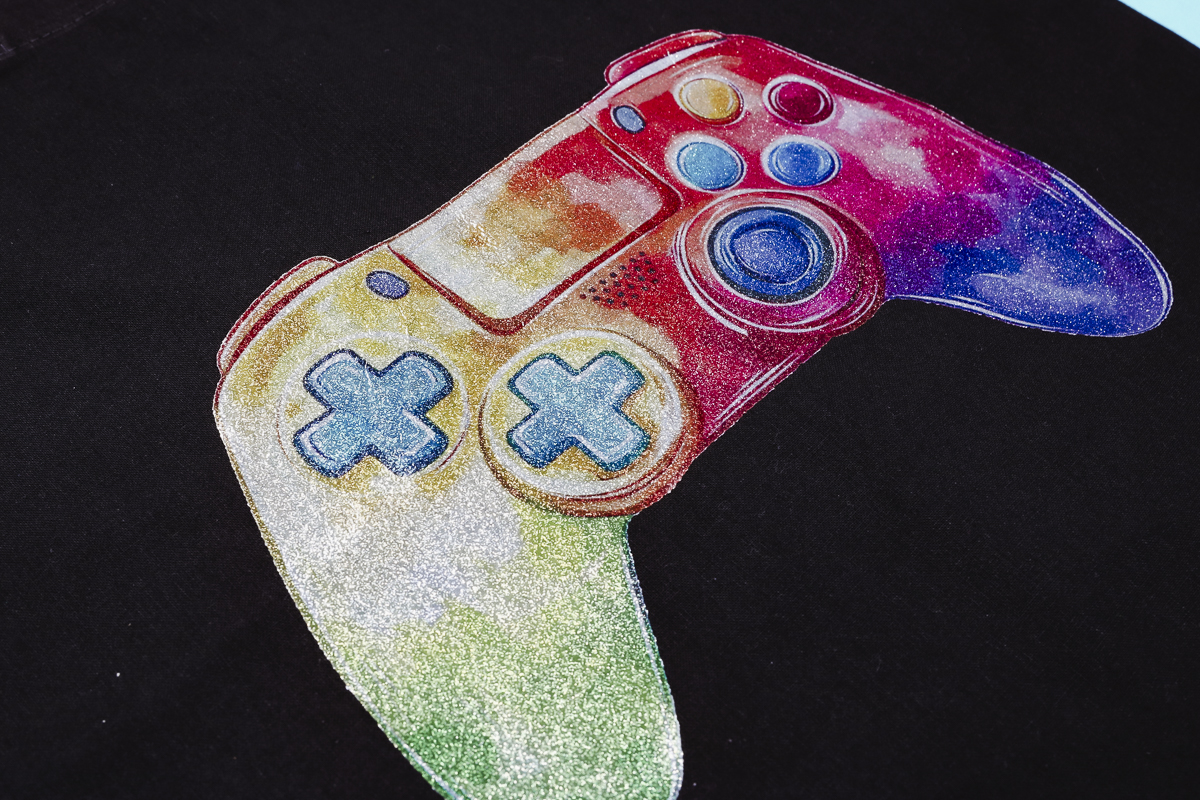
I also really love that you can have multiple colors on a design in one layer.
If you already own an iColor 560 printer, this is another type of print you can make with that printer. If you don't own a 560 and you're looking for a printer that can do it all, this may just be the right printer for you.
I hope I've answered any questions you have about making glitter transfers. If you have any additional questions, leave them in the comments, and I'll be happy to answer them for you.