

Have you ever wanted to engrave metal with color? If you have, you're going to have fun with the WeCreat Lumos. Today, I'm going to show you how to do color metal engraving with multiple colors on stainless steel.
This process is so fun and original. It adds a unique touch to metal projects and will actually allow you to charge more for handmade items.

I have reviewed the WeCreat Lumos in another post and touched on the color engraving. This is more in-depth on the color metal engraving abilities of this laser.
You can watch me color engrave with the WeCreat Lumos by pressing play on the video below.
How to Color Engrave Metal with WeCreat Lumos Laser
I tested a couple of metal types with the color engraving, and I had the best success with stainless steel. I will show you the results on both stainless steel and aluminum, so you can see the differences.
Supplies Used
Step 1. Create Color Engraving Test
Open WeCreat MakeIt and power on your laser. Connect the device and make sure you have it set to Red Light.
Choose the material you're using from the dropdown menu. I am using stainless steel.

It's very important to do the color engraving test on the exact material you're using. You'll want to order at least two blanks so you can get the correct color codes.
Click the button on the side of the machine to focus it on the material you're using.
Next, click the color engraving button and confirm. If you're engraving the same material a second, third, fourth, etc, time, you do not need to do these steps again.
Go to the Toolbox and select Color Engraving Test. Click Next and you'll be prompted to manually focus the laser. We have already done that.
Click Next, and I am choosing a 30 Block Count. You can try 10 if you want. Click Next, and it will show you what is going to be engraved on the surface and how large it will be.

My design is too big for the material I'm using, so I resized it by clicking on the design and dragging the corners. You can also move the design to relocate it if needed.

The Lumos will refresh, which will show you where the material is, so you can make sure the design is completely on the material. Resize and relocate as needed to get it set up exactly how you want it.
Close the cover and click Send. Click the button on the top of the machine to start the process. When it's done, lift the lid and remove the Color Engraving Button.
Step 2. Review Color Engraving Test
Click Next Step within WeCreat and look at the color IDs.
I created color engraving tests on both stainless steel and aluminum.
On the stainless steel, you can see all the different colors. Each color has a number beside it, and you can pick whatever color you like best.

On the aluminum, the only color that really shows is a variety of different yellows. No blues, purples, or reds.
What colors you'll be able to engrave will depend on the material you're using.
I selected color 167 in the software and then clicked Next Step. On this screen, I didn't change anything, but you can adjust the column and row numbers and the spacing if you want to.
Click Next Step, resize and move the grid so it will fit on the blank.
When you're engraving this grid, don't touch the focus knob. Leave it as it was for the previous grid. When you select the color ID 167, it is going to automatically go to the correct focus. The dots may not meet this time, and that is okay.
When that one is engraved, you'll see the colors, and there are speed settings along one side and a power setting across the bottom.
I can now use those settings to set the engraving for that color.

NOTE: This is all on stainless steel; on the aluminum, I only get shades of yellow, maybe a little orange.
Step 3. Create a Color Engraving Design in WeCreat MakeIt
Click Import within MakeIt and find the file on your computer. I am using an SVG file that has multiple layers. Each piece of the design is a layer.

Before you turn the color engraving on, add your blank to the laser and auto-focus so the dots are overlapping. Take a photo of the material in your laser. Refresh the screen before turning the color engraving on.
With everything in place, turn on Color Engraving. Enter the color ID that you picked before you engraved the last grid. Mine is 167.
With the color ID entered, you'll see that the red and blue dots don't overlap anymore. That is okay, leave it the way it is.

For each layer of the design, you'll input the power, speed, and line density settings. For the green, I liked 60% power, 10% speed, and a line density of 300.
Go through each layer and enter the color ID settings for the color you want to use. You can pick any colors you want; it does not need to match the image you're using. Use any colors you like.

Depending on how many layers your design has, this process can take a while. The fewer layers, the less time it will take.
Step 4. Color Engrave the Metal Blank
With all the layers set, we're ready to engrave. Close the lid of the Lumos and click Start.
When it's done engraving, lift the lid, and we can look at the results.
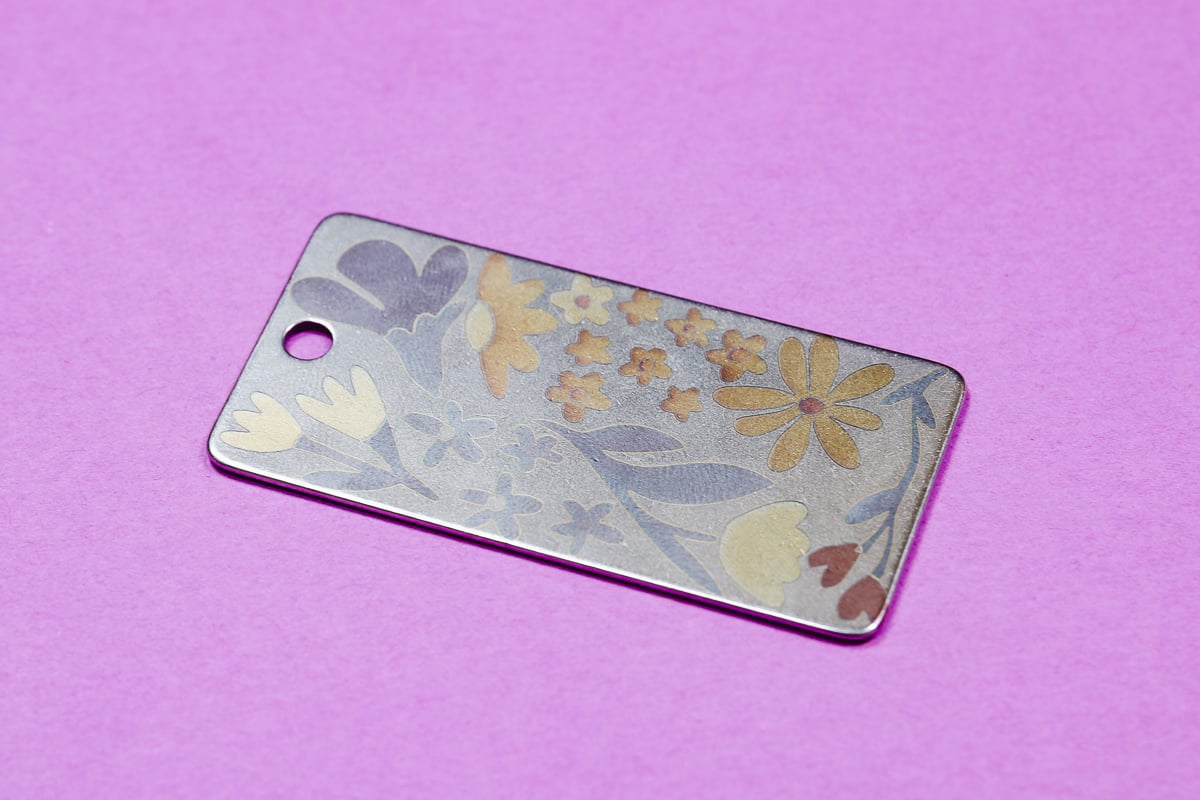
I am really impressed with the results I got with this stainless steel blank. You can see the yellows, blues, greens; there are some reds, and a variety of other colors I was able to get with this process.
All that's left to do to finish this project is to add the key ring.
Tips and Tricks for Color Engraving Metal with the WeCreat Lumos
There are so many possibilities with this technique, and I can't wait to do more projects.
The most important thing is to test the exact material you're using. The material really does make a difference. Each material type will be different.
My stainless steel blank worked much better than the aluminum I tried. I tried a different aluminum sheet, and it had a coating or something on it, and it didn't get any colors at all.
Different materials will each have different results. For every new blank, you'll need to do the Color Engraving Test. You will need at least two blanks for every color metal engraving project that uses a new blank.
I recommend stainless steel for these projects. I don't recommend aluminum unless you're only looking to engrave metal with yellow and orange.
These instructions are for color engraving metal with the WeCreat Lumos laser. If you're doing color engraving with a different laser, the steps may be different.
I had a lot of fun testing this technique. I hope I've answered any questions you have about color metal engraving. If you have any additional questions, leave them in the comments, and I'll be happy to answer them for you.


