
Jen with 100 Directions is back again this month and this time she has an adorable gift idea for the kids! Get started on your own DIY paper doll activity set to give to any child on your gift giving list.
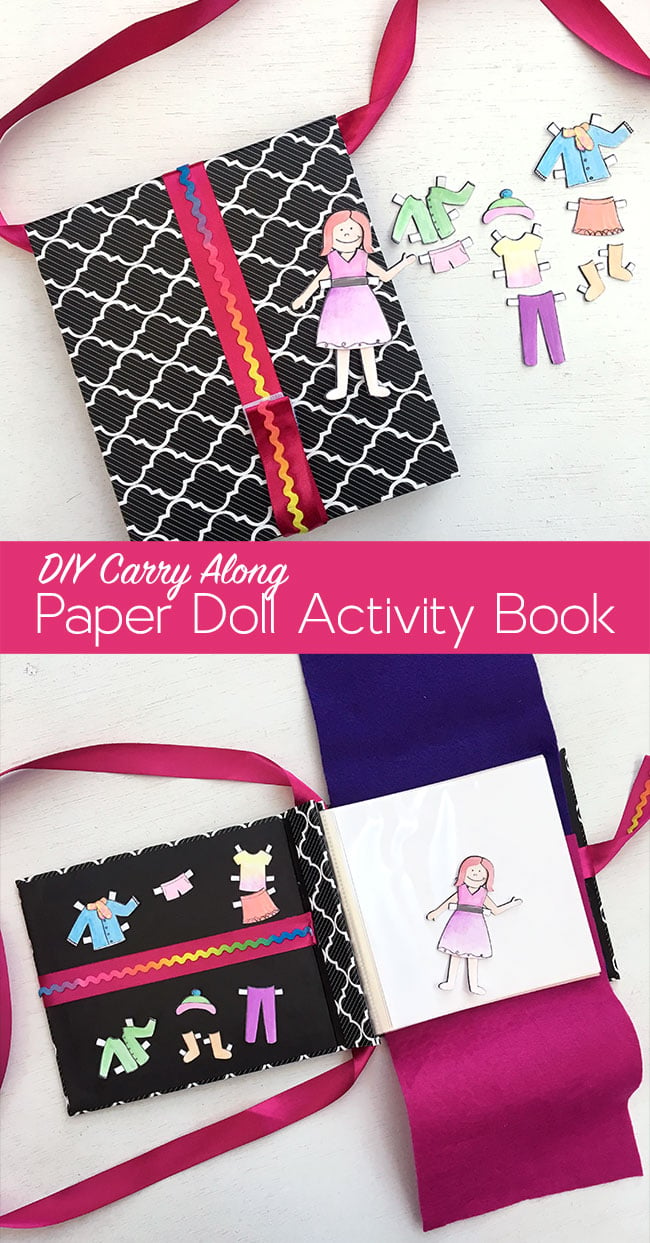
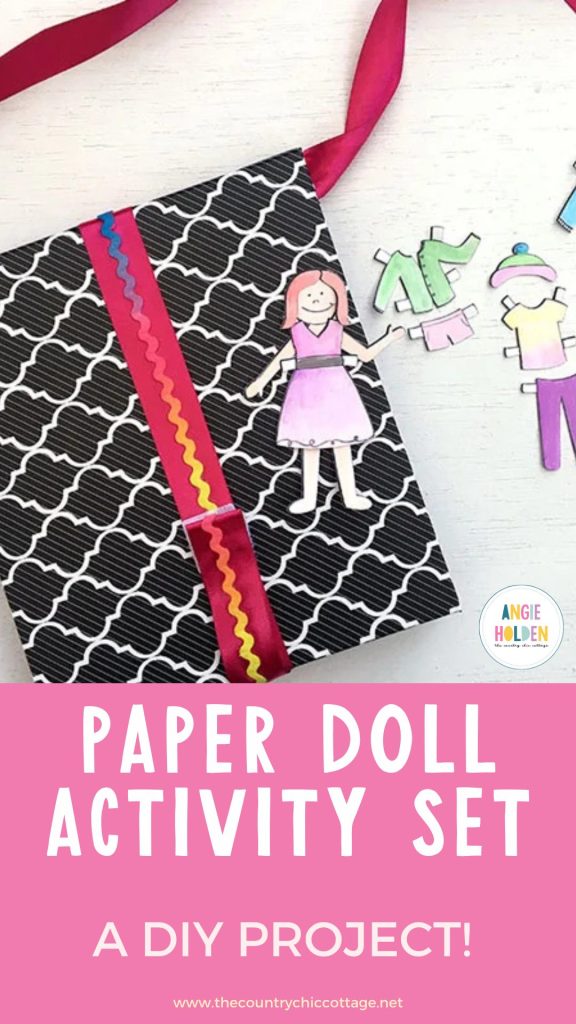
Make your own cute take-along paper doll purse to carry all those cute paper dolls. This DIY paper doll activity set makes a great handmade gift that can be personalized and added to easily. Today I'll show you how you can turn a regular mini photo book into this cute activity book, perfect for small paper dolls… and no sewing required!
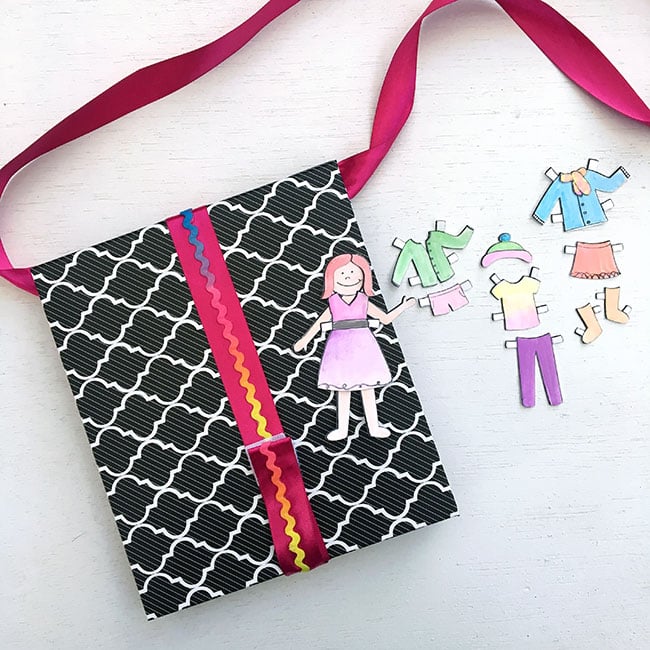
Remember paper dolls? They used to be some of my most cherished “toys”! If your daughter loves paper dolls as much as I did, this will be the perfect gift idea!
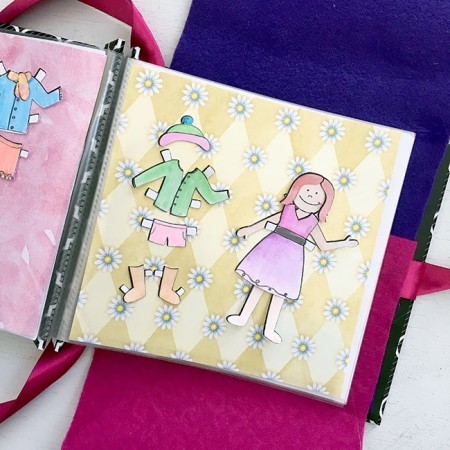
This activity book is made from a photo album! The photo pockets are the perfect place to store play scenes and paper doll outfits. The album holds all the pieces and parts for the paper dolls and provide a on-the-go play space your kids will love!
Use some of your fabric scraps and extra scrapbook sheets to for this cute activity. I used felt in my book because it helps hold paper pieces in place, even when playing in the car or other travel activity.
If you'd like to make your own paper dolls for this cute kit, check out my printable paper doll set.
How to Make a DIY Paper Doll Activity Set
Supplies needed for a paper doll activity set:
- Small photo album with photo pages
- Ribbon
- Felt
- Glue (I used hot glue, craft glue would work too)
- Velcro
- Scissors
Instructions

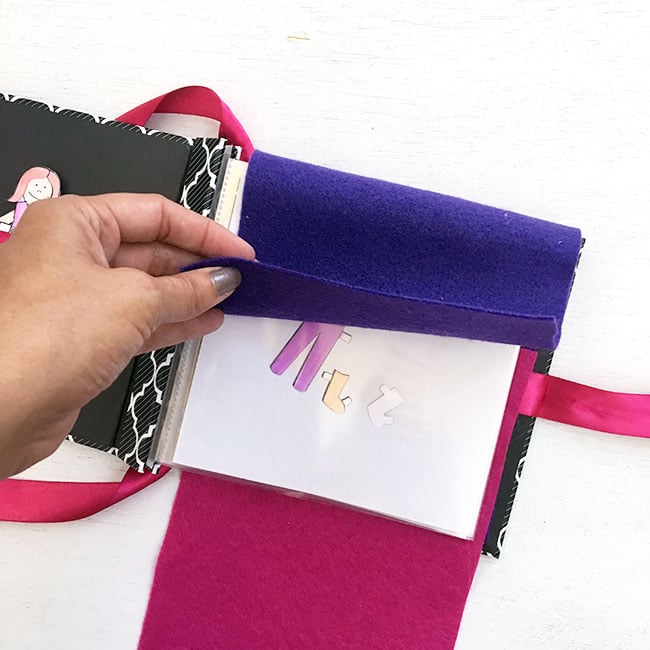
Cut and glue felt piece on the inside back of the book. The felt should be big enough to fold over a page. This helps prevent the paper doll pieces from falling out of the different photo pockets. I used two pieces of felt so one folds up and one folds down. This provides even more play space when fully opened.
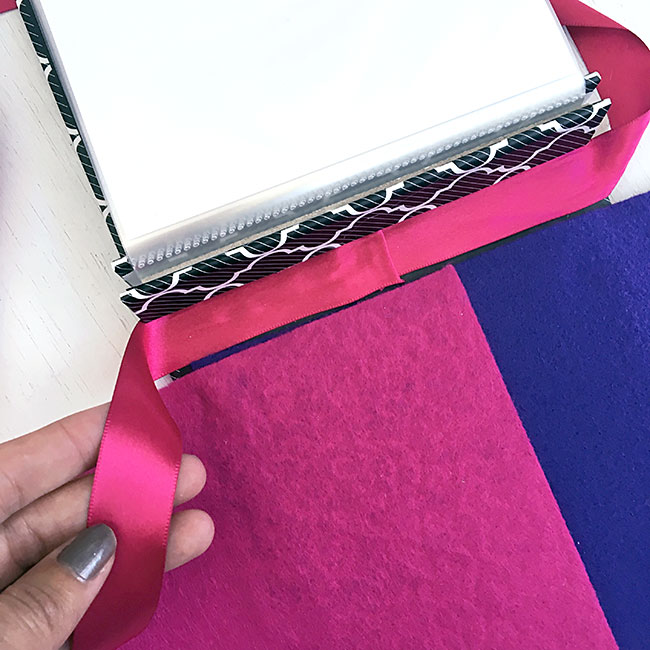
Wrap ribbon from front to back on the outside of the photo book. Leave enough ribbon to wrap around to the front of the book and add some velcro to this excess piece. This is how the book will stay closed.
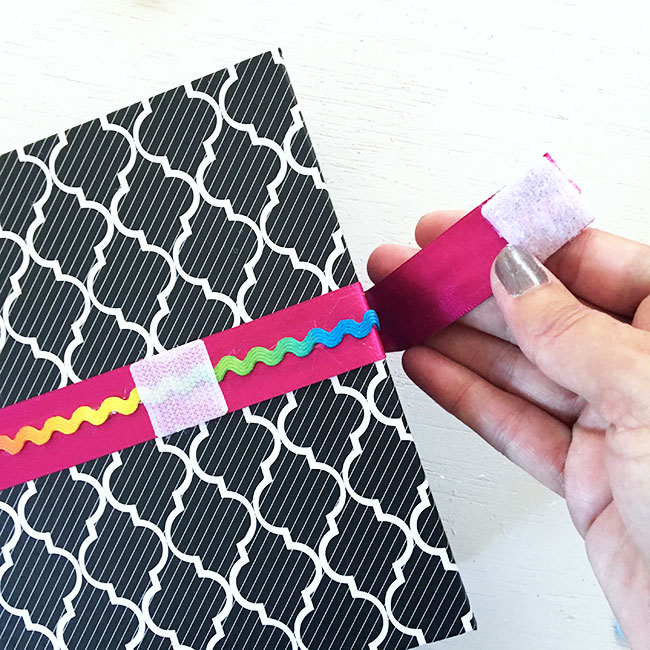
I wrapped the ribbon on the front, all the way to the center of the inside of the book. However, do not glue the ribbon down on the inside. This creates a nice place to stash the paper doll for easy access.

Finally add a ribbon to create a strap to carry the activity book like a purse. Glue the ribbon on the inside back of the book.
You can customize this DIY paper doll activity set however you'd like. Use your favorite paper and fabric colors. Draw on a plain photo book or buy a book already decorated. There are so many options, you can make a different book for each of the kids in the family!
You can also make your own customized paper doll with my printable paper doll set. You can download it from my site.
Supplies
- Small photo album with photo pages
- Ribbon
- Felt
- Glue I used hot glue, craft glue would work too
- Velcro
- Scissors
Instructions
- Cut and glue felt piece on the inside back of the book. The felt should be big enough to fold over a page. This helps prevent the paper doll pieces from falling out of the different photo pockets. I used two pieces of felt so one folds up and one folds down. This provides even more play space when fully opened.
- Starting inside of the front book cover, attach the end of the ribbon to the inside of the book cover with a dot of glue. Then, wrap the ribbon around the outside of the photo album with excess ribbon.
- Attach a piece of velcro to the end of the excess ribbon as a “clasp” to keep the book closed.
- Do not glue the ribbon completely down on the inside. This creates a nice place to stash the paper doll for easy access.
- Finally add a ribbon to create a strap to carry the activity book like a purse. Glue the ribbon on the inside back of the book.
- After all is dried, the book is ready to gift!
Notes


These are super cute! I have the fondest memories of playing paper dolls as a kid!!!
This is the cutest thing! You’re very clever! Thanks for the printable doll set too!
2ut