
Welcome to day 16 of the Beach Bash! Are you ready for some beach themed wall art?? Remember we are partying from June 27 to July 20 with the former contestants of One Month To Win It. If you have missed any of the posts head on over here and catch up!
Next up we have Emily from Domestic Deadline! Oh yes make your own pool float!! Amazing stuff y'all!
*~*~*~*~*~*~*~*~*~*~*~*~*~*
Hi! I'm Emily from Domestic Deadline, my piece of the bloggy world documenting the crafts and craziness that side track me from the things I should be doing (dishes… again?). I have three kiddos that keep me on my toes, but I love to craft, cook and create for them and with them.
When I got Angie's email to participate in her Beach Bash, I was so excited! Summer is my favorite time of year, especially when I get to lounge on the beach! Even though I could find a sunny patch on the Jersey Shore any day of the week, my favorite beach is Linwood Park, in Vermilion, Ohio!
What's the best part of the beach on a hot summer day? The water of course! Lounging on a float in the water is always so nice, until I'm trying to remember where the patch is and find the hole!
Time to steel your kid's pool noodle and make your own Lake Lounger! You'll need:
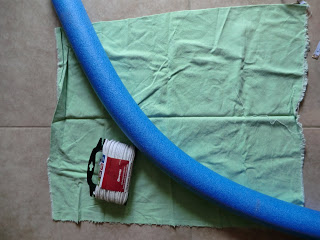
(2) 6 foot pieces of Rope
(1) 40 inch by 27 inch home decorator fabric (or double up some left over cotton from your stash)
(1) Pool noodle, go for the wider heavier type if you want to make this for an adults use
Basic sewing supplies
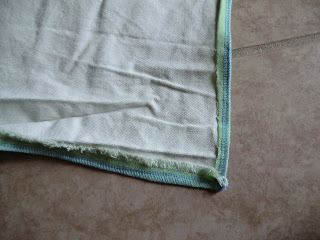
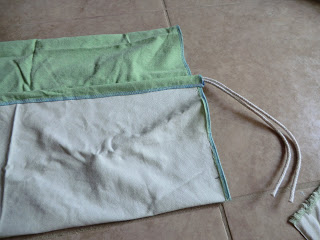
Step 1: Fold over edges of all four side, I used a serger (turned the blade off) but you could also zig-zag all the way around, making the edges sturdier.
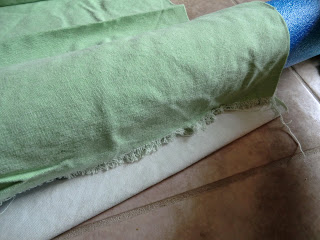
Step 2: Folding over the end (yes, I took this picture before sewing all the way around), sew a tube for your noodle to slide in to. We are folding back your length, the width after sewing around is about 25 inches. My noodle measured 11.5 inches around, so I measured back 13 inches for my sew line.
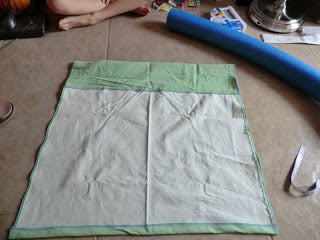
Step 3: On the opposite end, sew a narrow tube, about 1.5 inches, or a half inch wider than the width of both pieces of rope. Your piece should now look like this on the back side (yup, too lazy to iron this first!). Feed your ropes through, leaving an equal amount on both sides.
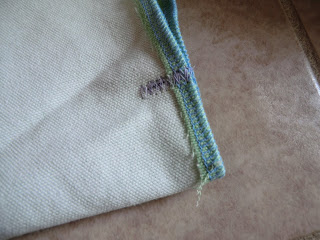
Step 4: Fold your piece back to the sew line of your noodle tube (yup, that's a technical term!) and make a mark 1.5 inches up from the fold on both sides.
Step 5: Sew an inch zig zag repeatedly over this line.
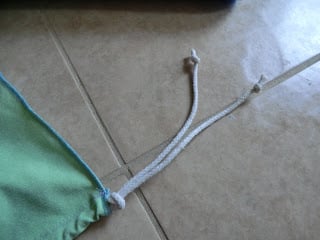
Step 6: Knot your rope at the ends and at the edge of the fabric, repeat on other side.
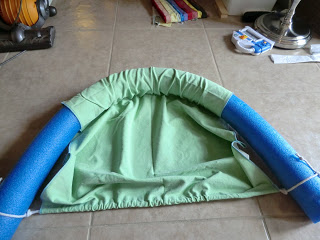
Step 7: Arc your noodle and tie one end onto each side to look like this:
Step 8: Throw your daughter into the pool and make sure it works!
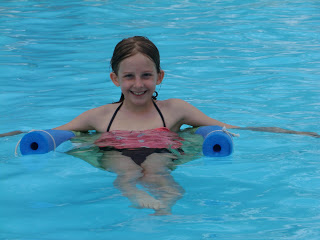
This was a quick and easy project that took longer for the kids to get into their bathing suits than it did to make! Plus I got to use up some fabric from my stash that I don't even remember where it came from.
I'd love for you to stop by Domestic Deadline and say hi. Check out some of my of my favorite past projects and meet some of my Summer Lovin' guests.

Peace be with you,

*~*~*~*~*~*~*~*~*~*~*~*~*~*
Thanks Emily!! What a great idea!! Perfect for the pool!!
The Beach Bash has been full of great ideas and runs til July 20 — follow along with The Country Chic Cottage and don't miss a day!! Grab a button if you want and help spread the word!!

I will be having a little giveaway day at the very end of the beach bash. If you have a beach themed item you would like to giveaway, drop me an email!! 🙂
Posted at Show and Tell on Blue Cricket Design.
Posted at Whatever Goes Wednesday on Someday Crafts.
Posted at What I Whipped Up Wednesday on Sugar and Dots.
Posted at Good Life Wednesdays on A Beach Cottage.
Posted at the party on Organize and Decorate Everything.
~Thanks for stopping by!~
Posted at What I Whipped Up Wednesday on Sugar and Dots.
Posted at Good Life Wednesdays on A Beach Cottage.
Posted at the party on Organize and Decorate Everything.
~Thanks for stopping by!~
~Angie~


Holy smokes this is brilliant!! Emily rocks socks!!
Thanks so much Angie! My kids fought over it last week at the beach, I’ll be making more when we get home from vacation, that’s for sure.
Emily
domesticdeadline.blogspot.com