
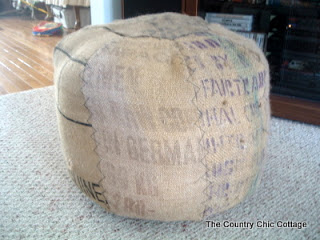
I did it!! I made my own pouf — aka ottoman! Now you can make your own pouf too! The Nester blogged about em a while back and made me think “hey I could make that”. Then my better homes and gardens magazine came…oh yes…a pouf with INSTRUCTIONS on how to make your own!!
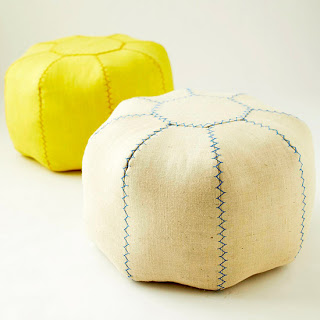
Image courtesy of Better Homes and Gardens
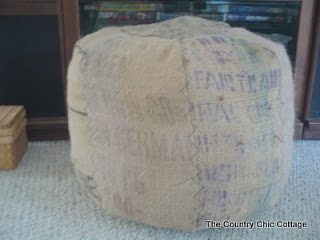
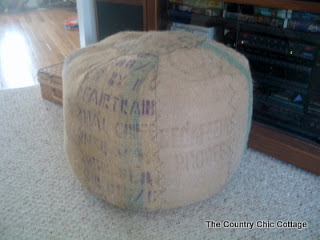
They suggested making one with burlap. Wellll…I have a ton of burlap coffee sacks . Seemed like the ideal project don't ya think?? So here she is….
Side story…I was almost done with her….loving every minute of it and dreaming of it being in my living room. My son walks in…gasps…and says “is that for me??” Course I said yes. And I am sure it will wind up in his room before long…sigh…good thing they are easy enough to make more!!

I am not going to recreate a tutorial here. Seriously Better Homes and Gardens does a fab job and the instructions are clear and easy to follow. Print em out and get to work!
I will give ya a few pointers..or lessons learned. If you are using coffee sack…don't wash em. Sigh…they don't wash well and make a mess of your washer…lesson learned…you get the benefit!

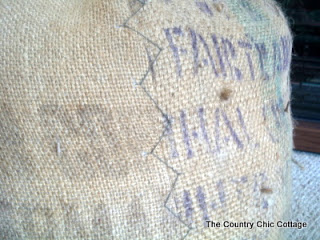
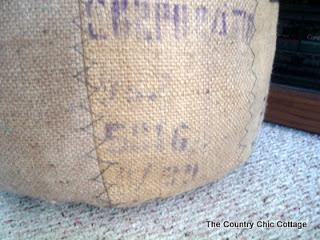
I double stiched each seam on my sewing machine. Call me safe if you wish. I did the straight stitch as the instructions called for then went right back with a zig zag stitch right next to it. Both with upholstry thread. Then you also hand stitch for decoration at the end. Seriously it seems ultra strong!!
Save your fabric scraps!! Most of the stuffing (about 2/3) is just whatever you have lying around. That really makes this project ROCK!! And it works great!! You still need the EXTRA large bag of stuffing from Wal-mart. But the scraps will save you a bundle! Plus you put your scraps in the bottom/middle. So it makes the bottom heavier which makes it stable when you sit on it. Awesome I am telling ya!! Works like a charm!
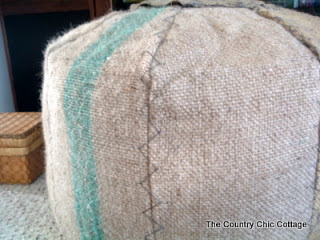
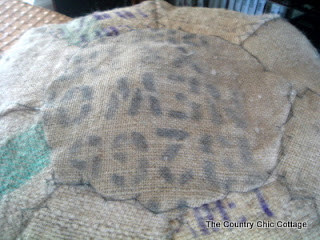
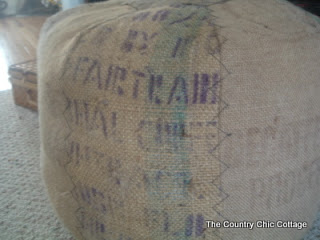
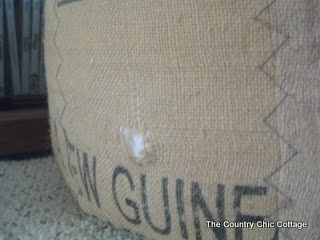
I used three full size coffee sack for my pouf. It took most of them to make it. The rest got stuffed inside! 🙂 I used various pieces…love the graphics and colors!! You can absolutely go plain burlap…or any fabric…and yes I have more pouf plans swimming in my head!!
I have a lot of other projects I need to tackle in the living/family room but this piece is a perfect addition for the vibe I want!!
Rustic, interesting, yet comfy!!
I even used one piece that already had a hole in it!! The pattern is fully lined with an OLD sheet!! 🙂 Love that!! So rustic holes are TOTALLY allowed!!
Download your instructions and patterns from Better Homes and Gardens today!! I can tell you from experience….you can do this!!
Are you ready to jump on the pouf bandwagon??
~Thanks for stopping by!~
~Angie~


So I’m in the middle of making one of these poufs following BHG’s instructions. I’m finding that the directions for the decorative stitching is wrong. To get mine to look right, I’m basically going 1, 3, 2, 5, 4 on the order of stitches. Did you find the same issues? If I follow there’s it doesn’t look right.
Susan,
I don’t remember having any issues. 🙁 But if it looks right the way you are doing it — I would run with it!
Angie
Can I use a normal sewing machine? Or do i need a special sewing machine for thick materials? Toni
Nope my regular old sewing machine worked fine! 🙂
Hi Angie – do you by chance have a PDF of the pattern with instructions that you could email to me or post in your reply? The link on BHG no longer works. I am dying to make this!
I was able to get the post to open with all the instructions. Try this link and see if it opens for you – https://www.bhg.com/decorating/do-it-yourself/accents/make-a-pretty-pouf/
Hi Angie! Absolutely love this! Thanks for sharing! I can see the link you have shared, however it looks like the link to the free pattern has expired or is broken 😞 Wondering if you might be able to send me the pattern download via email?
I’m sorry that link no longer works. It’s possible you can find another tutorial by doing a Google search. I don’t have the download to be able to share.
Bugger! No problem, thanks for letting me know.