
Did you know you can make your own DIY numbered tags out of clay and paper?
Today I’m going to teach you how to create faux metal numbered tags using supplies you probably have on hand right now.
I love using oven bake clay, it’s so fun and you can use it for so many different projects. I’ve used it to make earrings, ornaments, trinket dishes, and more.
One of my favorite things to do is create projects using supplies you wouldn’t normally think of.
I don’t think anyone would look at my numbered tags and guess they were made from clay and paper.
You’re going to love these tags. I know you’re going to end up using this process for many upcoming projects.
Let’s look at the supplies needed to make DIY numbered tags.
Supplies Needed to Make Metal DIY Numbered Tags
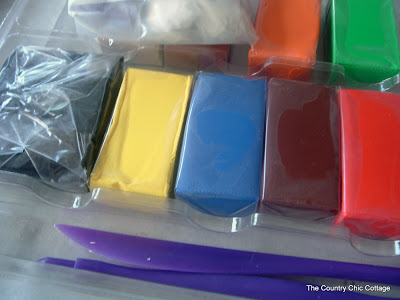
- Polymer Clay (I like Sculpey Brand)
- Stencil
- Clay Tools
- Paint
- Paintbrush
- Mod Podge
- Rusted Texture Paper
- Rolling Pin
- Exacto Knife
For the polymer clay, the color doesn’t really matter. I think a neutral color is a good idea but really, I would choose your rusted paper pattern and go with something that coordinates with that.
We will be painting all the areas that are exposed, we just don’t want it to show through the paper.
My clay came with a set of clay tools. These aren’t required but they are helpful. If you don’t have clay tools a knife will work just fine.
How to Make Metal DIY Numbered Tags
To begin we’re going to choose our clay color and then roll out a piece that is big enough for our stencil number and the tag.
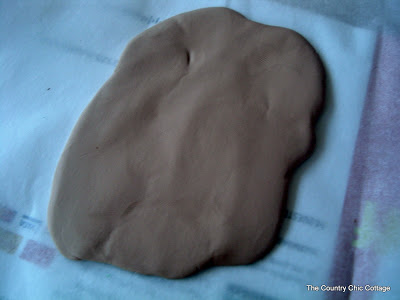
You want the clay to be rolled pretty thin, about ⅛-¼” thick. While these are going to look rustic we do want them to be pretty much the same thickness all the way across.
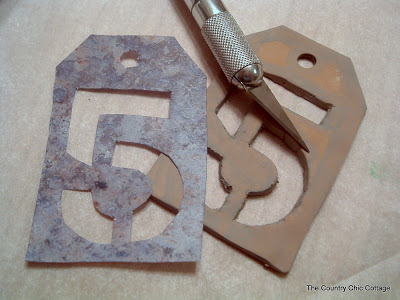
Cutting Out Stencil Numbers
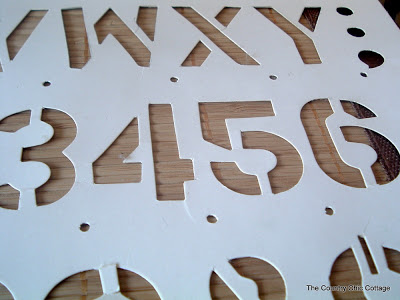
When it comes to cutting out your number you have a lot of options. I had this number stencil on hand so I am using it.
You can also use your Cricut machine to cut out a stencil. You have a lot of freedom when you use your Cricut to create your stencil. You’re able to use any stencil font to create the number you’ll use.
If you want to use your Cricut to create a stencil I have a file you can use in Design Space here. I did not weld the design so you can change the number to any number or letter you want.
If you’re using your Cricut to cut out a stencil make sure you use a material that is thick enough to hold its shape while you’re cutting out the clay.
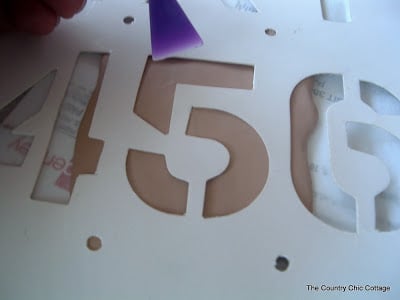
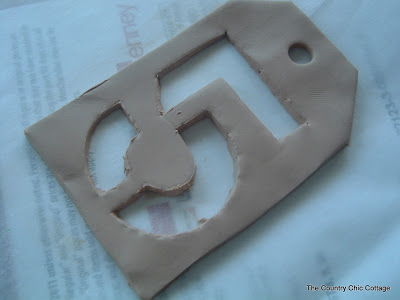
As I mentioned above, my clay came with some tools. To cut out my stencil I laid my stencil on top of the clay and then used the tool to cut out the number.
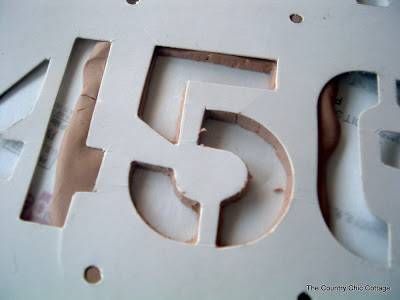
When placing your stencil make sure you’re leaving plenty of room all the way around your number to cut out the tag shape.
For the tag shape, I chose to freehand mine. You can choose to do that or use the shape from my Design Space file to create a stencil.
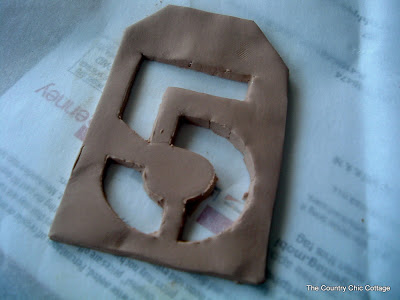
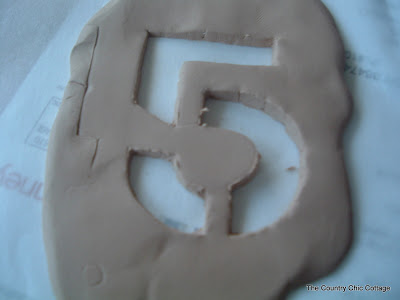
I found that using a straw worked perfectly to make the hole in the top of my tag for the twine or rope to go through.
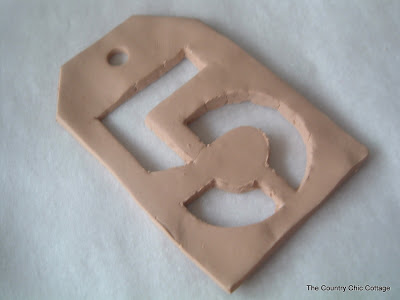
When you’re happy with the look of your numbered tag you can bake it. Follow the directions for your specific polymer clay to ensure it’s baked correctly.
When it’s done baking allow it to cool completely before proceeding.
How to Paint Your Baked Clay
Whether or not you need to paint your clay depends on if the color of your clay will match your rusted look.
Mine did not, so I chose a gray paint that blends in well with my rust look.
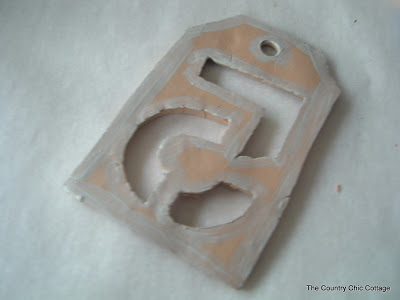
When we’re done with our project only the edges of the clay will show. We don’t need to paint the entire piece, just go over the edges with a coordinating paint color.
How to Make Our Numbered Tag Look Like Metal
Now that we have our clay tag prepped and ready it’s time to make some magic.
At this point, you may be asking yourself “How are we going to make this look like metal?” I have a trick you’re going to absolutely love.
The first thing we need to do is find a rusted textured digital paper pattern that has the look we like.

Unfortunately, the paper I originally used is no longer available but I found a couple of others that I think are great options.
Choose the digital paper you like and print it out. I don’t recommend printing it out on high quality because that puts a lot of ink on the paper and we don’t want it to smear when we add it to the clay.
A regular print setting should work just fine for this project.
Trim the Rust Paper to Fit the Tag
Lay your tag on top of the printed sheet and trace around it with a pencil.
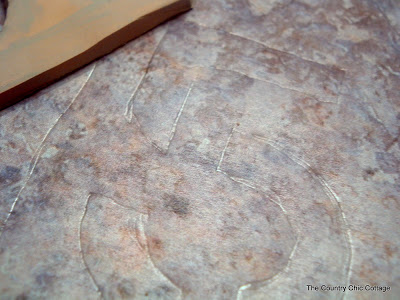
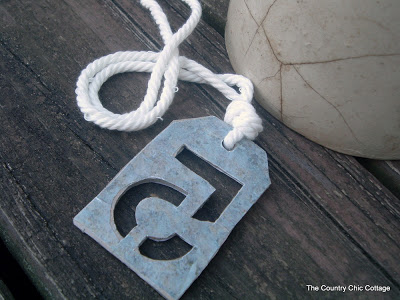
Make sure you trace both the front and the back of the tag. We want to cover both sides.
Use an exacto knife to cut out the tag from the paper and do the front and back.
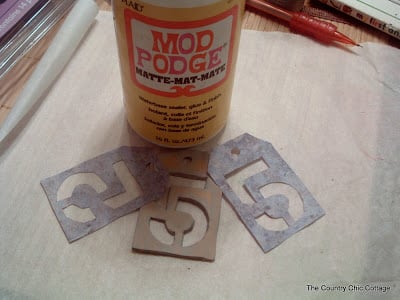
Now it’s time to break out the Mod Podge.
How to Mod Podge Metal Images Onto Clay Tag
Applying the rusted metal image is really easy. We’re going to use Mod Podge to apply the rusted metal image.
I like to add a thin layer to the back of the print and another thin layer to the clay tag. Foam paintbrushes are great to use with Mod Podge.
Lay the image on the tag and smooth it out really well making sure it’s attached to the tag everywhere.
Repeat the process for the other side.
If your image ends up being larger than your tag you can wait for the Mod Podge to dry and then using either sandpaper or your exacto knife you can remove any excess paper.
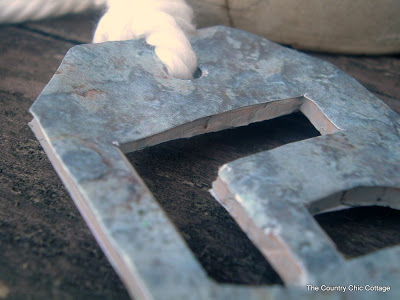
When the edges are how you want them, go over the whole thing with Mod Podge.
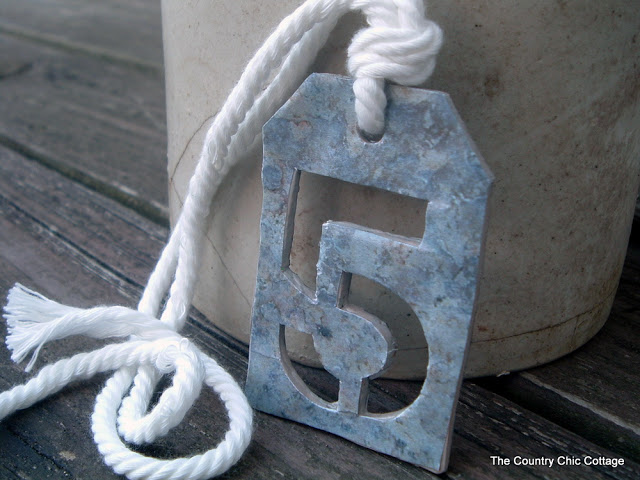
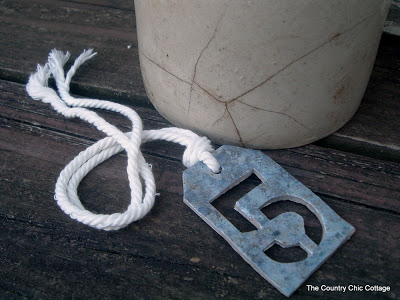
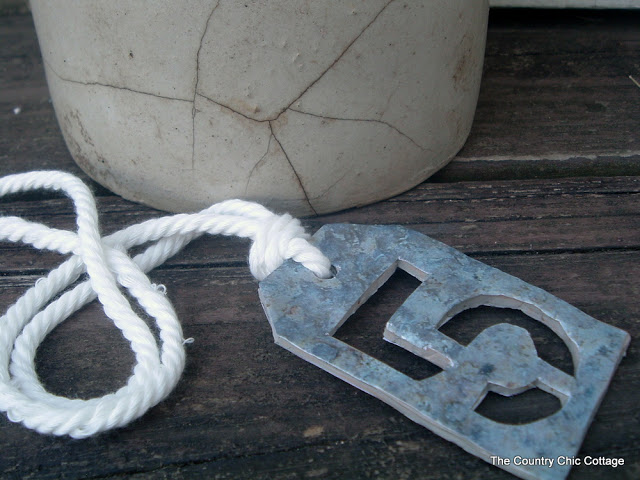
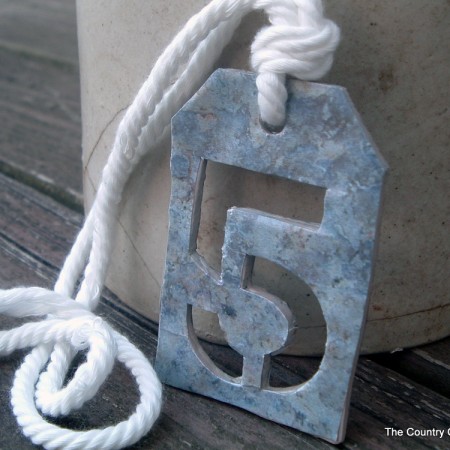
When everything is dry all that’s left to do is to add your cording or twine through the hole and your DIY numbered tag is finished and ready to display.
Final Thoughts on Making Metal DIY Numbered Tags
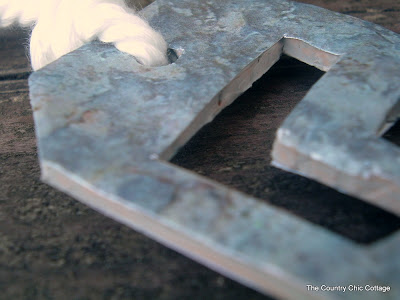
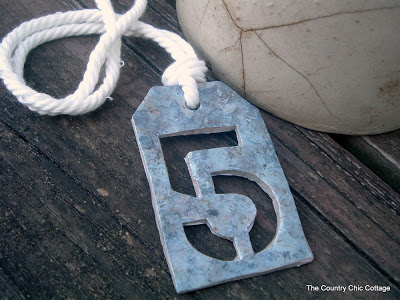
I am really impressed with how well the metal images worked to create this faux metal look.
I used the number 5 for my tag because there are 5 members in our family.

You can use any number(s) or letters you want for your tag.
I think these would be so cute to add to Christmas stockings or Easter baskets. There are so many ways you could use this tag.
With the Design Space file I shared you can edit the project to make the number 5 any letter or number you want.
To really fool everyone into thinking this is really metal make sure you add the metal image to the front and the back of your design.
This is also why I added coordinating paint to the edges of the clay so it looks consistent from all sides.
Are you ready to print rusted metal on paper yet? Once you start, you’re going to be hooked.
I hope I’ve answered any questions you have about making your own metal DIY numbered tags. If you have any additional questions feel free to leave them in the comments and I’ll answer those for you.
Equipment
- Stencil
- Clay tools
- Rusted Texture Paper
- Rolling Pin
- Exacto Knife
Supplies
- Polymer Clay (I like Sculpey Brand)
- Mod Podge
- Paint
Instructions
- For the polymer clay, the color doesn’t really matter. I think a neutral color is a good idea but really, I would choose your rusted paper pattern and go with something that coordinates with that.
- We will be painting all the areas that are exposed, we just don’t want it to show through the paper.
- My clay came with a set of clay tools. These aren’t required but they are helpful. If you don’t have clay tools a knife will work just fine.
How to Make Metal DIY Numbered Tags
- To begin we’re going to choose our clay color and then roll out a piece that is big enough for our stencil number and the tag.
- You want the clay to be rolled pretty thin, about ⅛-¼” thick. While these are going to look rustic we do want them to be pretty much the same thickness all the way across.
Cutting Out Stencil Numbers
- When it comes to cutting out your number you have a lot of options. I had this number stencil on hand so I am using it.
- You can also use your Cricut machine to cut out a stencil. You have a lot of freedom when you use your Cricut to create your stencil. You’re able to use any stencil font to create the number you’ll use.
- If you want to use your Cricut to create a stencil I have a file you can use in Design Space here. I did not weld the design so you can change the number to any number or letter you want.
- If you’re using your Cricut to cut out a stencil make sure you use a material that is thick enough to hold its shape while you’re cutting out the clay.
- As I mentioned above, my clay came with some tools. To cut out my stencil I laid my stencil on top of the clay and then used the tool to cut out the number.
- When placing your stencil make sure you’re leaving plenty of room all the way around your number to cut out the tag shape.
- For the tag shape, I chose to freehand mine. You can choose to do that or use the shape from my Design Space file to create a stencil.
- I found that using a straw worked perfectly to make the hole in the top of my tag for the twine or rope to go through.
- When you’re happy with the look of your numbered tag you can bake it. Follow the directions for your specific polymer clay to ensure it’s baked correctly.
- When it’s done baking allow it to cool completely before proceeding.
How to Paint Your Baked Clay
- Whether or not you need to paint your clay depends on if the color of your clay will match your rusted look.
- Mine did not, so I chose a gray paint that blends in well with my rust look.
- When we’re done with our project only the edges of the clay will show. We don’t need to paint the entire piece, just go over the edges with a coordinating paint color.
How to Make Our Numbered Tag Look Like Metal
- Now that we have our clay tag prepped and ready it’s time to make some magic.
- At this point, you may be asking yourself “How are we going to make this look like metal?” I have a trick you’re going to absolutely love.
- The first thing we need to do is find a rusted textured digital paper pattern that has the look we like.
- Unfortunately, the paper I originally used is no longer available but I found a couple of others that I think are great options.
- Rust Papers and Patterns
- Rusted Metal
- Choose the digital paper you like and print it out. I don’t recommend printing it out on high quality because that puts a lot of ink on the paper and we don’t want it to smear when we add it to the clay.
- A regular print setting should work just fine for this project.
Trim the Rust Paper to Fit the Tag
- Lay your tag on top of the printed sheet and trace around it with a pencil.
- Make sure you trace both the front and the back of the tag. We want to cover both sides.
- Use an exacto knife to cut out the tag from the paper and do the front and back.
- Now it’s time to break out the Mod Podge.
How to Mod Podge Metal Images Onto Clay Tag
- Applying the rusted metal image is really easy. We’re going to use Mod Podge to apply the rusted metal image.
- I like to add a thin layer to the back of the print and another thin layer to the clay tag. Foam paintbrushes are great to use with Mod Podge.
- Lay the image on the tag and smooth it out really well making sure it’s attached to the tag everywhere.
- Repeat the process for the other side.
- If your image ends up being larger than your tag you can wait for the Mod Podge to dry and then using either sandpaper or your exacto knife you can remove any excess paper.
- When the edges are how you want them, go over the whole thing with Mod Podge.
- When everything is dry all that’s left to do is to add your cording or twine through the hole and your DIY numbered tag is finished and ready to display.


genius! such a great tutorial too! Definitely can see me using this idea as favor tags with different cutouts (maybe with cookie cutters?)
hugs! Kim @ Party Frosting!
Lovely Angie, seriously. And the clay part is awesome. I’m so taken with clay these days!
Holy Cow Angie…These are phenomenal!
I’m late to these…just saw them over at MPR and they are so amazing. I was just looking at a Ballard catalog last night!
Great knock off! I have some clay that is calling my name! 🙂
Angie,
I am featuring your tags at Decor 2 Adoreable on 7-20-2012
Cheri