• Skip to primary navigation
  • Skip to main content
  • Skip to primary sidebar

The Country Chic Cottage logo

  • Home
  • Cricut
    • Beginner’s Guide
    • Cricut Crafts
    • Cricut Deals
    • Cricut Videos
    • SVG Files
  • Crafts
    • Budget-Friendly Ideas
    • Cricut Crafts
    • Kids Crafts
    • Mason Jar Crafts
    • Printables
    • SVG Files
  • DIY
    • Cleaning Tips
    • Farmhouse Style
    • Gardening
    • Home Decor
    • Organization Ideas
  • Celebrations
    • Gift Guides
    • Handmade Gifts
    • Party Crafts
    • Teacher Appreciation
    • Wedding Ideas
  • Holidays
    • 4th of July
    • Christmas
    • Easter
    • Father’s Day
    • Halloween
    • Mother’s Day
    • Saint Patrick’s Day
    • Thanksgiving
    • Valentine’s Day
  • Recipes
    • Appetizers
    • Beverages
    • Breakfast
    • Desserts
    • Main Dishes
    • Side Dishes
  • About
    • Advertise on The Country Chic Cottage
    • Contact Me
    • Terms and Disclosure
  • Nav Social Menu

You are here: Home » Crafts » Budget-Friendly Ideas » “Balling” in Love with Jute and Rope

“Balling” in Love with Jute and Rope

Jan 26, 2010 · 12 Comments

This post and photos may contain Amazon or other affiliate links. If you purchase something through any link, I may receive a small commission at no extra charge to you. Any supplies used may be given to me free of charge, however, all projects and opinions are my own.


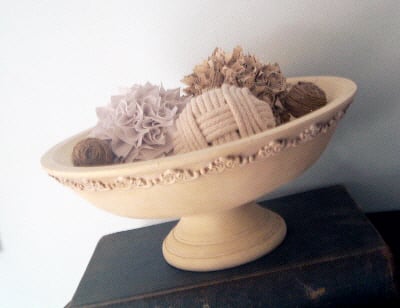
What would a week of home decor balls be without jute and rope?  I just had to include them with my fabric and sheet music versions.  I used twine to make a fun decor ball as well as some rope.  
See how to make home decor balls with rope and twine with these simple step by step instructions!
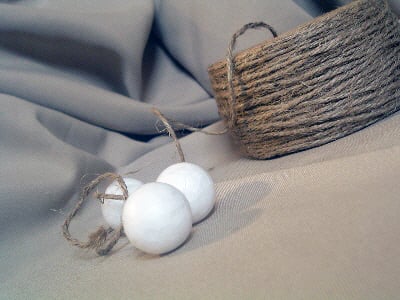
For the first “mini” set, I used jute and itty bitty styrofoam balls.  And my ever present glue gun.
See how to make home decor balls with rope and twine with these simple step by step instructions!
One of them I glued the jute two different directions.  Note:  You do not have to glue every bit of jute down.  Just some gluing every now and again holds it fine.  Be sure to glue the start and finish though.
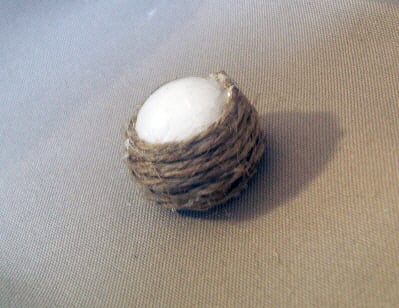
See how to make home decor balls with rope and twine with these simple step by step instructions!
Then the other way.
See how to make home decor balls with rope and twine with these simple step by step instructions!
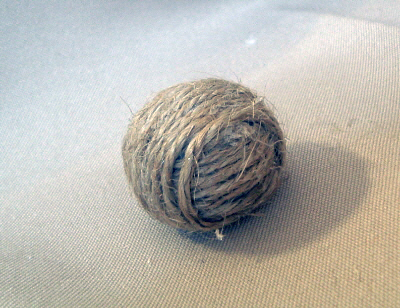
For the second jute ball I started and went all one way.
See how to make home decor balls with rope and twine with these simple step by step instructions!
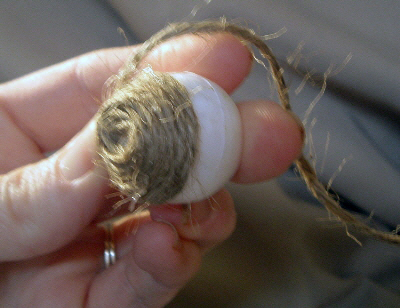
Hmmm…I think the one way version looks better and is a bit easier too.
See how to make home decor balls with rope and twine with these simple step by step instructions!
Now for the rope.
See how to make home decor balls with rope and twine with these simple step by step instructions!
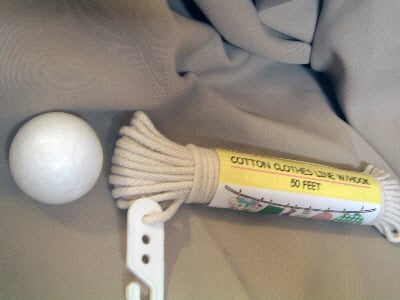
I wrapped the rope in 4 rows one way.
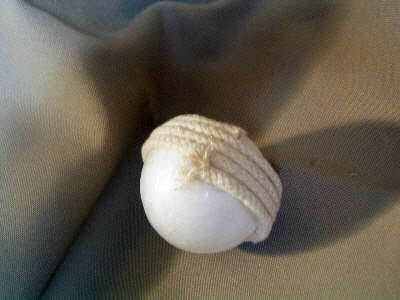
See how to make home decor balls with rope and twine with these simple step by step instructions!
Then 4 rows another way.  Again you don’t have to glue the entire strand just every now and again — plus both ends.
See how to make home decor balls with rope and twine with these simple step by step instructions!
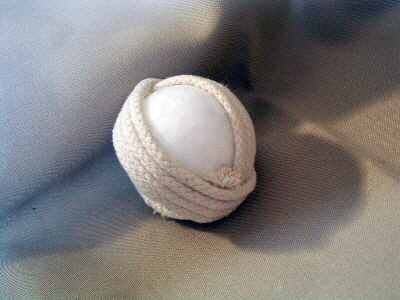
Then another 4 rows.
See how to make home decor balls with rope and twine with these simple step by step instructions!
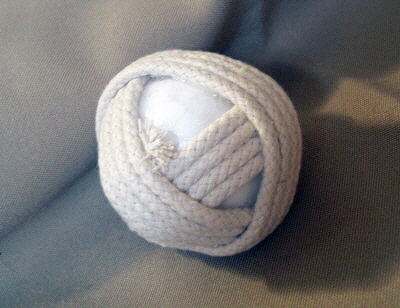
And finish it off by going the way you did with the first four rows.  Finish the top and bottom til the styrofoam is not showing anymore.
See how to make home decor balls with rope and twine with these simple step by step instructions!
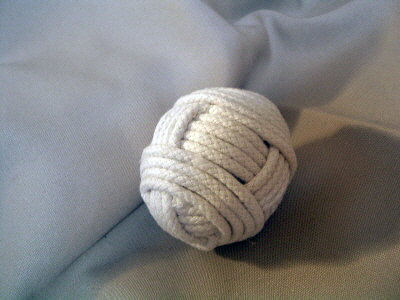
I think it gives this one a little bit of a woven look.
See how to make home decor balls with rope and twine with these simple step by step instructions!
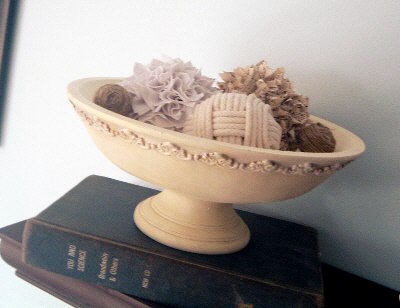
And the bowl gets a little fuller!  Stay tuned tomorrow — yep — BURLAP!
See how to make home decor balls with rope and twine with these simple step by step instructions!

Get Our Weekly Newsletter

Success! Now check your email to confirm your subscription.

There was an error submitting your subscription. Please try again.

Powered by ConvertKit

Budget-Friendly Ideas

previous post: “Balling” in Love with Fabric
next post: “Balling” in Love with Burlap!

Reader Interactions

Comments

  1. Eclectic Thrifty Chic says

    January 27, 2010 at 2:31 am

    wow they all look really good 🙂 I especially like the rope one.

    Reply
  2. One Cheap B*tch says

    January 27, 2010 at 11:42 am

    I love your balls – sorry that sounds so crass but they came out great. Make for such nice bowl fillers. This one I’m definitely trying!

    Reply
  3. Sherry says

    January 27, 2010 at 11:50 am

    Those look really nice. It is fun to make something for your home yourself.

    Reply
  4. rebecca says

    January 27, 2010 at 12:24 pm

    Love these! I would have never known how to wrap that rope! thanks!

    Reply
  5. tenthingsfarm says

    January 27, 2010 at 12:47 pm

    Those are cool! If I made those I’d have to use industrial glue or my little one would have them all unraveled – it’s a ‘string thing’, hee hee.

    Thanks for linking up over at Ten Things Farm!

    Reply
  6. Jane says

    January 27, 2010 at 4:17 pm

    Super cute…I love these! But then again I love anything with texture…even a rice grain sack (tan burlap) got me excited at Costco the other day! Fabulous project…thanks for sharing!

    Reply
  7. AlchemyJunk says

    January 27, 2010 at 4:34 pm

    these are so wonderful!!! I have tons of rope lying around and this would be perfect for some of it. Thanks for sharing!

    Reply
  8. Amanda @ Serenity Now says

    January 27, 2010 at 6:46 pm

    Nice!! I love all the textures you have going on. 🙂 Thanks for the visit!

    Reply
  9. Lady in Texas says

    January 28, 2010 at 4:50 pm

    Neat stuff, I like it.

    Reply
  10. [email protected] says

    February 2, 2010 at 7:07 am

    This one has to be my favorite! Featuring it at somedaycrafts.blogspot.com

    Reply
  11. Mommabear says

    February 15, 2010 at 8:56 pm

    These are so cute, I LOVE decorative balls! Your clothesline one came out so cool looking too, the pattern looks awesome!
    -Mags

    Reply
  12. Michelle says

    May 14, 2010 at 4:14 pm

    Thanks for linking this up! I almost added this to the spotlight, but had already had the other picture loaded. You rock!

    Reply

Leave a Reply Cancel reply

Your email address will not be published.

Primary Sidebar

angie holden the country chic cottage cricut crafts blogger

Welcome to my cottage! My name is Angie and I am here to share my Cricut tutorials and crafts with all of you! If you love to DIY everything for your home’s decor and handmade gifts as well, you have found the only resource that you need. Pull up a chair and have a seat inside our Tennessee home!

Want to see more about me? You can find more about my story here.


COPYRIGHT © 2019 · THE COUNTRY CHIC COTTAGE · PRIVACY POLICY

The Country Chic Cottage is a participant in the Amazon Services LLC Associates Program, an affiliate advertising program designed to provide a means for sites to earn advertising fees by advertising and linking to amazon.com. Amazon, the Amazon logo, MYHABIT, and the MYHABIT logo are trademarks of Amazon.com, Inc. or its affiliates. Please note that some products used may be given to The Country Chic Cottage free of charge.