

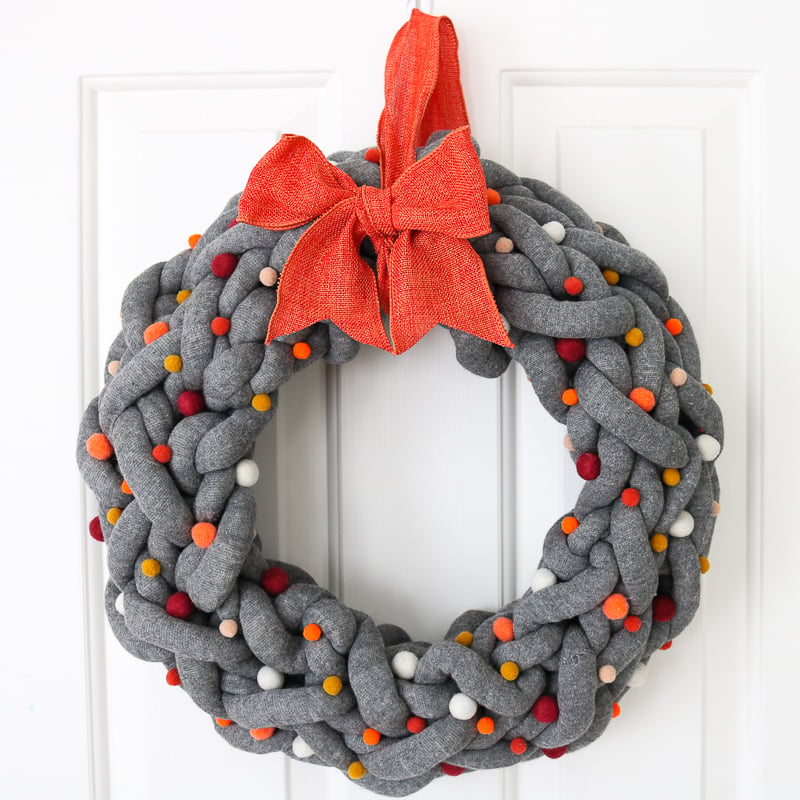
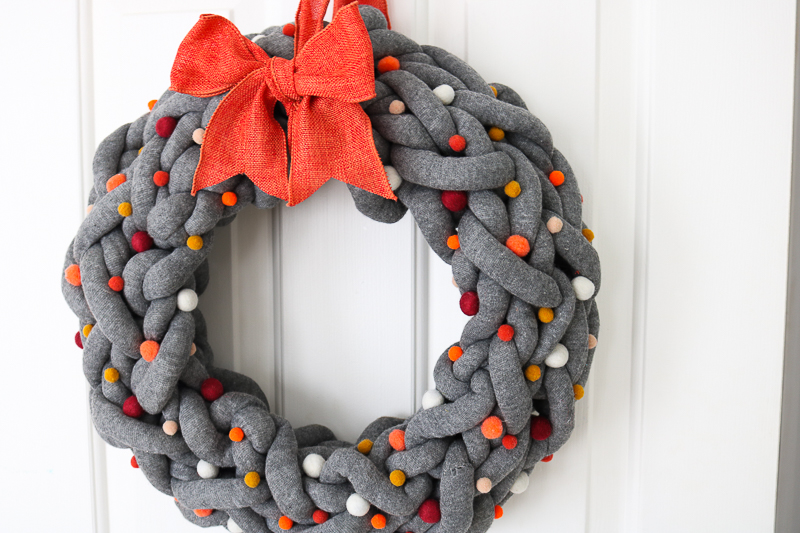
Learn how to make this unique DIY Fall wreath for the front door, perfect for whenever you need wreath ideas! Last week, I shared a simple fall wreath, but this version is a bit more complicated.
This wreath is made with warm-colored ribbon, fun pom poms, and soft yarn–the perfect elements of fall! For more ideas, learn more about my fall door wreaths.
Make Your Own DIY Fall Wreath
Welcome fall with this easy, family- and kid-friendly craft, which is perfect for celebrating the autumnal months. If you enjoy hand-knitting yarn, then you will appreciate this wreath! Do not worry if you have never used your hands to knit–it's pretty easy!
Supplies Needed To Make DIY Fall Wreath
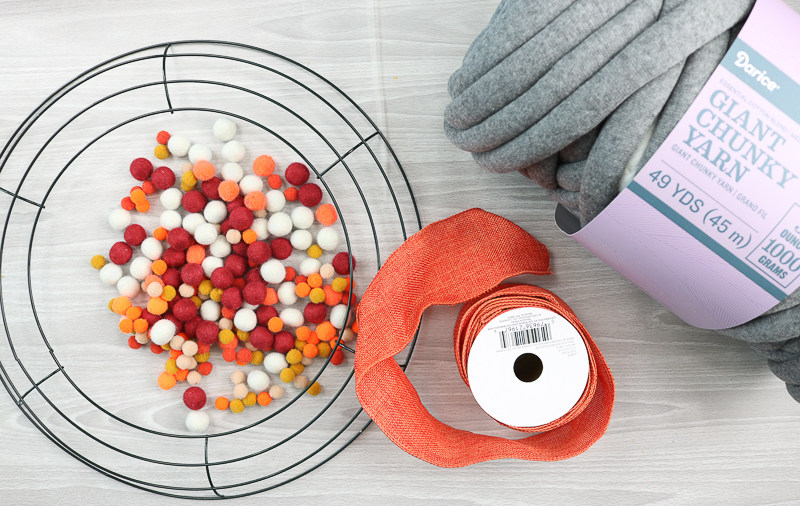
- Giant Chunky Yarn: You can use any color you want! I like grey because it is neutral.
- Burlap Ribbon: I used orange, but feel free to use any colored or patterned burlap you would like. Think of your favorite warm fall colors!
- Wire Wreath Form: In any size you wish.
- Pom Poms or Wool Balls: You can use any color of pom poms you would like. Feel free to use neutral or bold colors! I like warm colors for Fall.
- Hot Glue and Glue Gun: This is used to glue different parts of the wreath together, including the extra materials. Make sure you have a hot glue gun!
Note: Gather all of the supplies before starting this crafty DIY project!
How To Knit Wreath
Step 1: Begin Arm Knitting Your Wreath
First, we will begin our first row of arm knitting with a knot. Pull out about a 3-foot piece from your yarn. Drape this over your hand. There should be three feet on one side, and the yarn should be attached to your skein on the other.
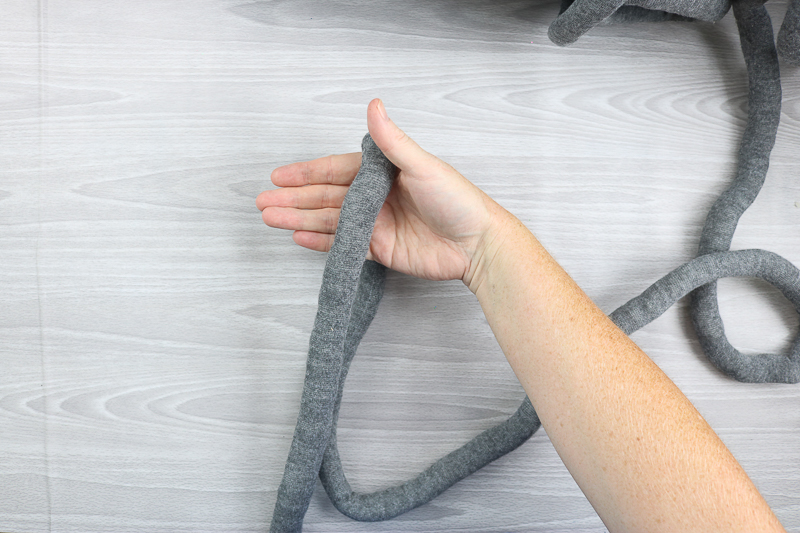
Pinch the yarn with your other hand, as shown below.

Step 2: Make Knot
Twist and grab the yarn that is attached to your skein.
Pull through, and now you have a slip knot.
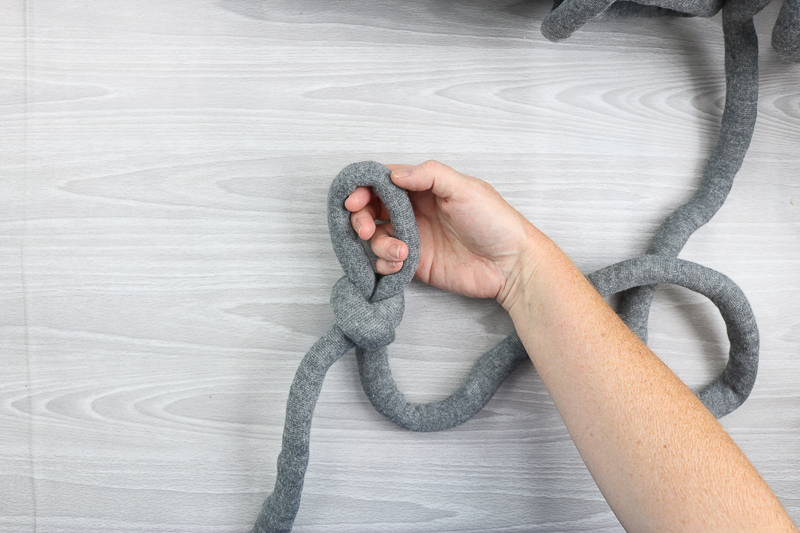
Step 3: Thread Yarn
Now that your first knot is complete thread it onto your arm. You can tighten this if needed.
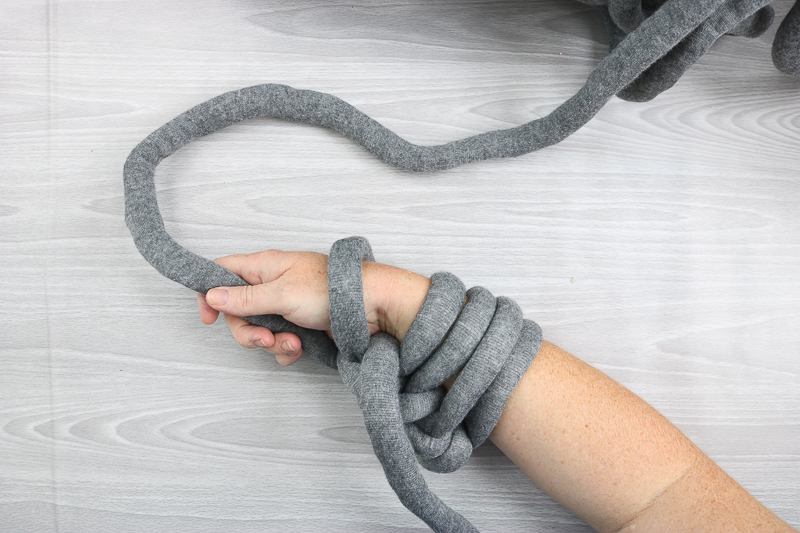
Now, we will begin adding the stitches that will become our first row. You will need to hold the yarn properly for each stitch. Hold the yarn attached to your skein with your index and middle finger, as shown below. Then, grab the end with your other two fingers.
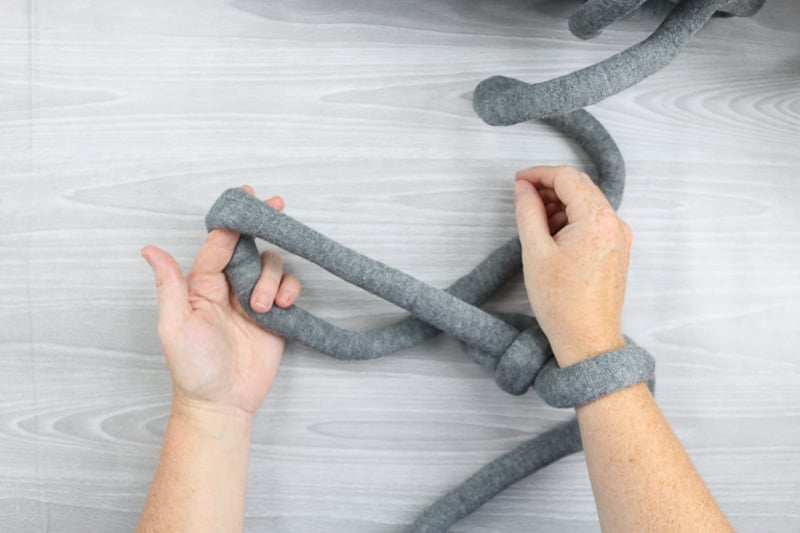
Put the 3-foot tail of yarn around your thumb, as shown below. The pinky and ring fingers will hold both of the pieces.

Step 4: Keep Threading
Take your index finger on the opposite hand. Go under the first strand, over the second, and grab the third. Pull it through to create another stitch.

Add this to your arm as well. Repeat as many times as you would like. I did 5 stitches across for my wreath. You could do more or fewer to make the wreath itself wider or narrower.
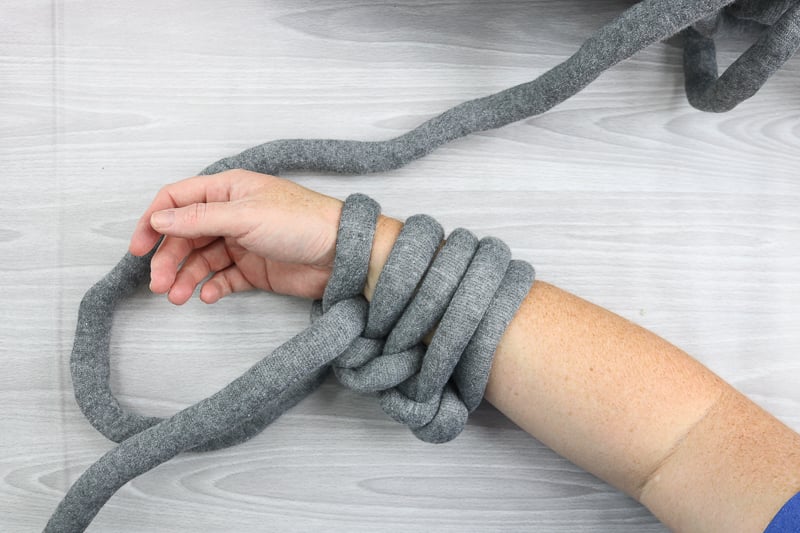
You will not need the tail end of the yarn any longer. From now on, work only with the piece connected to the skein of yarn. Grab that piece with the hand that has the loops.
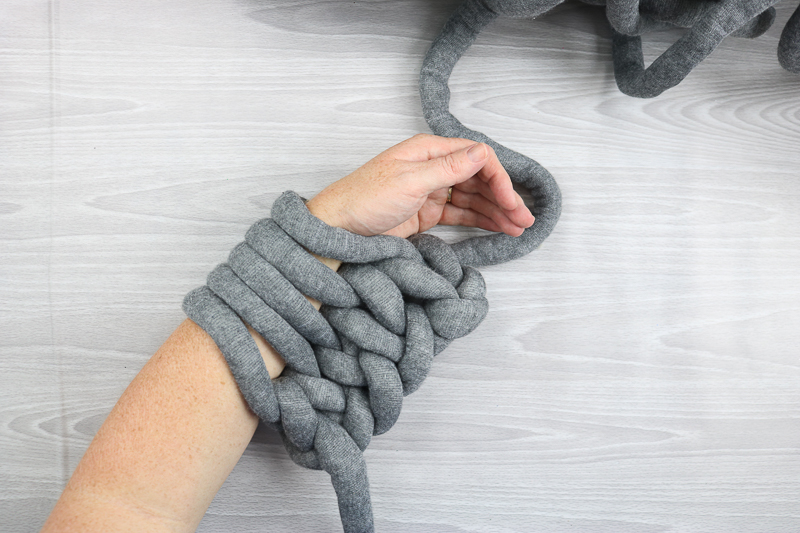
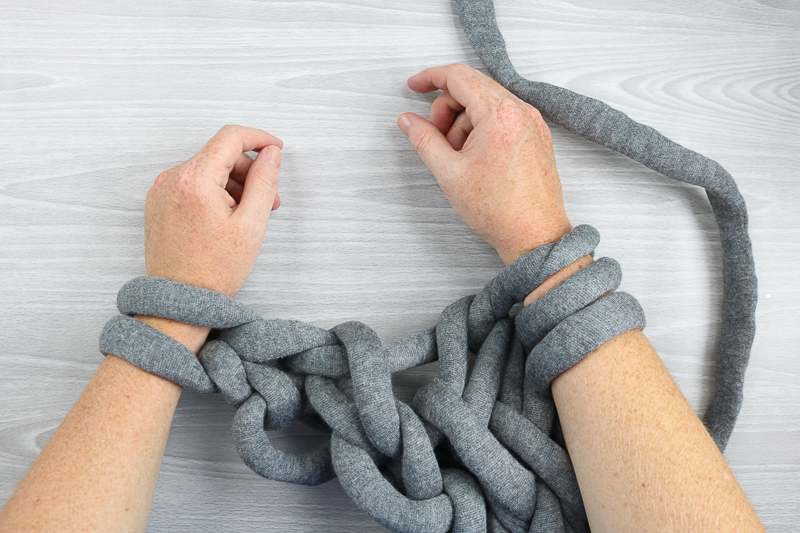
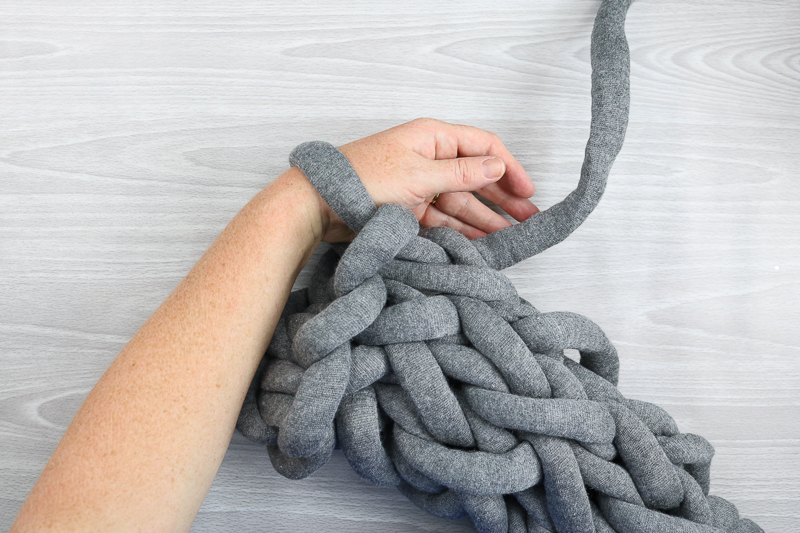
Step 5: Arm Knit
Pull it through the first loop, turn it towards yourself, and slip it on the opposite hand. Tighten the stitches as you go. You should get them as tight as possible. Guess what? You are now arm knitting!

Repeat the same process above and move the stitches to your other arm. Work until they are all moved. Now, you have completed your first row. Congrats! But we have a few more to complete this DIY Fall wreath.
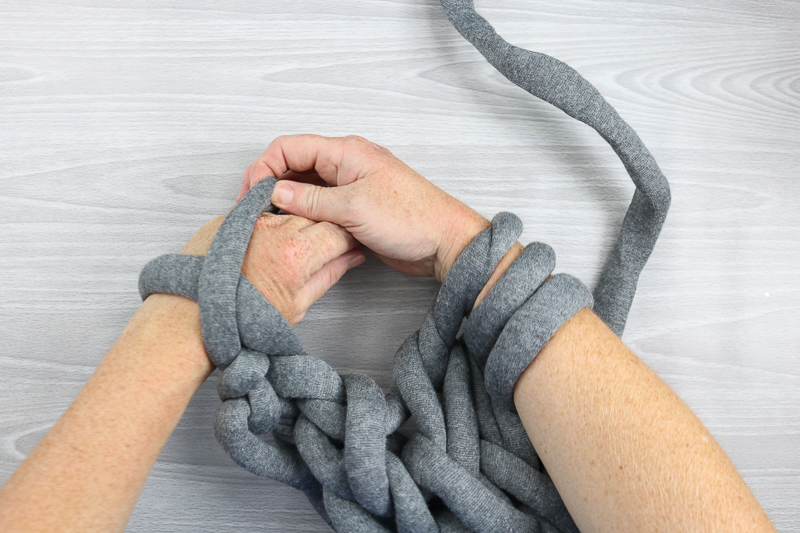
Step 6: Repeat
Repeat these same steps, moving the stitches to alternating arms as you go along.
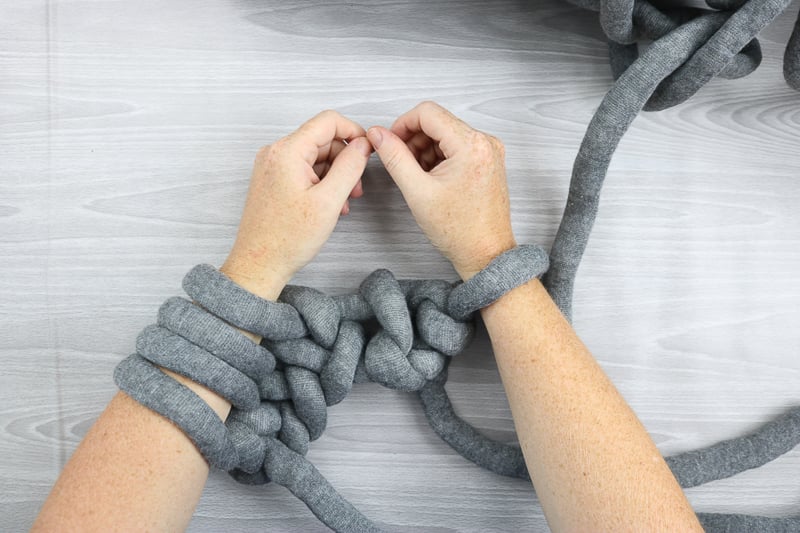
Repeat as many times as necessary to make your piece long enough to wrap around your wreath form.
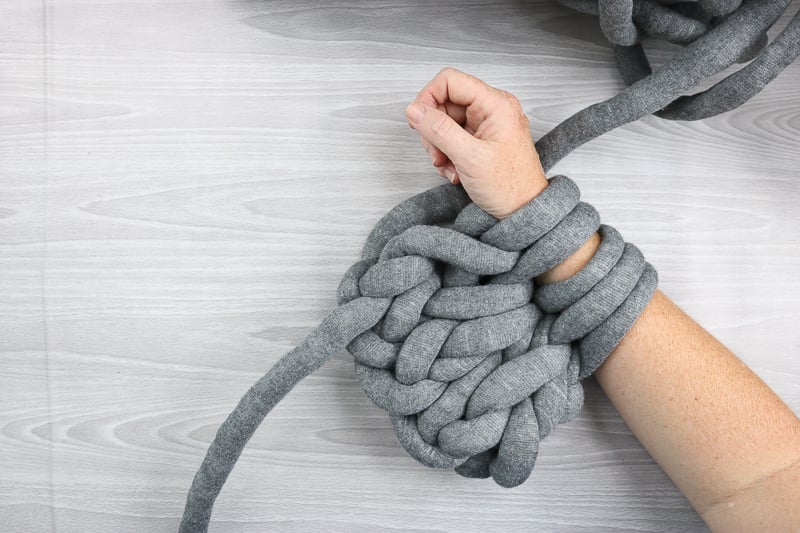
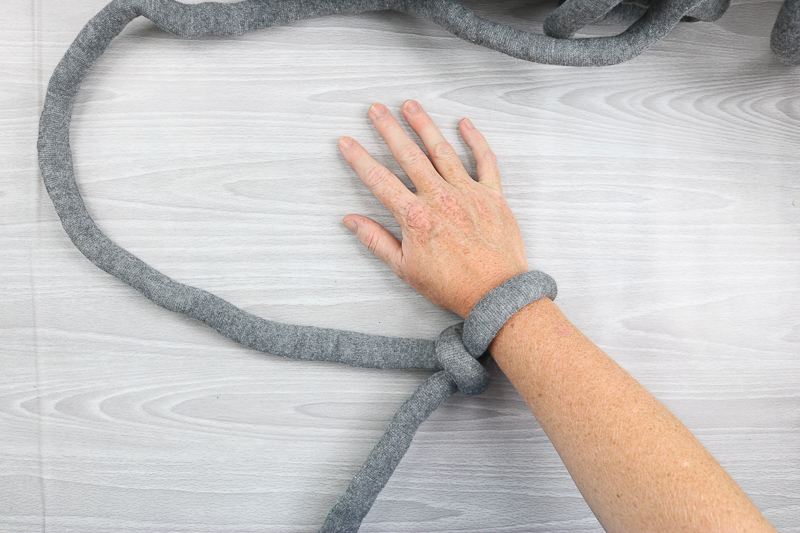
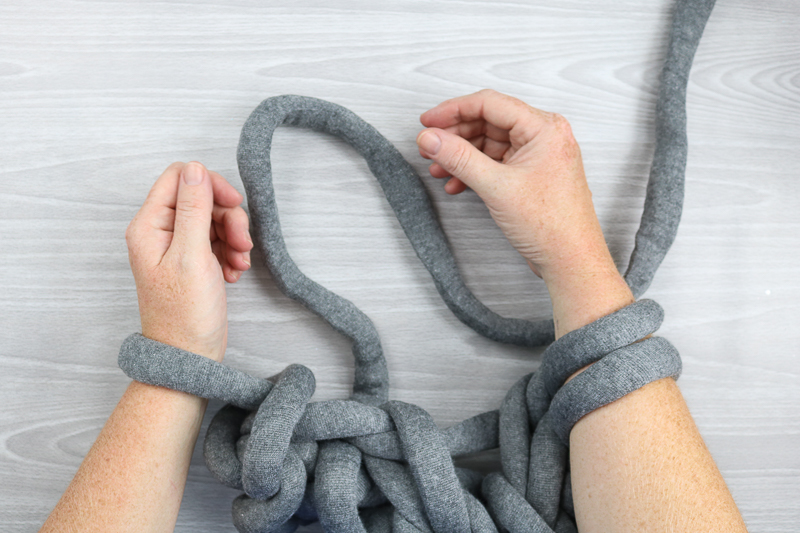
Step 7: Tie Off Yarn
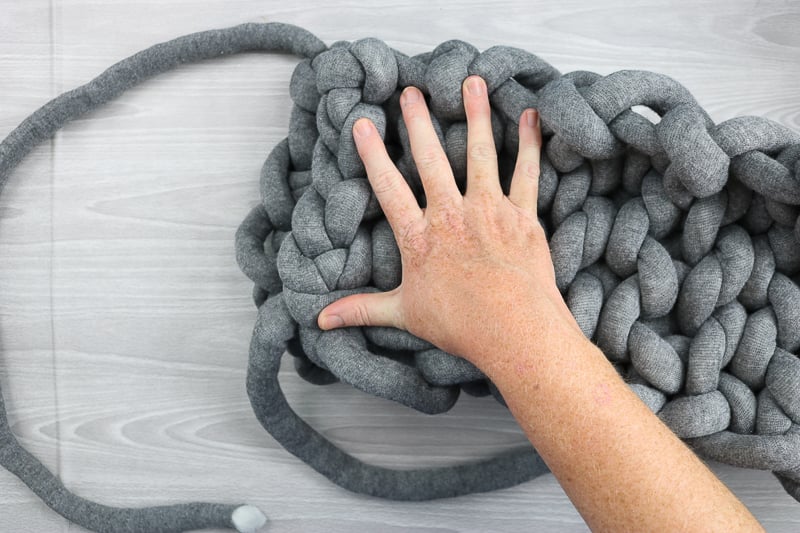
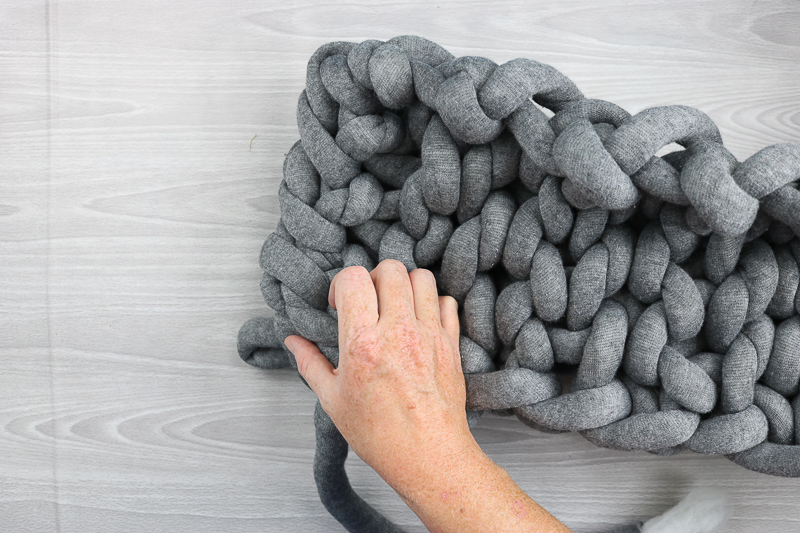
When you wrap the form, it should not be super tight but not too loose, either. Once you think you have enough, it is time to tie off your project.
Complete two stitches on the row just like the instructions above.
Step 8: Tighten
Pull the first stitch over the second and then tighten. Do not over-tighten here, as your end can get super small.
You will want to continue in this same manner for all of your stitches.
Step 9: Cut Strand
Now you are left with one stitch left on your arm. Cut the strand attached to your skein about a foot and a half away from your project.
Pull that end through the last stitch.
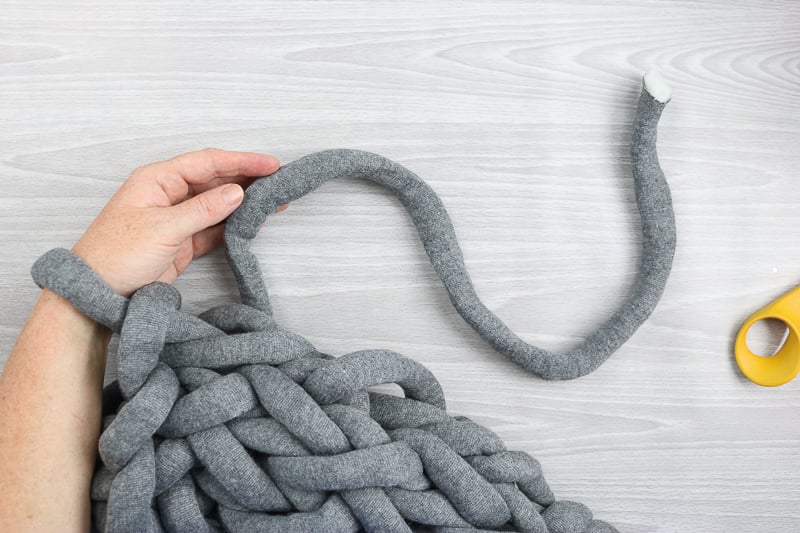
Step 10: Pull
Then, pull it until it is tight.
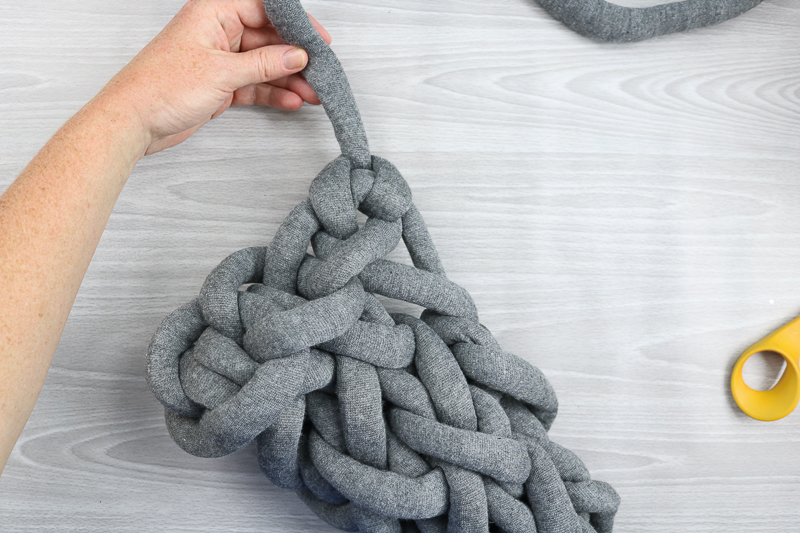
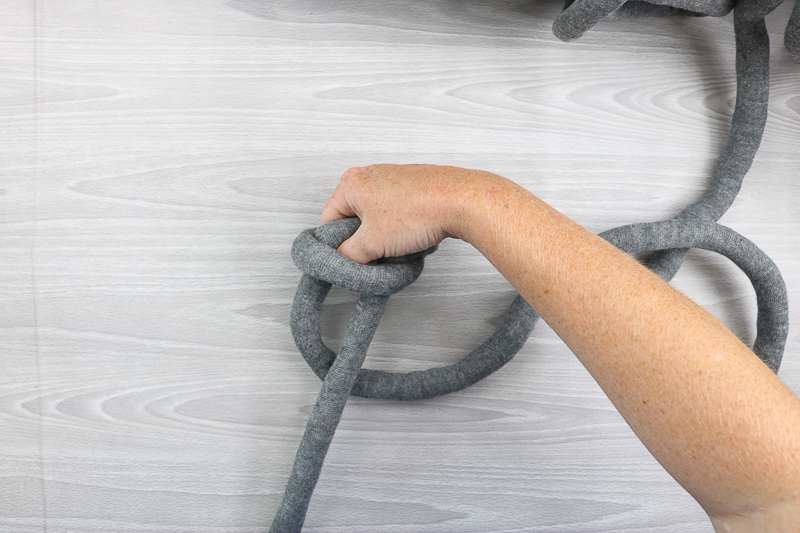
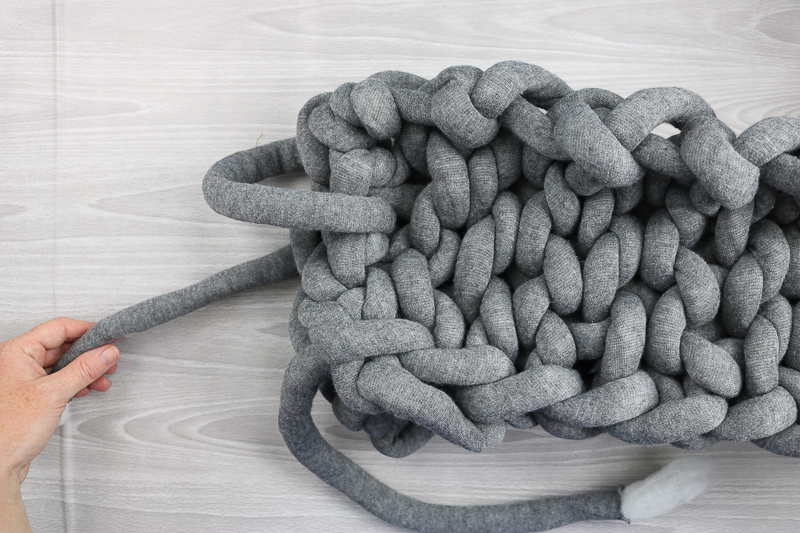
Now, we have one long piece, but we need a circle to go around the wreath form. Next, we will secure the two ends together.
Step 11: Secure
Put the two ends together. Then, use the piece you cut a foot and a half long to bind the two together.
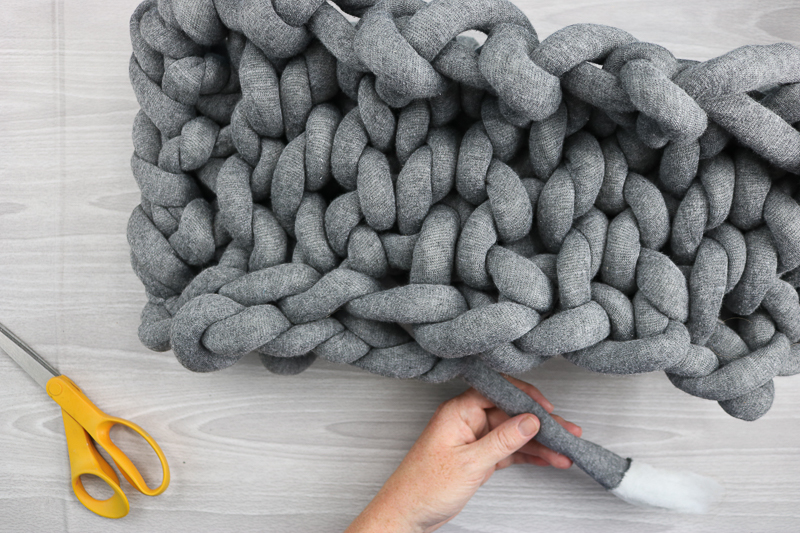
Step 12: Weave
Put it through both pieces weaving it in and out until you get to the other side of the knitted piece.
Step 13: Tie Knot
Once you get to the other side, make a loop with the yarn and pull the end through to make a knot. You can double this knot if you would like.
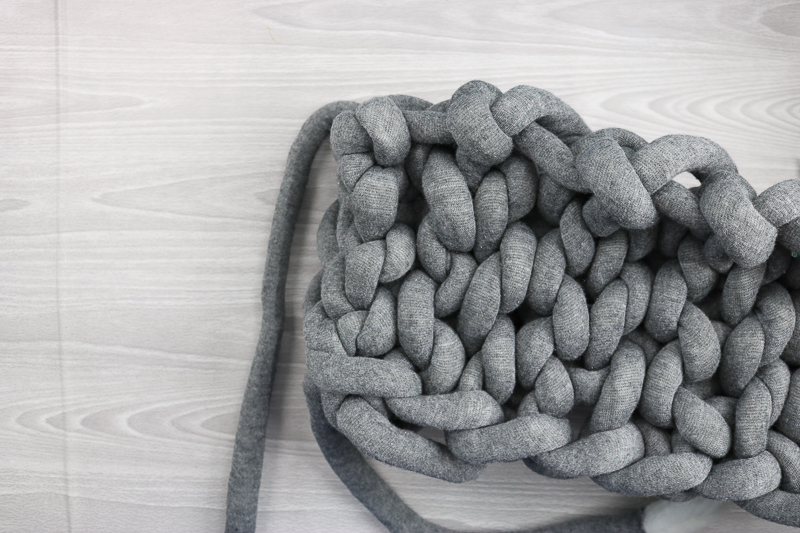
Then, all that is left is to hide both ends. You can cut some off to make them shorter, and then weave them throughout your piece to hide them.
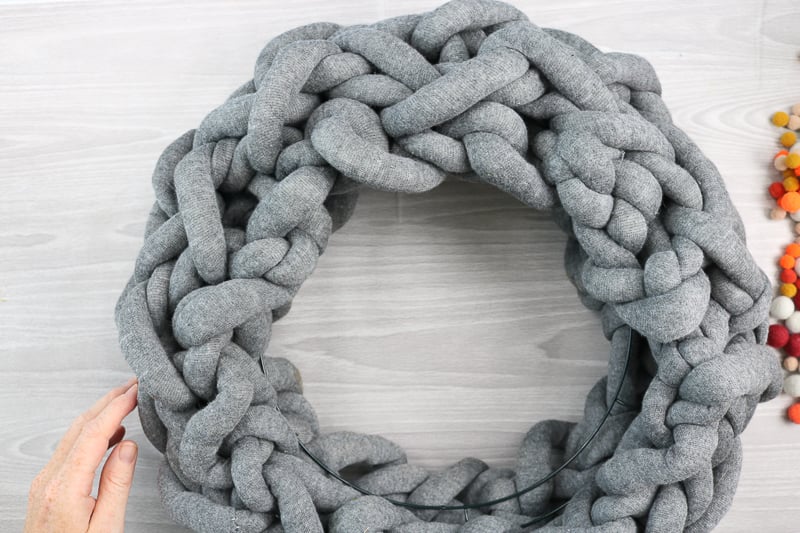
Step 14: Form Circle
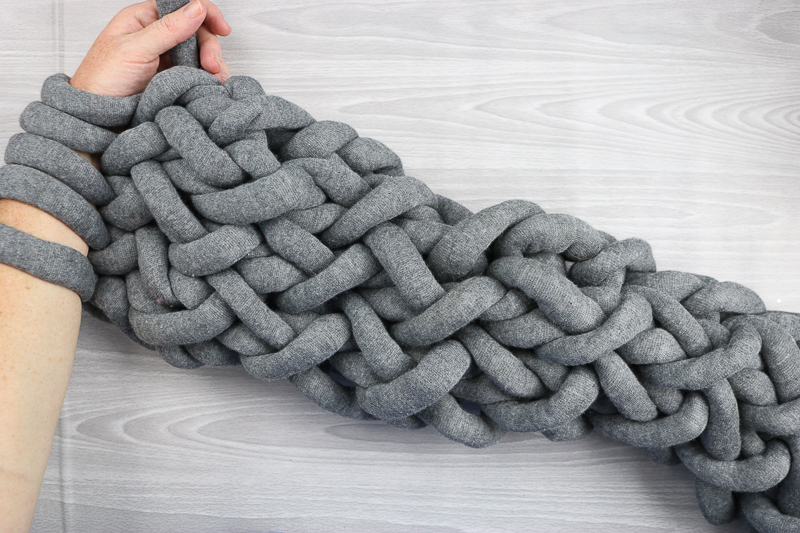
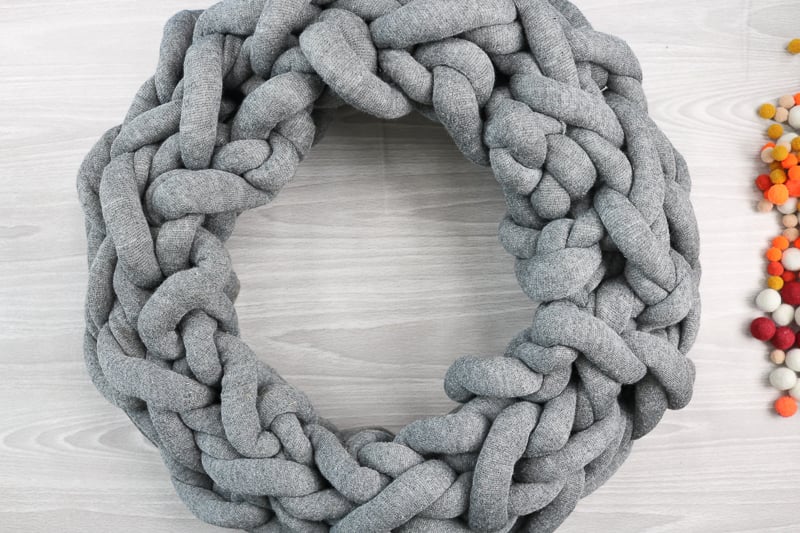
Turn your knitted piece so that it is a formed circle. I found that mine naturally made this shape. Then I just put the wreath form inside the piece. Maneuver the piece until the wreath form is hidden.
You did it! You learned arm knitting, and you made a wreath. But how do you make it into a DIY Fall wreath? Well, we need a few more supplies.
How To Decorate A Fall Wreath
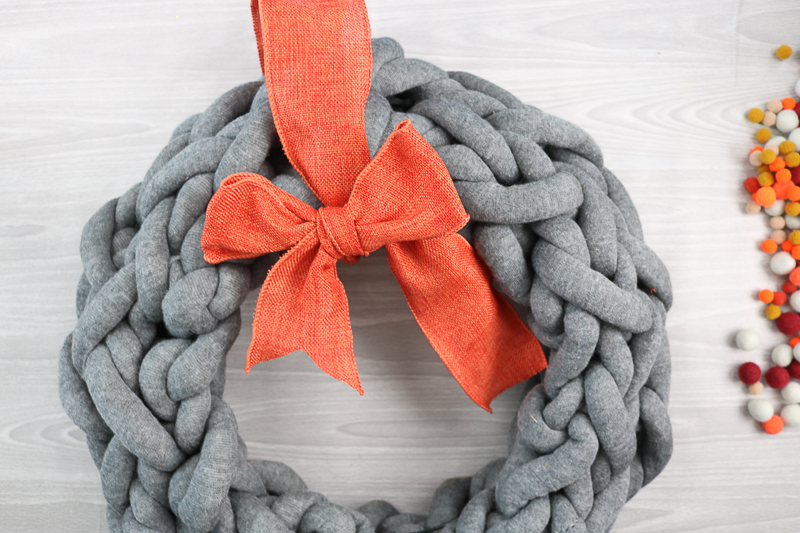
Step 1: Add Burlap Bow
First, tie a bow to hang your wreath from the burlap ribbon.
Step 2: Add Pom Poms
Then, use hot glue to secure pom poms or wool balls in various colors all over your wreath.
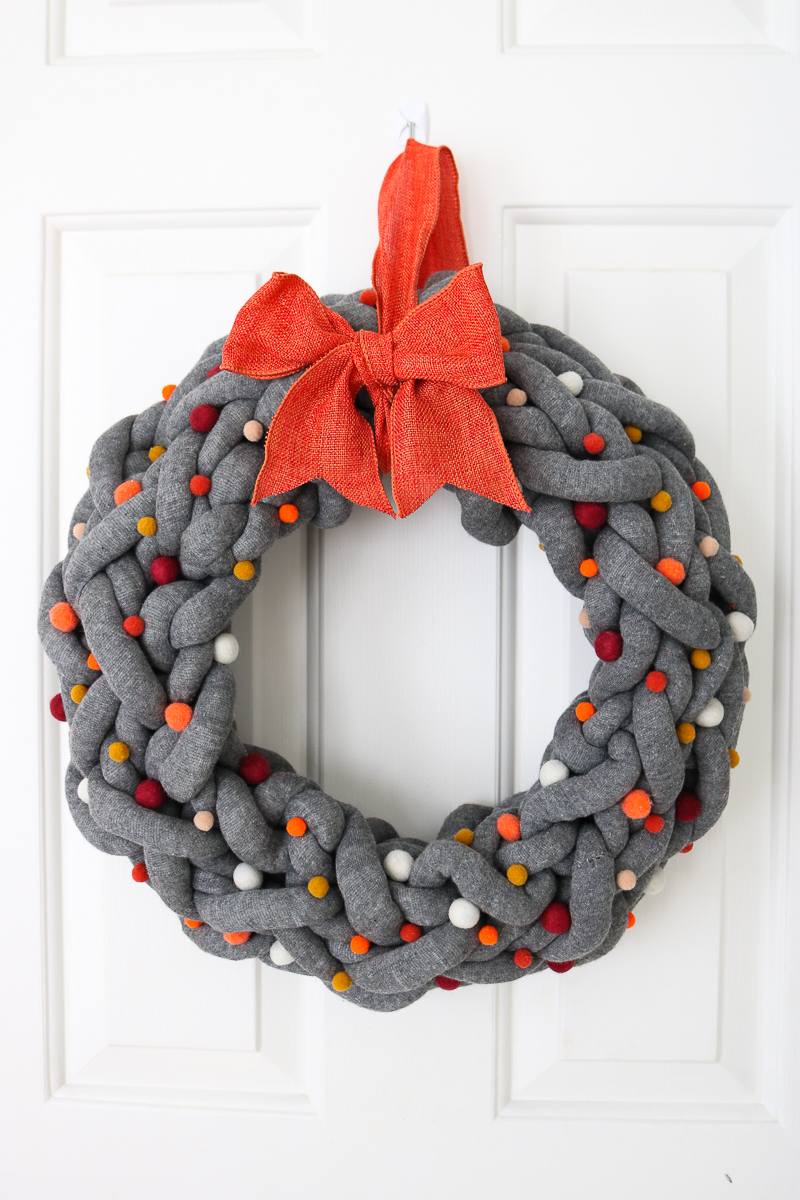
Then, let your arm-knit wreath welcome your Thanksgiving guests! They will love this unique twist on a traditional wreath.
You will love saying you made this DIY Fall wreath all by yourself! Now, wasn't that easy?
How To Use DIY Fall Wreath
Use this wreath idea to decorate your home for Fall! Switch up the colors for each holiday to use this project idea over and over.
Hang this wreath on the door of your home or the walls inside the house.
FAQs About DIY Fall Wreath
Here are some questions readers ask about making this DIY Fall wreath. If you have a question, please check if I’ve answered it below. Don’t see your question? Leave it for me in the comments!
How Many Skeins Of Yarn Do You Need For This Project?
For my wreath, I used less than one skein of yarn. However, you may need more or less depending on the size of your wire wreath form.
What Type Of Yarn Did You Use?
For this project, I used Giant Chunky Yarn, a cotton blend. My skein had 49 YDS, 35 ounces / 1000 grams, and more of a “t-shirt feel” (vs. a fuzzy/fluffy feel).
The specific brand of yarn that I used in this tutorial is no longer available, but you can use any chunky yarn or chunky blanket yarn for this project.
Where Can You Get A Wire Wreath Form?
You can purchase a wire wreath from the craft store or online. A smaller one might be available at the Dollar Store.
Could I Make My Own Pom Poms For This Project?
Yes! You can easily use a pom pom maker to create your own custom pom poms for your wreath!
5 More Fall DIYs
Did you love this DIY fall wreath and are looking for more fall DIYs? Then check out the projects below!
- Fall SVG Files: 14 Free Files for Your Crafts
- Fall Leaf Candle Wraps
- How to Make Sweater Pumpkins — NO SEWING!!
- Thankful and Blessed Shirt SVG
- Free Fabric Pumpkin Patterns and Sewing Tutorial


I am obsessed with this! So cute and so many fun possibilities! One question … how many skeins did you use?
It was less than one actually. I bought two and didn’t need it!
I love, love, love this wreath! Thank you very much for the tutorial! I can’t wait to try to make this!
Your link to get details and purchase this yarn no longer works. Please tell us how much yarn? what weight of yarn? etc., so we can get the proper yarn to do this project.
I love your wreath!
I apologize but the company went out of business. I am unsure of weight.
Do you have a video for this? I have tried to follow with the written instructions, but I am a visual learner.
I don’t, I’m sorry!